


Heroine Conquest places players in tense battles against a lineup of powerful bosses, each presenting a unique challenge that tests your tactical flexibility. Progressing through these encounters isn’t just about brute force; it involves understanding enemy mechanics and adapting your unit deployment and upgrades accordingly. These boss fights represent critical milestones where your experience and patience pay off as you refine strategies tailored to each heroine’s combat style.
Heroine Conquest All Bosses
| Boss Name | Unit Types Available | Key Mechanics | Achievement Condition |
|---|---|---|---|
| Sword Knight Azure | Spear Goblin, Shield Goblin, Capture Goblin | Basic melee combat with cleave attacks; perfect for mastering unit positioning | Defeat within 21 attempts |
| Magic Templar Dianthus | Ranged Tentacle, Tank Tentacle, Capture Tentacle | Ranged AoE magic attacks with slow movement; emphasizes spacing and patient positioning | Defeat within 24 attempts |
| Lightning Fist Caera | Pheromone Faerie, Vine Faerie, Capture Faerie | Highly aggressive with fast attacks; requires poison and stun tactics | Defeat within 23 attempts |
| Holy Priest Viridi | Chasing Slime, Puddle Slime, Capture Slime | No direct damage dealt by boss; relies on indirect damage and movement control | Defeat within 22 attempts |
| King Xanthe | Stone Orc, Shield Orc, Capture Orc | Heavy melee with radial AoE; defense-oriented “meat wall” strategy essential | Defeat within 25 attempts |
| Demon Lord Mel | Club Minotaur, Shield Minotaur, Capture Minotaur | Wide AoE attacks with spawn zone restrictions; tests endurance and multi-angle pressure | Defeat within 50 attempts |
Sword Knight Azure

The inaugural boss, Sword Knight Azure, serves as a foundational lesson in positioning and unit management. Her slow movement and cleave attacks punish clustered units, making spacing critical. Misplaced units often fall victim to her sweeping strikes early on.
The key units used for this battle are:
- Spear goblins deliver sustained damage from a safe distance
- Shield goblins act as frontline tanks to absorb damage
- Capture goblins are reserved for securing the capture phase once the boss is weakened
Position your shield goblins concentrated in one corner to draw Azure’s attention while aligning your spear goblins diagonally opposite for consistent rear attacks. Prioritize early upgrades to unit quantity to maximize experience gains per attempt, followed by enhancing tank durability and spear goblin offense. When Azure’s health drops to critical, deploy your capture goblins carefully behind your shield line to secure victory. Persistence pays off — expect roughly twenty attempts before consistent success.
Magic Templar Dianthus

Dianthus elevates the challenge by wielding ranged, area-of-effect magic. Her slow pace belies devastating attacks capable of crippling clustered units. This demands unit positioning that emphasizes spacing and layered defense.
Available units consist of:
- Ranged tentacles for safe, consistent damage output
- Tank tentacles to absorb incoming attacks
- Capture tentacles for executing captures when the boss is vulnerable
The strategy revolves around enclosing Dianthus between your tank tentacles positioned upfront and ranged tentacles behind her. Upgrading range is crucial so your units can maintain damage without entering dangerous zones. Avoid clustering to minimize AoE damage. Patience is key — wait for her to slow at low health before sending in capture units, shielded carefully to secure the win.
Lightning Fist Caera

The third boss, Caera, is a quick and relentless attacker, negating simple tank-and-damage setups due to her speed and frequency of attacks. Direct confrontations usually result in heavy losses.
The units at your disposal include:
- Pheromone faeries deploying poison clouds over wide areas
- Vine faeries delivering crucial stuns at close range
- Capture faeries to finish the capture phase
Focus upgrades on expanding poison cloud radius, eventually covering half the screen to constantly erode Caera’s health regardless of her position. Bolster faerie durability to survive her relentless attacks and enhance stun duration to limit her movement and attacks. Timing is critical; only when she noticeably slows from poison and stuns should you send your capture units in from a safe angle. Avoid direct confrontations and balance damage with control for victory.
Holy Priest Viridi

Viridi breaks conventional combat by not dealing direct damage and enforcing strict unit lifespan limitations. This requires a shift to indirect damage and movement manipulation tactics to overcome her.
The units involved are:
- Chasing slimes used strategically to influence Viridi’s movement patterns
- Puddle slimes that explode and create damaging fields
- Capture slimes for final capturing
The strategy hinges on guiding Viridi across the damaging puddles left by puddle slimes. Use chasing slimes to herd her towards these traps, exploiting predictable movement responses. Upgrading lifespan and speed for chasing slimes and enhancing puddle longevity and damage ensures cumulative harm. This fight demands patience and repeated trials, but effective puddle control ultimately wears her down.
King Xanthe

King Xanthe presents an intimidating melee challenge accented by radial area attacks that punish poor positioning. Defensive resilience is the cornerstone of overcoming his relentless onslaught.
The units you field include:
- Stone orcs responsible for ranged damage from safety
- Shield orcs form a tanky frontline to absorb Xanthe’s attacks
- Capture orcs deployed opportunistically to secure the boss
Build a solid defensive wall of shield orcs, enhancing their block chance and health to endure multiple hits. Position stone orcs behind to deliver continuous ranged damage. Only when Xanthe slows at low health should capture orcs move in under the protection of your wall. This “meat wall” method ensures durability and sustained damage output necessary for success.
Demon Lord Mel
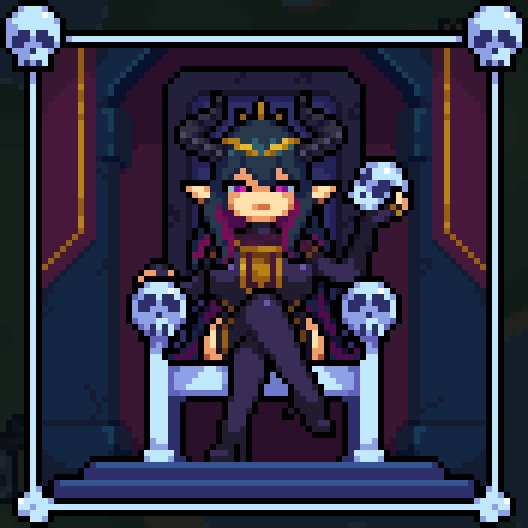
As the culminating encounter, Demon Lord Mel tests your mastery of all previous lessons. Her massive AoE attacks and spawn zone restrictions demand constant, coordinated multi-corner pressure and endurance under fire.
Your units for this fight are:
- Club minotaurs dealing heavy melee damage
- Shield minotaurs acting as durable tanks
- Capture minotaurs for the final capture attempts
Upgrade your maximum spawn count first, then focus on tank durability and speed to ensure survivability amidst Mel’s explosive orb barrages. Adopt a dual-corner deployment: one corner spawns shield minotaurs to soak damage, the other launches club minotaurs to chip away at her health. Steady tank spawning is essential to keep Mel focused, preventing her from decimating your damage dealers. Ignore tank attack upgrades as survivability is paramount. Aim to upgrade capture minotaur speed and durability once you have a reliable frontline, timing captures around attempt 42 onwards.
P.SS
Each boss encounter in Heroine Conquest reveals a new facet of the game’s depth. Early bosses teach fundamental unit positioning and spacing, while mid-to-late fights demand mastery over control, defensive formations, and precise timing. Persistently accruing experience and strategically upgrading units tailored to each battle’s demands unlocks consistent victories. Protecting capture units during critical phases remains a universal key to sealing the deal. The game rewards those who learn and adapt, making every defeat a stepping stone toward triumph.