


When I first jumped into House 2, untangling Tabby’s night felt like trying to solve a puzzle while the house itself tried to bite my head off. This guide breaks down everything I learned across countless runs: every environmental interaction, foolproof step-by-step routes for all endings, complete item mechanics, and how to snag every single achievement—along with spoiler-free pointers if you just need a nudge in the right direction.
- Kimiko’s Curse 2
- House Map
- Enemies
- Walkthrough
- Tendency
- Pure Tendency
- Corrupt Tendency
- Rooms
- Entry Hall
- Closet
- Living Room
- Kitchen
- Back Door
- Backyard
- Hallway
- Basement
- Deep Basement
- Lois’s Room
- Lois’s Closet
- Upstairs
- Bathroom
- Tabby’s Room
- Melody’s Room
- Spare Bedroom
- Attic
- Phone Numbers
- Melody’s TV
- Attic
- Lois’s Room
- Hidden & Reference Numbers
- Characters
- Lois
- Melody
- Simon
- Lenny
- Dolly
- Zakk
- Maggie
- Majesty
- Marty
- Marnie
- Items
- Sponge
- Baseball
- Anvil
- Bell
- Knife
- Lois’s Key
- Gun
- Bullets
- Pie
- Pizza
- Banana
- Threats
- Bear Trap
- Lightning Bolt
- Coat Rack
- Shadow Apparitions
- Fridge
- Floor Spikes
- Stairs
- Majesty
- Maggie
- Mud Man
- Toilet Hair
- Bed Monster
- Floating Head
- Lois (Reanimated)
- Noose
- Melody (Ghost)
- Ghost Cat
- Father
- Immortal Achievement
- Ending Conditions
- Savior Ending Guide
- Butcher Ending Guide
- Survivor Ending Guide
- Babysitter Ending Guide
- Mr. Fingers Boss Encounter
- Nihilist Ending Guide
- Mud World Threats
- Heartless Ending Guide
- Frozen Time Threats
- Sea of Time Guide
- Desert Hazards
- Red & Green Crystals (Sun Switch #1)
- Blue Crystal (Sun Switch #2 & Moon Switch #1)
- Brown Crystal (Sun Switch #3)
- Crystal Door Maze
- Sea of Time Collectibles
- Moon Switch #2
- Hourglass Collectible & Moon Switch #3
- Moon Switches #4, #5 & #6 (Sun Switches #4, #5 & #6)
- Sun & Moon Collectibles
- Collectibles Guide
- Loot Box Collectibles
- Unique Collectibles
- Trash Can
- Burger
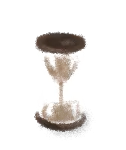
- Hourglass
- Crystal Ball
- Mud Man
- Network Logo
- Toilet
- Little Suzie
- Rubber Chicken
- Frog
- Sun
- Moon
- Consumer
- True Ending Requirements
- Kimiko Encounters
- Other Achievements
Much like the original cult classic, House 2 traps Tabby in a recurring time loop where she has to choose between saving or butchering her household. The night starts promptly at 6:00 PM and ends at midnight. Every murder, accident, and eerie visitor runs on an exact, unyielding timetable. Once I memorized the schedules, stringing together complex routes became second nature. If you want to piece things together yourself without spoiling everything, keep these fundamental survival tips in mind:
- Experiment with new items: Whenever you pick up something new, burn a loop or two just using it on every prop and character you can find. There are wild interactions waiting in almost every room.
- Stalk your family: Spend an entire evening following each individual family member. Watch when, where, and how they perish. Chatting with them often drops crucial hints.
- Observe empty rooms: Stand idle in rooms throughout the evening to catch ambient events and hidden clues that trigger future loop pathways.
- Assemble all pieces first: Don’t get tunnel vision trying to force a partial solution. If a puzzle feels incomplete, you are probably missing a key item or trigger.
- Carry the anvil everywhere: Lugging the heavy anvil around is slow and painful, but it solves problems in nearly every room in the house.
- Inspect the walls: If you find yourself hunting for a combination code, look closely at wall scrawls and patterns.
- Check for persistent changes: Completing specific endings permanently alters details around the house. If you hit a wall, look for new anomalies.
- Seek outside help: Tabby cannot break free from this cursed loop on her own; reaching the true ending demands an ally.
Kimiko’s Curse 2
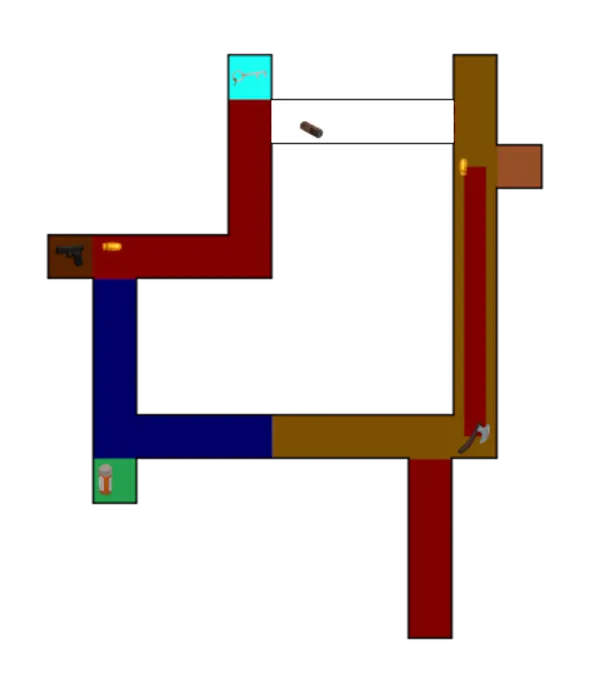
During the prologue, meeting the mysterious child by the backyard fence hands you an in-game cartridge: Kimiko’s Curse 2. While technically an optional retro dungeon crawler, beating it directly influences variations in the true ending later on. Here is my breakdown of the layout and the most consistent path I used to clear it.
House Map
Enemies
Rat
The slowest and weakest foe in the dungeon. Attacks from the rat deal only half a heart of damage. You can comfortably land three to four strikes before it retaliates. If it carries cheese, it will try eating it at low health to heal up; strike it down before it takes a bite to restore half a heart for yourself instead.
Zombie
Similar to the rat, dealing half a heart per hit, but packing a slightly beefier health pool. You can consistently sneak in three to four hits between its swings.
Dolly
Dolly is the only standard enemy with a defensive guard. Her strikes deal half a heart of damage. Whenever she raises her guard, wail on her without fear of retribution. Outside of her blocking stance, limit yourself to two or three hits before retreating.
Yukiko
Yukiko serves as an aggressive optional mini-boss, hitting for a full heart per blow. Her windows are tight—only one or two hits before she counters—and she has massive HP. Resist the urge to burn precious pistol ammunition here; you want those bullets for the finale. You can skip her entirely, but doing so leaves you facing the final boss with lower maximum HP and no healing items.
Mother
The final boss and the deadliest encounter by a mile. Mother’s strikes take a full heart per blow, leaving room for roughly two hits before she strikes back. After swinging two or three times with her arm, she lashes out twice with her elongated tongue. To survive, block the initial lash early, then instantly guard again for the follow-up strike. Hitting her while her tongue remains extended guarantees a critical strike, making this the prime window to unload your firearm.
Walkthrough
- Head through the doorway situated at the far end of the hall.
- Take a left turn and advance toward the corner grandfather clock.
- Slip inside the bathroom on your left to speak with Yukiko.
- Pivot right and pass through the doorway at the corridor’s end.
- Turn right and strike down the rat blocking your path.
- Push forward, bear left at the turn, and go through the end door.
- Turn right and execute the quick-time event to pry the key away from the clown.
- Backtrack to the earlier hallway and turn left into the kitchen.
- You can veer left here to converse with the neighbor.
- Continue through the rear door into a dining room with two doorways.
- Take the right-hand door, walk to the end of the hall, and claim the axe.
- Be alert: from this moment on, doll enemies can spawn inside small rooms.
- Turn around, move forward, and step through the door on your right.
- Turn left and open the container to reveal a three-digit safe combination.
- Return to the hallway and smash through the crumbling wall to uncover a bullet.
- Turn right and proceed through the doorway into the kitchen.
- Bypass the refrigerator, turn left, and search the side table for a battery.
- Turn right, exit the kitchen, hang a left, and run down the hall through the doorway.
- Turn right and crack open the safe to secure the gun.
- Leave the safe room, turn left, and smash the fish tank to secure another bullet.
- Head through the door behind you, then confront Yukiko in the bathroom ahead.
- After felling Yukiko, grab the pill bottle sitting on the sink for a complete heal.
- Exit the bathroom, turn right, and sprint ahead until you reach a boarded doorway.
- Chop down the barricade, pass through, and descend the ladder.
- Trek down the prolonged corridor until Mother initiates combat.

Gamer
Clear Kimiko’s Curse 2. If you missed it during the prologue, you can also boot up and beat the cartridge during the epilogue.
Tendency
Throughout your loops in House 2, the game silently tallies Tabby’s deeds, tracking how pure or corrupted the home becomes. Protecting residents and cleaning up filth purifies the space, whereas slaughtering occupants plunges the house into dark corruption. While much of this shift is atmospheric, your tendency determines which wandering spirits speak with you and boosts the spawn rate of hidden loot crates.
You can check your exact standing at any time by examining the framed artwork hanging right above Tabby’s bed.
Pure Tendency
- You can hold conversations with the mounted singing fish in the living room.
- A delicate butterfly appears fluttering in the backyard.
- A hidden spirit lurks behind storage boxes in the basement, granting Tabby the Spirit Bell.
- Loot crates are virtually guaranteed to materialize on shelves throughout the household.
Purifying Actions
- Scrubbing away Simon’s cat urine.
- Washing the pile of dirty dishes in the kitchen sink.
- Flushing the demonic hair clump down the toilet.
- Knocking down the chandelier in Lois’s bedroom.
- Feeding a meal to Maggie in the basement.
- Feeding Majesty the taxidermy horse in the attic.
- Triggering the armed snap trap in the spare bedroom.

Corrupt Tendency
- Wriggling maggots begin infesting floors and hallways.
- Marnie the snail spawns in the backyard, granting a damage buff for your knife and gun when picked up.
- You can spot the Mud Man lingering outside the kitchen window before he kidnaps Melody.
- A rotten apple appears inside the toilet bowl, serving as the gateway to the Nihilist ending.
Corrupting Actions
- Murdering Lois.
- Murdering Melody.
- Murdering Simon the cat.
- Murdering Majesty the horse.
- Murdering Lenny the rat.
- Murdering Marty the snail.
- Murdering Zakk the delivery driver.
- Murdering Dolly the doll.
- Murdering Tulip the goldfish.

Pure
Bring holy light into the household. Push your alignment to maximum purity until the tree illustration in Tabby’s room blooms into full blossom.

You Rang?
Acquire the Spirit Bell. Although the bell can technically be obtained via alternate means, this specific achievement only pops when you collect it directly from the bashful basement spirit while maintaining high house purity.

Corrupt
Plunge the household into utter darkness. Maximize your corruption rating until the tree in the painting completely withers and blackens.

Who is She?
Befriend Marnie the Snail. Crank your house corruption into the red, then find Marnie in the muddy yard and carry her along on Tabby’s head across three distinct loops.
Rooms
Entry Hall
The main threshold housing the front entrance. The grandfather clock sits tucked under the stairwell, and a haunted coat rack can manifest beside the door. Paths lead left into a closet, straight into the living room, or up the stairs.
- Clock: After gathering four visible fractures across multiple completed endings, a forceful strike can shatter its face to trigger the Heartless ending.
Closet
A cramped storage closet off the entry hall. A spider hangs high in the upper corner, and loot boxes frequently rest on the top shelf.
- Spider: Drops down after 7:30 PM; dislodge it by hurling a baseball or dropping the anvil.
- Loot Box: Chuck a baseball at the top shelf to knock it down and claim a random collectible.
Living Room
The communal hub featuring the family couch, television, a spinning ceiling fan, and Tulip’s fishbowl. The coat rack can also spawn here.
- Ceiling Fan: Knocking it loose with a baseball sends it crashing down directly onto the couch cushions.
- Fishbowl: Shatter it with a knife or baseball to leave Tulip flopping helplessly on the rug.
Kitchen
Where the cooking happens. Contains the oven, dirty dish sink, refrigerator, and a wall shelf holding a kitchen knife. Lois starts the loop here reading the evening paper, while Lenny sleeps under the table. The rear doorway leads into the backyard.
- Fridge: Holds an unbaked raw pie. Springs a slippery water puddle at 8:15 PM.
- Oven: Used to bake the raw pie into a consumable meal.
- Dishes: Can be scrubbed clean using the bathroom sponge.
- Knife: Dislodged if Tabby slips, if the anvil is dropped nearby, or automatically when lightning strikes at 9:00 PM.
Back Door
The small transition corridor between the kitchen and sliding backyard door. A high shelf holds a spare bullet.
- Bullet: Knock it off the high shelf by slipping or dropping the heavy anvil on the floorboards.
Backyard
A stormy, muddy yard bordered by a splintered wooden fence. Holds a trash bin on the left and a barbecue grill tucked into the corner. A frog occasionally hops around the grass. The Mud Man looms outside the kitchen window between 7:30 PM and 9:00 PM, while the mystery kid watches through the fence breach.
- Trash Can: Smack it with a knife or baseball for a chance at finding a banana, a bullet, or a unique trinket.
- Grill: Pry it open with the knife to reveal an unhatched egg. Getting struck by lightning here hatches a unique collectible.
- Frog: Splat it with the dropped anvil to secure a collectible.
- Mystery Kid: Appears during the prologue and after earning your first few endings. After clearing four unique routes, a green pendant rests where she once stood.
Hallway
The ground-floor hallway linking the living room and basement stairs. Features the wall telephone. Lois’s bedroom door remains locked and requires her personal key.
- Phone: Allows Tabby to dial custom phone numbers, including emergency hotlines.
Basement
The upper basement level cluttered with storage boxes, a table holding a breakable vase, and Maggie’s dingy dog kennel.
- Food Dish: Fill it with freshly baked pie or ordered pizza to tame Maggie for the remainder of the night.
- Vase: Shatter with a baseball or knife to potentially uncover a bullet.
Deep Basement
The darker, rear basement chamber. Contains an armed bear trap chained to the floor, high storage shelving with ammo, and boxes hiding a spirit on the far left.
- Spirit: Hands Tabby the Spirit Bell if your house has achieved high purity.
- Bullets: Knocked down onto the floorboards by Simon at 9:05 PM.
- Loot Box: Can be retrieved from the high shelf with a clean baseball toss.
Lois’s Room
Lois’s private quarters where she heads later in the evening. Houses her vanity desk, a locked jewelry box, and an overhead chandelier.
- Jewelry Box: Pops open automatically once you beat the Babysitter ending, revealing a unique collectible.
- Chandelier: Knock it down with a baseball toss to crush the mattress below.
Lois’s Closet
A walk-in wardrobe filled with hanging clothes. Features a floor safe and an overhead loft ladder leading into the attic space.
- Safe: Requires a three-digit code randomized per save file. Digit one is scrawled in the spare bedroom, digit two in the basement kennel, and digit three in the muddy backyard.
- Loot Box: Rests on the upper shelving; knock it down with a baseball.
Upstairs
The second-floor landing connecting all bedrooms. Simon rests on the armchair at 6:00 PM. Features a flowerpot outside Melody’s door and a hanging planter poised over the staircase.
- Flowerpot: Break it with a knife or ball to reveal a hidden bullet.
- Hanging Planter: Drop it down the stairwell using a baseball to smash whatever is passing underneath.
Bathroom
Standard bathroom containing the toilet and sink vanity.
- Toilet: Flush repeatedly for a rare chance to retrieve a unique toilet collectible.
- Sponge: Stored under the sink; used to wipe away spills, leaks, and blood.
Tabby’s Room
Where Tabby wakes up at 6:00 PM every single loop. Contains her sketch desk, journal, and Marty’s glass aquarium.
- Journal: Flip through pages to read Tabby’s evolving psychological notes across runs.
- Aquarium: Following the prologue, interact with the glass to carry Marty the snail on your head for extra run speed.
Melody’s Room
Melody’s sanctuary where she watches cartoons before evening chores. A stray baseball shatters her window at 6:15 PM.
- Melody’s TV: Turn it on after she departs to watch late-night broadcasts. Drops to static after the storm knocks out electricity.
- Baseball: Essential throwable tool retrieved from the floor after 6:15 PM.
Spare Bedroom
A creepy guest room packed with Suzie’s Circus props, Dolly the doll, an armed snap trap, and a heavy wooden wardrobe.
- Wardrobe: Pry it open to reveal an inflatable clown; pop it with your blade to expose an attic ladder.
- Mouse Trap: Intentionally step on it or trigger it to clear the hazard for Lenny.
Attic
A dusty loft dominated by Majesty, a reanimated taxidermy horse, plus a floor trapdoor linked directly to Lois’s closet.
- Vase: Smash with a knife or ball for ammo drops.
- Suitcase: Stab up to three times with your blade to extract bullets, code fragments, or unique collectibles.
- Trapdoor: Repeatedly crush it by dropping the heavy anvil four times to break through to the closet below.
Phone Numbers
Using the hallway telephone, you can punch in specific phone numbers uncovered through environment clues, broadcasts, and Easter eggs.
Melody’s TV

OctoPizza Hotline: Dial to place a delivery order before 9:30 PM.
Tarot Tonight: Dial to hear unique fortune readings that eventually unlock a shelf collectible.
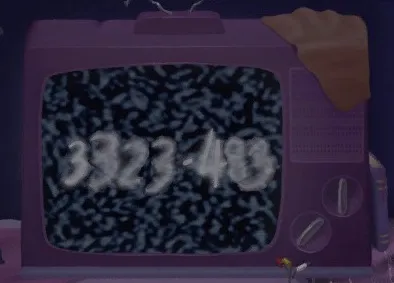
Watching the television static after the blackout reveals one of three randomized number fragments.
Attic

Found scribbled across a crumpled promotional circus flyer resting on the attic floorboards.

Stabbing the attic suitcase drops one of three randomized paper number fragments to the ground.
Lois’s Room

Inspect the scrap tucked inside Lois’s bedside table drawer to find this contact number.
Hidden & Reference Numbers
- 666-6666: A dark secret number extrapolated logically from the TV broadcast promotions.
- 867-5309: The classic pop-rock homage to Tommy Tutone’s famous single.
- 911 / 411: Standard civic emergency dispatch and operator information lines.

Caller
Dial every valid telephone number in the game from the hallway phone across your playthroughs.

Donut Call Again
Repeatedly dial 911 to annoy dispatchers until the authorities refuse your calls.
Characters

Lois
The neighbor who took in Tabby and Melody after the grim events of the first game. She spends her evening reading in the kitchen, migrates to the living room for television, and then locks herself away in her bedroom.
Threats & Fatalities
- Tabby can directly stab or shoot Lois.
- Tabby can drop the living room ceiling fan on her while she watches TV, decapitating her.
- A shadowy monster lurking beneath her bed murders her at 9:55 PM unless Tabby drops the overhead chandelier beforehand.
Lois’s Timeline
- 6:00 PM: Reading the evening newspaper in the kitchen.
- 7:30 PM: Relocates to the living room sofa to watch Suzie’s Circus.
- 8:30 PM: Retires to her private bedroom, locking the door.
- 9:55 PM: Murdered by the under-bed entity if the chandelier was not dropped.
- 10:00 PM: If killed by the bed monster, she reanimates as a deflated wanderer in the foyer, kitchen, or living room. If murdered by Tabby, her severed head floats where she fell. Otherwise, she sits peacefully at her vanity looking at an old photograph.
- 10:25 PM: Flips the framed photo over to read the message on the back.
- 11:15 PM: Falls sound asleep resting on her vanity desk.

Melody
Tabby’s younger sister who escaped the original house alongside her. She watches television, heads downstairs to tackle the dish pile, brushes her teeth, and finishes the evening playing her flute.
Threats & Fatalities
- Tabby can directly stab or shoot Melody.
- Melody can slip on Simon’s urine puddle at the top of the stairs and break her neck unless Tabby sponges it up beforehand.
- The Mud Man kidnaps Melody from the kitchen window at 8:40 PM if the dishes aren’t done or if he isn’t struck by lightning.
- Dropping the hanging staircase planter onto Melody cracks her skull.
- A hair entity drags Melody into the toilet bowl at 9:10 PM unless flushed away first.
Melody’s Timeline
- 6:00 PM: Watching cartoons in her bedroom.
- 7:45 PM: Walks down to the kitchen.
- 8:20 PM: Begins washing dishes; finishes instantly if the Mud Man was previously killed.
- 8:40 PM: Kidnapped by the Mud Man if still standing at the kitchen sink.
- 9:10 PM: Brushes teeth in the upstairs bathroom.
- 9:30 PM: If she broke her neck down the stairs, her body manifests in the entry closet. If killed by Tabby, she reappears in her bedroom alongside an aggressive hanging noose.
- 10:15 PM: If saved, sits on the upstairs landing armchair practicing her flute.

Simon
The girls’ pet cat brought along into Lois’s house. He lounges upstairs before venturing down toward the basement to chase a stray toy ball.
Threats & Fatalities
- Crushed by a dropped anvil or the falling staircase planter.
- Chokes to death on Tulip if Tabby shatters the living room fishbowl.
- Devoured by Maggie in the basement unless Maggie is fed or killed beforehand.
- Snared in the chained bear trap in the deep basement unless Tabby disarms it first.
Simon’s Timeline
- 6:00 PM: Napping on the upstairs landing chair.
- 6:30 PM: Wanders toward the stairwell edge.
- 6:55 PM: Urinates at the top of the stairs, creating a slip hazard, then walks downstairs.
- 8:10 PM: Prowls through the living room.
- 8:35 PM: Descends into the basement.
- 9:00 PM: If crushed by Tabby, haunts the house as an ethereal ghost cat.
- 9:05 PM: If kept alive, swats loose ammo off the deep basement storage shelf.
Other Residents

Lenny
The house rat scurrying through baseboards in search of cheese chunks late into the night.
Threats & Fatalities
- Crushed under a falling anvil.
- Impaled by the falling kitchen wall knife while nibbling cheese.
- Captured by the closet spider after 7:30 PM unless Tabby knocks the spider down early.
- Snared in the spare bedroom snap trap unless Tabby springs it beforehand.
Lenny’s Timeline
- 6:00 PM: Sleeping quietly beneath the kitchen table.
- 8:25 PM: Awakens to eat cheese under the kitchen counter.
- 10:30 PM: Feeds on cheese inside the foyer closet.
- 11:30 PM: Nibbles cheese in the spare circus bedroom.

Dolly
Melody’s sinister porcelain doll from the original game who loves taunting Tabby after cleared endings. She sleeps in the spare bedroom before randomly teleporting to another room at 9:00 PM.
Possible Teleport Locations
- Underneath the foyer grandfather clock.
- Beneath the shelf inside the entryway closet.
- Resting on the kitchen food prep counter.
- Sitting on the basement armchair.
- Lying on the rug in the deep basement.

Zakk
The exhausted OctoPizza delivery courier.
- Tabby can order delivery anytime before 9:30 PM via the hallway telephone.
- Zakk takes approximately 35 to 40 in-game minutes to knock on the front door.
- He patiently waits at the porch for 75 minutes before packing up and leaving.

Maggie
Lois’s neglected, ravenous hound locked away inside the basement kennel. She breaks out at 7:00 PM and lunges at anything alive, calming down only once fed.
Threats & Fatalities
- Crushed by the heavy anvil if Tabby drops it as she bursts from her kennel before 8:00 PM.
- Killed if Tabby lures her directly into the deep basement bear trap before 8:00 PM.

Majesty
A creepy taxidermy horse mounted in the attic who inexplicably snaps to life, biting the head off anyone who approaches unless pacified with food.
Threats & Fatalities
- While hostile, she can only be permanently slain using the handgun.
Marty
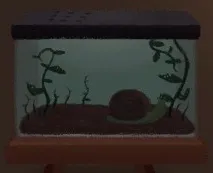
The helpful snail companion returning from House. Stored in his bedroom terrarium, he provides a passive movement speed boost when carried on Tabby’s head. If Tabby’s direct kills on Marty outnumber Tabby’s overall deaths, he refuses to help until your death count balances out.
Threats & Fatalities
- Crushed if Tabby shatters his glass aquarium.
- Crushed if Tabby drops an anvil on him.

Marnie
Marty’s aggressive snail sister who spawns in the muddy backyard once the house turns corrupt. Resting on Tabby’s head, she grants a damage boost to both knife thrusts and gunfire. Once invited along on three separate loops, she permanently replaces Marty in your room. Prior to that, she can only be eliminated by an anvil drop.
Items
Sponge
Found resting on the bathroom floor beneath the sink basin.

- Cleans up bloodstains on floorboards.
- Wipes away Simon’s urine puddle at the top of the stair landing.
- Soaks up water leaking from the kitchen refrigerator.
- Cleans the mountain of dirty dishes in the kitchen sink.
- During the Babysitter boss battle, wipes away popped balloon puddles.
Baseball
Found lying on Melody’s bedroom carpet after crashing through her window at 6:15 PM.

- Knocks down high loot boxes perched on walls.
- Shatters decorative vases around the household.
- Smashes the ceramic planter outside Melody’s bedroom.
- Breaks the basement support shelf holding up the anvil.
- Rattles the backyard trash can for loot drops.
- Pries open the backyard barbecue grill lid.
- Shatters Marty’s glass aquarium.
- Knocks down the hanging plant suspended over the stairwell.
- Dislodges the closet ceiling spider after 7:30 PM.
- Shatters Tulip’s living room fishbowl.
- Knocks down the spinning living room ceiling fan.
- Shatters the cracked entry clock during the Heartless ending sequence.
- Brings down the hovering giant brain boss in the attic during Heartless mode.
Anvil
Stored on a high basement shelf; dislodge it by pegging the bracket with your baseball.

- Crushes Maggie if dropped right as she emerges from her basement kennel.
- Dropped to shake loose the closet spider after 7:30 PM.
- Dropped to rattle loose the kitchen knife from its high wall mount.
- Dropped to shake loose the spare bullet from the back door shelf.
- Acts as a lightning rod in the backyard during storms to direct lightning strikes.
- Breaks open the locked attic floor trapdoor after four impacts.
- Dropped onto Simon or Lenny to crush them.
- Dropped onto the giant snapping mouth’s teeth in the backyard during Heartless mode.
Bell
The Spirit Bell is gifted by the pure basement ghost or retrieved from the Mud Man’s ashes.

- Banishes wandering shadow apparitions after blackouts.
- Exorcises Simon’s vengeful ghost cat.
- Banishes the basement spirit who originally gives it to you.
Knife
Hung on the kitchen wall rack; dislodged by Tabby slipping, an anvil ground-pound, or the 9:00 PM lightning strike.

- Stabs any boss or family member to deal physical damage.
- Shatters decorative ceramic vases.
- Destroys the flowerpot outside Melody’s room.
- Strikes the backyard trash can.
- Cuts open the locked attic leather suitcase.
- Shatters Tulip’s living room fishbowl.
- Slays Lois, Melody, or Zakk.
- Slays Maggie or Majesty after they have finished eating food.
Lois’s Key
Dropped onto the floor immediately whenever Tabby murders Lois.

- Unlocks Lois’s private bedroom door in the ground-floor hallway.
Gun
Locked inside the floor safe located in Lois’s closet. The safe code digits are hidden across household walls.

- First safe digit: scrawled on the spare circus bedroom wall.
- Second safe digit: written inside the basement kennel wall where Maggie sleeps.
- Third safe digit: etched onto the exterior backyard wall.
- Fires lethal shots into any boss or household resident.
- Kills Lois’s floating severed head if she was slain earlier.
- Kills wandering zombies during the Heartless ending.
- Damages the giant brain once brought down to ground level.
- Destroys the beating heart boss once its binding chains are severed.
Bullets
Ammunition needed to fire the handgun. The gun comes loaded with two rounds, with extra rounds hidden across the estate.

- One bullet hidden inside the hallway planter outside Melody’s room.
- Two bullets knocked off the deep basement shelf by Simon at 9:05 PM.
- One bullet shaken loose from the high back door shelf.
- One bullet found inside the backyard trash bin.
- Random chance inside the basement table vase.
- Random chance inside the attic vase.
- Random chance dropped from stabbing the attic suitcase.
Pie
Found unbaked inside the refrigerator before 10:00 PM. Must be baked in the oven for 45 in-game minutes. Leaving it in for an additional 30 minutes burns it to a crisp.

- Eaten by Tabby to grant infinite sprint stamina for the rest of the night.
- Fed to Maggie or Majesty to permanently pacify them.
Pizza
Ordered by calling OctoPizza on the hallway phone prior to 9:30 PM. Arrives 35–40 minutes later; courier waits on porch for 75 minutes.

- Eaten by Tabby to permanently boost knife and gunfire attack damage.
- Fed to Maggie or Majesty to calm them down.
Banana
Knocked out of the backyard trash can. Unlike other food items, only Tabby can consume the banana.

- Significantly boosts loot drop chances from breakable vases, trash bins, suitcases, and the toilet bowl.
- Discards a slippery banana peel that trips Tabby, Lois, and Father.
Threats
These environmental hazards operate independently of family mechanics, posing a direct threat to Tabby as she navigates the property.

Bear Trap
Chained to the center of the deep basement floor. Stepping on it inflicts severe damage and stuns Tabby. If Simon wanders into it, the trap remains disabled for the loop. If used to snare Lois, it cannot be reset until Father arrives at midnight.

Lightning Bolt
A natural bolt strikes the backyard at 9:00 PM sharp, plunging the entire estate into a blackout. If Tabby drops the heavy iron anvil in the yard, lightning strikes the metal a few moments later, damaging and stunning anything nearby. You can trigger repeated strikes after a brief cooldown.

Coat Rack
Manifests at random in one of four spots: beside the front door, upstairs outside the bathroom, in the living room, or outside Lois’s door. Once the power cuts out, stepping near it causes it to sprint after Tabby, instantly killing her on touch. A single gunshot destroys it.
Shadow Apparitions
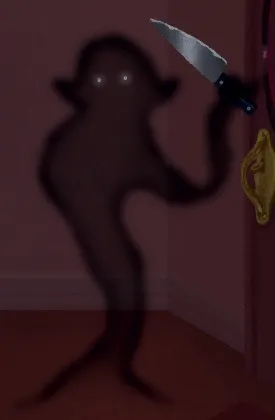
A shadowy figure spawns randomly after the blackout, relentlessly stalking Tabby from room to room for 15 seconds; contact means instant death. Rang the Spirit Bell while he moves to banish him for the night. After completing two endings, a Knife Thrower also appears in wide rooms, hurling lethal blades across the screen. Ring the bell mid-throw to banish him until you exit the room.

Fridge
Completely benign until 10:00 PM, after which its exterior twists into a monstrous face. Walking directly in front of it causes it to topple forward to crush Tabby. Cross the kitchen along the far bottom wall to stay safe, or bait its fall and immediately step back.

Floor Spikes
As you unlock unique endings, ragged holes tear open across rugs at specific times. Stepping on them triggers lethal upward spikes. Avoid them or bait them by tapping the edge and backing away quickly.
- One Ending Cleared: Upstairs landing (9:30 PM), Deep Basement (9:45 PM).
- Two Endings Cleared: Back Door hallway (9:00 PM).
- Three Endings Cleared: Upper Basement (9:45 PM), Living Room (11:00 PM).
- Four Endings Cleared: Foyer Front Door (9:00 PM), Tabby’s Bedroom (11:30 PM).
Family Threats
Stairs
The stairs are safe under normal conditions, but slipping on Simon’s urine puddle or a discarded banana peel at the top landing sends Tabby tumbling to her death.

Majesty
Stepping near the taxidermy horse in the attic causes her to gallop forward, chomping Tabby’s head off. Drop a pie or pizza into her food bowl to placate her, or blast her from across the room with the handgun. She goes to sleep automatically when Father arrives at midnight.

Maggie
Maggie bursts out of her basement kennel at 7:00 PM, lunging at anything in sight. Tame her with pizza or baked pie, impale her with the knife as she emerges, drop the anvil on her skull, blast her with the gun, or lead her into the deep basement bear trap.

Mud Man
Rises from the backyard mud at 7:30 PM (visible only when the house is corrupt). At 8:40 PM, he snatches Melody through the window if she is doing dishes. He vanishes at 9:00 PM. Drop the anvil near him to summon a lightning strike, killing him and yielding a Spirit Bell.

Toilet Hair
At 7:30 PM, black hair creeps out of the toilet across the bathroom tiles. Stepping on it drags Tabby down into the pipes. Walk around the perimeter and flush the handle to banish it for the rest of the night.

Bed Monster
Hiding beneath Lois’s bed, this creature mauls Lois at 9:55 PM shortly after she sits down. You can neutralize it beforehand by dropping the overhead chandelier to crush the bed.

Floating Head
If Tabby murders Lois directly, Lois’s decapitated head hovers where she died once the blackout hits. Getting close causes it to chase Tabby relentlessly through the estate. Shoot it from afar to eliminate it.

Lois (Reanimated)
If Lois dies to environmental hazards without Tabby’s blade, she reappears deflated at 10:00 PM in the living room, kitchen, or stair base. After you enter, she reanimates and hunts Tabby down. Deplete her health bar to defeat her, or kite her until she vanishes right at midnight.

Noose
If Tabby stabs or shoots Melody, a swinging hangman’s noose begins appearing throughout the rooms after the blackout. Touching it causes it to strangle Tabby instantly.

Melody (Ghost)
If Tabby kills Melody, her apparition sits in her bedroom after the blackout. Approaching her causes her to blow a fatal note on her flute, killing Tabby instantly. Blast her with the gun from the doorway to dispel her.

Ghost Cat
If Tabby crushes Simon with the anvil or planter, his phantom roams the house post-blackout. Touching him completely saps Tabby’s stamina bar. Ring the Spirit Bell to banish him until you change rooms.

Father
Father kicks open the front door at midnight sharp, stalking Tabby with a knife. Deplete his health bar to survive the confrontation. Meeting the requirements for special endings skips this fight entirely.
Immortal Achievement
Every time Tabby suffers a unique death across her loops, she pins a commemorative crayon sketch onto the wall behind her bedroom desk. To earn the prestigious Immortal achievement, you must experience and pin every single death drawing. Here is how I unlocked each drawing across my runs:

- Step into the deep basement bear trap.
- During the Heartless route, let the giant mouth in the backyard bite you in half.
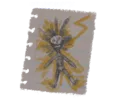
- Drop the anvil in the backyard during the storm and stand right next to it to take the lightning strike.

- Approach the possessed coat rack after the 9:00 PM blackout and let it catch you.

- Allow the stalking shadow man to grab Tabby in the dark after 9:00 PM.
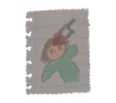
- After clearing two endings, wait for the phantom knife thrower to materialize after 9:00 PM and take a blade to the chest.
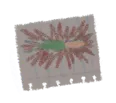
- Walk directly in front of the kitchen fridge after 10:00 PM to get crushed.
- During the Heartless ending, stand beneath the falling hands in Lois’s/Tabby’s room or the attic brain.
- During the Nihilist route, enter the backyard grave and let Mud Tabby crush you.
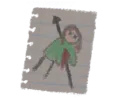
- Step onto exposed rug holes after 11:00 PM to get impaled by spikes.
- Step into spike pits in the underground ruins of the Sea of Time.
Family Death Sketches

- Slip on Simon’s urine puddle at the top stair landing after 6:55 PM.
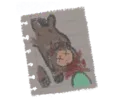
- Approach Majesty in the attic without feeding her to get your head bitten off (also unlocks Majesty’s journal entry).
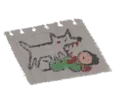
- Walk into Maggie’s basement kennel after she wakes at 7:00 PM without food.

- Step into the black toilet hair spreading across the bathroom tiles after 7:30 PM.

- Kill Lois or drop the ceiling fan on her, then let her floating severed head catch you after 9:00 PM.

- Let Lois die to the bed monster, then allow her deflated reanimated form to grab you after 10:00 PM.
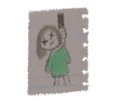
- Murder Melody, then let the phantom hanging noose catch you after 9:00 PM.
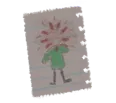
- Murder Melody, then approach her playing the flute in her bedroom after 9:30 PM.
- Allow Father to catch and stab you with his blade after midnight.
Ending Death Sketches

- During the Babysitter ending, let Mr. Fingers grab Tabby during phase one.

- During the Babysitter ending, get struck by Mr. Fingers’ spinning detached head during phase two.

- During the Nihilist ending, stay on the mud after destroying an idol until the erupting bone mouth bites you.
- In the Sea of Time, allow the surface sand tornado to sweep you up.
- In the Sea of Time ruins, walk directly into the swing path of a pendulum blade.

- During the Heartless ending, let a wandering zombie catch and maul you.
Death Achievements

Immortal
Witness every possible fatality. Once every death drawing is displayed on Tabby’s bedroom wall, this unlocks.

Masochist
Die a total of 25 times. You will almost certainly unlock this through natural progression, but if not, throw yourself into traps.

Straight From a Horse’s Mouth
Meet Majesty. Unlocks by dying to Majesty’s bite in the attic, adding her entry to Tabby’s journal.
Ending Conditions
There are six core endings in House 2, each demanding a specific sequence of choices. Which standard ending you receive is calculated at midnight when Father steps through the front door.

Guardian
Save your core family. Unlocks when you ensure Lois, Melody, and Simon survive the night on the same loop.

Savior
Save everyone. Extends Guardian by keeping all household residents and pets alive on the same loop. Most can only die by Tabby’s hand, but you must feed both Maggie and Majesty to qualify. Must keep alive: Lois, Melody, Simon, Zakk, Lenny, Maggie, Majesty, Marty, Dolly, and Tulip.

Killer
Slaughter your household. Qualify by murdering at least six residents from this list: Lois, Melody, Simon, Zakk, Lenny, Maggie, Majesty, Marty, and Dolly. Bathroom mirror tick marks track kills; summon the Akaname by flushing the toilet to check ending status.

Butcher
Kill literally everyone. Extends Killer by slaughtering every single resident listed above, plus shattering Tulip’s fishbowl to kill the fish.

Survivor
Slay Father. If you fail to qualify for any other household ending, Tabby must battle and defeat Father as a midnight boss encounter.
Beyond the standard household outcomes, three special endings transport Tabby into alternate dimensions featuring unique boss fights.

Babysitter
Rescue Suzie. After clearing at least one ending, approach the living room TV after 9:00 PM when the clown beckons. Defeat Mr. Fingers in Suzie’s Circus to unlock this ending.

Nihilist
Let go. Fully corrupt the house until the tree turns black, eat the apple from the toilet, cross into the backyard grave, and defeat Mud Tabby.

Heartless
Break free. After clearing four endings, shatter the cracked foyer clock with a baseball to enter frozen time, destroying the body parts spread across the rooms.
Ending Achievements

Scribe
Fill every journal entry. Completing all endings and returning after the True Ending unlocks this. If it doesn’t pop, talk to the toilet monster or die to Majesty.

Independent
Defeat Father completely unassisted: no food buffs, no snail companions (Marty/Marnie), using only your knife and handgun.

Feeder
Take Lenny on a culinary journey. Automatically unlocks alongside the Savior ending when Tabby wakes up the next morning.
Savior Ending Guide
Here is my exact, loop-tested checklist to save every soul in the house:
- Head straight to the bathroom and grab the sponge from under the sink.
- Enter Melody’s room and pick up the baseball off the floor at 6:15 PM.
- Use the hallway telephone to dial OctoPizza and order a pizza.
- Run down to the basement and chuck the baseball to knock the anvil down.
- Haul the anvil into the kitchen and set it down near the entrance.
- Open the oven door, then use your sponge to wash the dirty dishes in the sink.
- Open the fridge, take the raw pie, grab the knife from the rack, and put the pie in the oven.
- Carry the anvil and drop it at the base of the stairwell landing.
- Answer the front door to pay for and collect the pizza from Zakk.
- Head upstairs and scrub Simon’s urine puddle at the top of the stairs.
- Enter the bathroom and flush the black hair tendrils down the toilet.
- Return to the kitchen and take the freshly baked pie out of the oven.
- Head down into the basement and feed the baked pie to Maggie.
- Toss the baseball at the deep basement bear trap to disarm it.
- If house purity is high, collect the Spirit Bell from the hidden ghost behind the boxes.
- Pick up your baseball from the disarmed trap.
- Drop the anvil inside the foyer closet to dislodge the spider before Lenny arrives.
- Carry the anvil into the upstairs spare circus bedroom and drop it.
- Open the wardrobe, step on the snap trap to disarm it, and pop the inflatable clown with your knife.
- Carry the anvil into the attic and walk toward the rear trapdoor.
- When Majesty awakens, set down the anvil and feed her the pizza.
- Drop the anvil onto the floor trapdoor four times to break through, dropping into Lois’s bedroom.
- Throw the baseball at the overhead chandelier above Lois’s bed to crush the mattress.
- Survive peacefully until midnight arrives.
Butcher Ending Guide
When you want to leave no survivors, follow this ruthless execution route:
- Grab the baseball from Melody’s bedroom.
- Use the hallway phone to order a pizza from OctoPizza.
- Go to the basement and dislodge the anvil with your baseball.
- Bring the anvil into the kitchen and take the knife from the shelf.
- Carry the anvil to the stair landing and drop it onto Simon to crush him.
- Answer the front door and stab the pizza delivery guy Zakk.
- Run upstairs into Melody’s bedroom and stab Melody.
- Enter the spare bedroom, open the wardrobe, stab Dolly, then pop the inflatable clown.
- Head back downstairs, hauling the anvil into the living room.
- Shatter Tulip’s fishbowl with the knife, then stab Lois on the couch and grab her bedroom key.
- Drop the anvil onto the Mud Man in the backyard to trigger lightning, killing him and yielding the bell.
- Carry the anvil into the kitchen and crush Lenny the rat beneath it.
- Unlock Lois’s bedroom with her key, enter her closet, and open the safe to grab the gun.
- Descend into the basement and shoot Maggie.
- Go upstairs to the spare bedroom and climb the clown ladder into the attic.
- Sprint toward the left wall and shoot Majesty.
- If the shadow apparition spawns, ring the Spirit Bell to banish him.
- Return to Tabby’s room and crush Marty or Marnie with the knife or anvil.
- Exit Tabby’s room, step left, and check the bathroom mirror to confirm all 9 kill ticks.
Survivor Ending Guide
This route defeats Father while concurrently unlocking the Independent achievement. Stick to this precise routine:
- Grab the baseball from Melody’s room.
- Shatter the ceramic planter outside Melody’s room with the baseball to get a bullet.
- Head to the deep basement and trigger the bear trap with the baseball.
- Smash the basement vase using your baseball for potential ammo.
- Wait near Maggie’s kennel and crush her with the anvil as she bursts out at 7:00 PM.
- Haul the anvil to the kitchen and place it in front of the fridge.
- Take the raw pie from the fridge and slide it into the oven.
- Take the knife, then carry the anvil to the back door to dislodge the shelf bullet.
- Drop the anvil outside next to the bottom corner outline of the kitchen window.
- Lightning will eliminate the Mud Man; collect the Spirit Bell from his ashes.
- Return to the living room, stab Lois when she sits at 7:30 PM, and take her dropped key.
- Go upstairs to the spare bedroom, open the wardrobe, pop the clown, and enter the attic.
- Retrieve the baked pie and feed it to Majesty to pacify her.
- Smash the attic vase and stab the suitcase three times to scavenge extra bullets.
- Use Lois’s key to enter her closet safe and collect the gun.
- Head down to the basement to collect the bullets Simon knocked off the shelf.
- Hit the backyard trash bin repeatedly until Father arrives to secure the final bullet.
- Unload all pistol rounds directly into Father as he enters at midnight.
- Finish him off with two to five knife thrusts to claim victory.
Babysitter Ending Guide
After clearing at least one standard ending, the living room TV displays Suzie’s Circus between 9:00 PM and 11:00 PM. Stepping near the screen pulls Tabby into a two-phase boss showdown against Mr. Fingers.
Mr. Fingers Boss Encounter

Phase One: Mr. Fingers pursues Tabby, steadily accelerating. Every 25 seconds, he dashes across the arena three times, blowing balloons that pop into hazard puddles. Sponge up puddles and damage him with your knife or pistol until his head detaches.

Phase Two: Mr. Fingers’ floating head retreats to corners for 12 seconds before spinning aggressively in wide bouncing arcs for 6 seconds. Touching him during his spin is fatal. Keep your distance, fire your handgun, and finish him off with the knife when he pauses.
My prep checklist before stepping through the TV:
- Collect the sponge from the bathroom floor.
- Grab the baseball from Melody’s room.
- Break the planter outside Melody’s room with the ball for ammo.
- Call OctoPizza to order food.
- Trigger the deep basement bear trap with the baseball.
- Crush Maggie with the anvil at 7:00 PM as she emerges.
- Drop the anvil by the fridge, take the knife, and bake the raw pie.
- Collect the pizza from Zakk at the front door.
- Stab Lois on the couch at 7:30 PM and claim her bedroom key.
- Retrieve the baked pie from the oven.
- Drop the anvil at the back door for the high shelf bullet.
- Hit the trash can for the banana.
- Eat the banana, pie, and pizza to stack stamina, damage, and luck buffs.
- Unlock Lois’s safe for the gun, then collect Simon’s basement bullets.
- Lure any roaming coat rack away, slip around the sofa, and touch the TV screen.
- Defeat Mr. Fingers across both combat phases.
Nihilist Ending Guide
Accessible only after driving house corruption to maximum. When the bedroom tree painting is entirely pitch-black, a rotten apple bobs in the toilet bowl. Eating it pulls Tabby into Mud World, where normal time is frozen. Approaching the open grave in the yard initiates the boss trial.
Mud World Threats

Bone Teeth: Whenever an idol is destroyed, bubbling mud stalks Tabby before erupting into lethal jaws. Lure the bubbles onto a patch of green grass to trigger the snap harmlessly.

Mud Tabby: Wanders passively until injured or until all three arena idols shatter. Once provoked, she relentlessly chases Tabby to crush her with giant mud fists.
My step-by-step route to conquer Mud World:
- Grab the knife from Melody’s bedroom.
- Shatter the hallway planter for a bullet.
- Head to the kitchen, open the oven, and grab the gun.
- Bake the pie in the oven.
- Hit the backyard trash can to secure the banana.
- Eat the banana in front of the back door ammo shelf.
- Eat the baked pie once the timer chimes.
- Slip on the banana peel to knock down and collect the high shelf bullet.
- Hit the trash can again for the remaining bullet.
- Interact with the backyard gravestone to enter Mud World.
- Sprint west, circle north around mud pools, and stab Idol #1 three times.
- Let stamina regenerate, finish off the idol, run east onto the grass patch, and let the bone teeth snap safely.
- Move northeast to the larger grass patch, stabbing Mud Tabby twice as you pass.
- Run straight east, stab Idol #2 three times, finish it, and retreat west to grass.
- Head north, loop west around the mud, and stab Idol #3 three times; finish it and wait on the northeast grass patch.
- For a unique collectible, run southeast, stand right of the chest, and bait Mud Tabby into smashing it open.
- Line up cleanly in open space and fire all five pistol rounds into Mud Tabby.
- Bait her fist swing, slip behind her, and deliver knife strikes until she collapses to her knees; deliver one final blow to finish the loop.
Heartless Ending Guide
Every unique ending you achieve carves a crack across the foyer grandfather clock. Once four cracks appear, pegging the glass with a baseball shatters time itself, plunging the house into a sluggish, frozen nightmare where body parts run amok.
Frozen Time Threats

Zombies: Slumbering corpses scattered across rooms that awaken when approached. Slay them with three knife stabs, gunfire, or environmental traps.

Giant Hands: Crawling hands located in Lois’s and Tabby’s bedrooms. Bait their downward slams and sever their fingers one by one with your knife.

House 2 Giant Mouth chasing Tabby across frozen yard during Heartless ending sequence
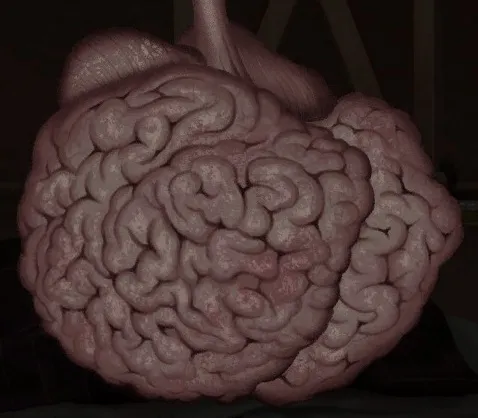
Giant Brain: Hovers in the attic rafters. Step beneath it to bait a ground crash, then stab or shoot it before it floats back up.
My complete execution path for the Heartless route:
- Skirt the foyer perimeter to avoid waking the entrance zombie.
- Sprint into the kitchen and grab Lois’s key.
- Unlock Lois’s closet safe to secure the gun.
- Head down into the basement and shoot the basement zombie.
- Drop the anvil in the kitchen and shoot the kitchen zombie.
- Take the knife, drop the anvil near the back door shelf, and collect the bullet.
- Carry the anvil into the backyard, lure the giant mouth forward, let it snap, and drop the anvil onto its teeth.
- Enter Lois’s room and bait the giant hand to slam down; sever all five fingers with knife stabs.
- Check the basement vase for potential ammo.
- Head upstairs and stab the landing zombie to death.
- Enter Tabby’s bedroom to defeat the second giant hand by severing its five fingers.
- Enter the attic and stab the lower zombie.
- Line up along the right wall and fire a bullet through both attic zombies simultaneously.
- Bait the attic brain to crash down, stabbing it repeatedly across six cycles until destroyed.
- Return to the living room, kite and eliminate remaining zombies, then stab the giant heart.
- Speak to the Janitor on the theater stage right, then talk to the suited man beside the TV to conclude the ending.
Sea of Time Guide
After earning four endings, opening your bedroom door leads straight into a vast, sun-baked desert called the Sea of Time. Dying here causes a towering giant to retrieve Tabby and deposit her back in the house, leaving a green pendant where the mystery kid stood in the yard. Picking it up lets you teleport back here from Tabby’s desk at will.
Desert Hazards

Sand Tornado: Patrols the desert dunes, gaining speed as it tracks Tabby. Touching it is fatal.

Underground Zombies: Dormant ghouls lurking inside subterranean passages that awaken when stepped near.

Swinging Blades: Huge pendulum scythes oscillating back and forth across underground corridors.
Your main objective in the desert is rescuing Kimiko by gathering four elemental crystals to open the subterranean vault door south of the entrance portal:
Red & Green Crystals (Sun Switch #1)
- Walk south from the entrance doorframe, pick up a rock, and descend the ladder.
- Follow red crystal shards southeast into an enclosure holding the red crystal.
- Follow shards into a second enclosure and climb down the ladder.
- Trek west along the shard trail to a surface ladder.
- Grab the red crystal and return through the cavern tunnel to the rock opening.
- Travel south to four boulders with a center sand pile; drop a rock on the sand to reveal Sun Switch #1 and press it.
- Sprint west along the southern map border to find a boarded hole.
- Drop a rock onto the boards to smash through and reveal the green crystal.
- Carry the green crystal back along the shard trail, climb down, and slot both gems into the central vault door.
Blue Crystal (Sun Switch #2 & Moon Switch #1)
- Head south from the portal, grab a rock, and climb down the ladder.
- Follow blue shards southeast, smash the ladder boards with a rock, and descend.
- Hug stalagmites heading west to sneak past the dormant zombie.
- Follow shards north around sleeping ghouls.
- At the northwest tunnel junction, take ladders to the surface and hit Sun Switch #2.
- Climb back down and follow blue shards to a hidden south wall doorway.
- Carefully follow shards through the gap at the room’s base, loop up the left wall, and press Moon Switch #1.
- Retrieve the blue crystal, grab a rock from the southeast hidden room, return up the ladder, and slot the blue crystal into the door.
Brown Crystal (Sun Switch #3)
- Descend to the lower tunnels, grab a second rock from the southeast room, and head to the surface.
- Follow brown shards east and descend the ladder.
- Place two rocks on the floor switches and stand on the third to unlock the gate.
- Grab the brown crystal and return to the surface.
- Head east to find Sun Switch #3 enclosed in rocks; enter from the north side to activate it.
- Return to the vault and insert the brown crystal into the doorway.
Crystal Door Maze
Once all four crystals are set, step through the vault portal and navigate the audio maze following this exact directional pattern: Right, Right, Down, Down, Left, Left, Up. Hit the switch to free Kimiko, then return to the surface portal.
Sea of Time Collectibles
To claim the remaining secret collectibles in the desert after freeing Kimiko, complete these puzzle routes:
Moon Switch #2
- From the subterranean crossroads, head west.
- Descend the northwest ladder, dodge floor spikes, and weigh down the gate switch with a rock.
- Climb back up, run west, and take two ladders down.
- Run east past swinging pendulum blades and exit southeast.
- Sprint west past blades, climb the ladder, and hold the switch until the gate lifts.
- Retrieve your rock, climb up, and press Moon Switch #2 before returning to the crossroads.
Hourglass Collectible & Moon Switch #3
- From crossroads, head east past swinging blades.
- Continue east dodging spike traps.
- Head north, drop a rock on one pressure plate and stand on the second to lift the gate.
- Grab the rock, pass through, and hit Moon Switch #3.
- Head south twice to claim the floating Hourglass collectible.
- Return to the surface and weigh down the gate switch with your stone.
Moon Switches #4, #5 & #6 (Sun Switches #4, #5 & #6)
- From crossroads, head south with a rock, taking two ladders down.
- Follow the north wall past the extinguished campfire to falling sand; slip south to hit Moon Switch #4.
- Advance through the eastern tunnel, sneaking past stalagmite zombies to activate Moon Switch #5.
- On the surface, smash sand piles northwest using rocks to reach Sun Switch #4.
- Follow the west barrier north and clear sand to press Sun Switch #5.
- Descend the adjacent ladder; drop a stone into the small sand pile in the southwest corner to uncover Moon Switch #6.
- Advance east past the campfire boy and take the ladder up to the giant’s feet enclosure to press Sun Switch #6.
Sun & Moon Collectibles
- Sun Collectible: With all six sun switches active, head due north of the desert entrance doorframe to the Sun Obelisk. Enter the opened chamber to collect the Sun artifact.
- Moon Collectible: With all six moon switches pressed, travel due south from the entrance portal to the bottom map boundary. Descend the fully revealed ladder surrounded by green pools to claim the Moon artifact.
Collectibles Guide
All unlocked figurines and oddities appear proudly on the display shelf above Tabby’s bedroom desk. Gathering the full set awards the Consumer achievement.
Loot Box Collectibles

Small cardboard crates rest on high shelves around the house. Knocking them down with a baseball yields one of 18 randomized collectibles. Exactly one loot crate spawns per loop, appearing far more frequently when the house is pure.

- Inside the entryway closet near the front stairs.
- In the deep basement where Simon plays with his ball.
- Inside Lois’s closet perched above the combination safe.
Unique Collectibles

Trash Can
Rare random drop awarded by smacking the backyard trash bin with a baseball or knife.

Burger
When Tabby slips anywhere in the house, a mocking ghost may appear pointing at her; banish him with the Spirit Bell to earn this.
Hourglass
Found hidden in the Sea of Time ruins by taking the right path at the crossroads past the swinging blades.

Crystal Ball
Keep calling Tarot Tonight on the telephone until she reveals all fortunes; this collectible appears on your desk shelf the next morning.

Mud Man
During the Nihilist route, bait Mud Tabby into smashing the treasure chest in the southeast corner of Mud World.

Network Logo
Randomly drops from stabbing the attic suitcase with your knife.

Toilet
Rare random unlock granted by repeatedly flushing the bathroom toilet across loops.

Little Suzie
After beating the Babysitter ending, inspect the unlocked jewelry box on Lois’s bedroom vanity desk.

Rubber Chicken
Pry open the backyard barbecue with a knife, set the anvil beneath the egg, and let lightning hatch it.

Frog
Crush the live frog hopping in the backyard mud using the dropped anvil.

Sun
Activate all six Sun Switches across the Sea of Time surface and enter the open Sun Obelisk.

Moon
Activate all six Moon Switches in the Sea of Time underground and descend the uncovered south boundary ladder.
Collectibles Achievement

Consumer
Find and display every single collectible figurine and artifact on Tabby’s bedroom shelf.
True Ending Requirements
To break Tabby out of the time loop once and for all, you must enlist Kimiko’s help across specific milestones.
Kimiko Encounters

You have four distinct opportunities to speak with Kimiko through the backyard fence breach:
- Prologue: Hands you the cartridge for Kimiko’s Curse 2.
- After clearing one ending: Shares lore dialogue.
- After clearing two endings: If you spoke with the Akaname in the bathroom, provides clues to her identity.
- After entering Sea of Time: Leaves a green pendant behind for fast-travel.
- After rescuing her from Sea of Time: Hands you the final hint to unlock the True Ending.
Once Kimiko is freed from the desert sands, she appears in the theater audience at the end of the Heartless route, joining Tabby on a bus escaping into the city. Key decisions influence how this final cutscene unfolds:
- If you beat Kimiko’s Curse 2 in the prologue and spoke to Kimiko at every loop opportunity, she sits right beside Tabby on the bus. Otherwise, she sits a seat away.
- If you completed the Nihilist ending prior to the True Ending, Tabby appears deeply traumatized during the ride and writes darkly about the player in her journal.
- The billboard for Suzie’s Circus changes subtly depending on whether Suzie was rescued via the Babysitter ending.
Other Achievements
If you’ve completed all endings, filled your journal, and cleared the shelf but are still missing trophies, check these miscellaneous milestone achievements:

Exterminator
Crush 50 total bugs (cockroaches, maggots, or worms) beneath Tabby’s shoes across your loops. Worms stomped in Mud World count, but the trophy pops only after stepping on an insect inside the normal house loop.

Maid
Clean up 50 messes using the sponge across your playthroughs (cat urine, water puddles, blood, dishes, and popped balloon slime).

Animal Husbandry
Feed Maggie the hound in the basement a total of 10 times across your loops (feeding her Simon does not count).

Baker
Bake 10 total pies in the kitchen oven across your runs without burning them.

Customer
Order pizza through the hallway telephone 10 times across your loops.

Glutton
Consume a slice of baked pie, an ordered pizza, and a scavenged banana all within the same single night loop.

What Was That?
Witness a rare eerie event where an unknown man peers through the kitchen window and snaps a camera flash as Tabby walks in from the living room after 9:00 PM.

Completionist
Achieve 100% completion across all achievements. Unlocks the morning after completing every doodle sketch page in Tabby’s journal.