


Cleaning up endless piles of leaves in Leaf It Alone can become a repetitive grind, but uncovering the game’s hidden secrets offers a rewarding break from the monotony. One of the more intriguing challenges involves tracking down eight mysterious photos scattered throughout the map, adding a layer of exploration and discovery to the experience. These photos tie into an achievement, making their locations valuable for completionists and players eager to delve deeper into the game world.
Collecting all eight photos isn’t just about neat exploration; it culminates in unlocking the Say Leaf! achievement, which adds a gratifying milestone for your efforts. This incentive pushes players to engage with the environment beyond basic leaf clearing.
Leaf it Alone Photo Locations
Finding these photos without wandering aimlessly requires knowing exactly where to look. They’re tucked away in spots that don’t stand out immediately, so focusing on specific landmarks will save time and frustration.
Shed
Start your photo hunt inside the shed, conveniently positioned near the well. This area holds several interactable items like a TV, a football, and a blower, helping set the scene.
Check the notice board within the shed. Your first mysterious photo is discreetly attached there, signaling the beginning of your collection journey.

Porch
Exiting the shed, you’ll spot a house nearby. Head up the stairs and approach the left side of the porch railing.
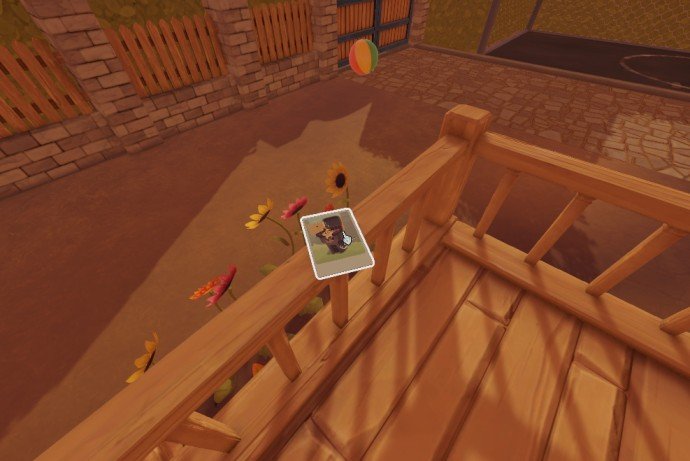
This side area conceals another one of the elusive photos, waiting for you to claim it.
Court
Next, make your way to the basketball court. Look behind the hoop, where the third photo is stashed away, rewarding a careful eye.
Garage
The garage door starts locked, so you need to activate it from the shed first.
Back in the shed, find the black button next to the TV. Press and hold it to open the garage door remotely. The in-game TV screen shows the door’s movement so you know when it’s open.
Once the door is ajar, dash straight into the garage before it shuts. Inside, check the right side near the entrance for the photo tucked away.

Swings
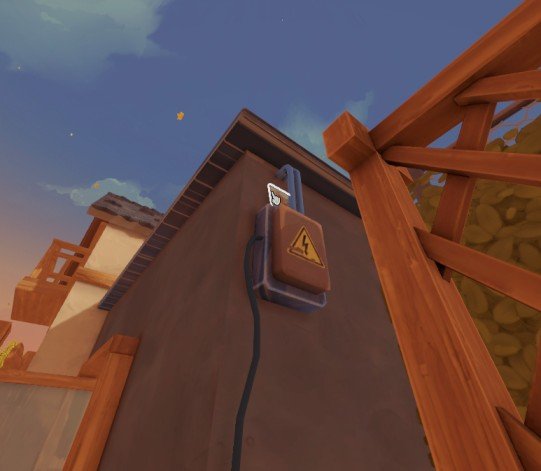
Leaving the garage, look to your left at the electrical box next to the swings. That’s where the next photo is concealed.
Basement
To find the basement photo, enter the basement and explore the left side of the shelf. It’s placed beside a large wine bottle, welcoming close inspection.
Access to the basement comes through the garage. From there, head toward the swings, and just to the right near a trash can, you’ll discover the basement entrance.
This tucked-away entry requires navigating through these adjacent spaces, making it less obvious at first glance.
Grill
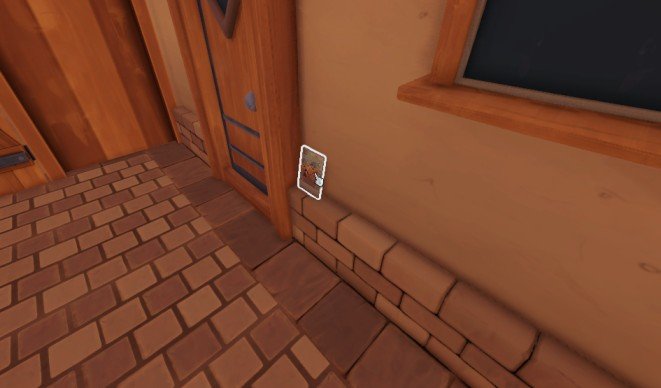
Enter the grill area to find another photo. Look closely on the left side near the entrance, where it rests on the foundation beside the door.
Gaining entry isn’t immediate—you’ll need to clean up the shed area first to obtain the key.
Once you have the key, unlock the door and explore the grill section that includes both a grill and a pool.
Greenhouse
The final mysterious photo hides inside the scarecrow’s jacket within the greenhouse. Hover your cursor over it and left-click to collect this last elusive item.

Once you’ve gathered all eight photos from these carefully chosen spots, your collection is complete, and the Say Leaf! achievement will be yours. This accomplishment reflects not just your cleaning skills but your dedication to fully exploring Leaf It Alone’s charming environment.