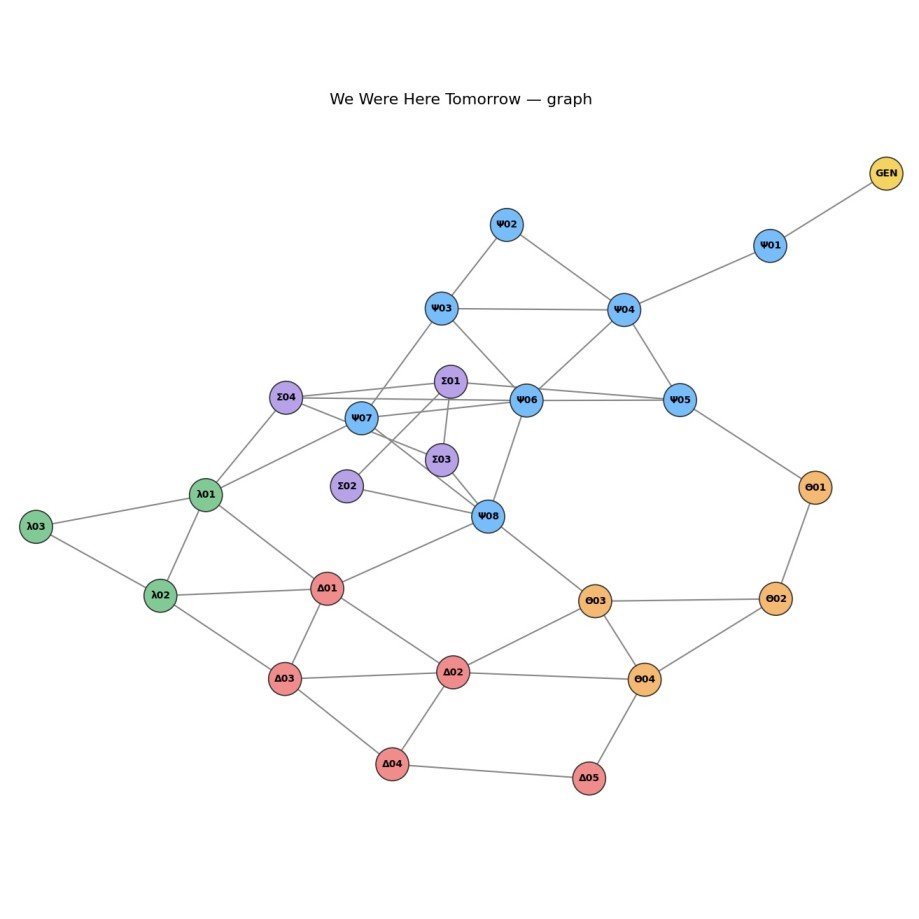

How the Time Loop Puzzle Works
Solving the Time Loop puzzle in We Were Here Tomorrow requires destroying four distinct crystals across three iterative loops. The puzzle relies on two recording phases where both players lay down actions, creating automated clones that assist during the final execution run.
Each player is assigned a specific gadget:
- Player 1 (P1): Equips the cube weapon.
- Player 2 (P2): Equips the suction cup tool.
Keep in mind that every phase operates under a strict timer, and initiating a new recording overwrites the previous sequence.
Phase 1: Activating the Crystal 1 Pressure Plates
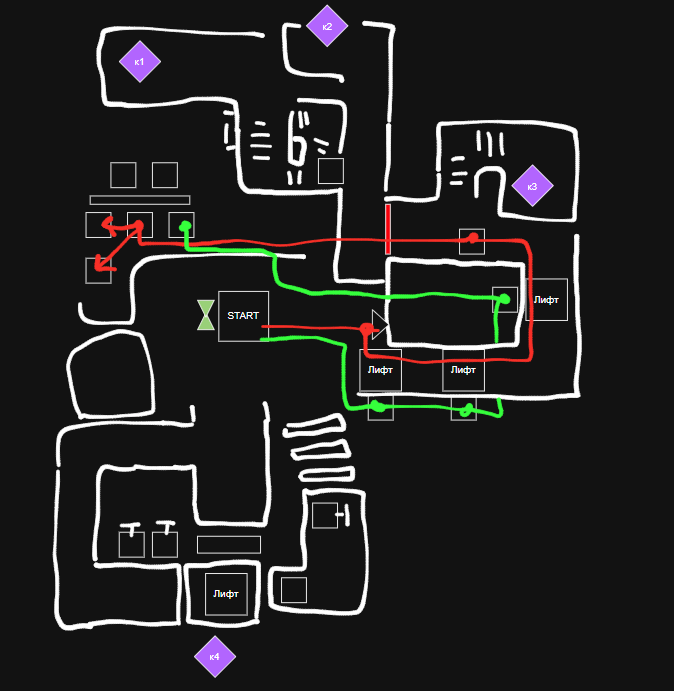
Begin Phase 1 by moving toward Crystal 3 (C3). Your ultimate goal during this phase is to activate and maintain all six pressure plates surrounding Crystal 1 (C1) before the timer expires.
Reaching the Castle
- Scale the first elevator: Both players head toward C3. Player 1 stacks two cubes beside the initial elevator platform to form an improvised staircase. Player 2 waits for Player 1 to jump up, then hits the elevator switch to raise them.
- Traverse the lift path: Continue forward across the route, hitting the three elevator buttons in sequence to escort Player 1 inside the castle perimeter.
- Unlock the castle gate: Once inside, Player 1 places a cube on the interior switch to open the exit. Player 1 then bolts toward C1, while Player 2 triggers the final elevator and sprints toward C1 as well.
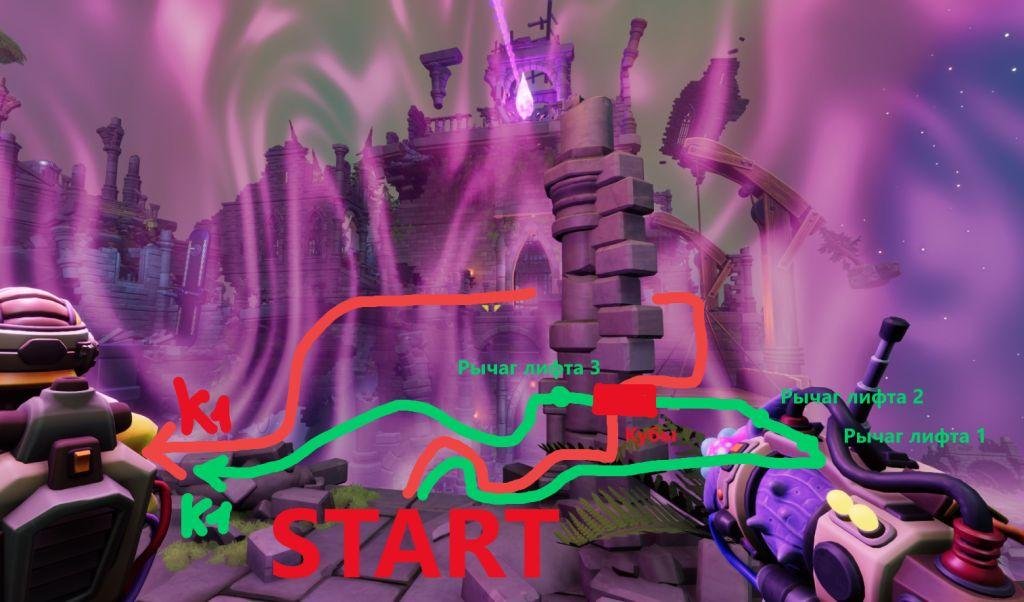
Securing All Six Pressure Buttons
Once at Crystal 1, coordinate to ensure all plates remain fully depressed:
- Deploy cubes: Player 1 recalls the cube used at the castle gate and places cubes onto the required ground switches around C1 until maximum automated coverage is reached.
- Hold remaining switches: Player 1 and Player 2 must each step onto the remaining vacant pressure buttons.
- Remain stationary: Both players must stand firmly on their assigned plates until the recording timer runs out, ensuring the automated clones hold these positions later.
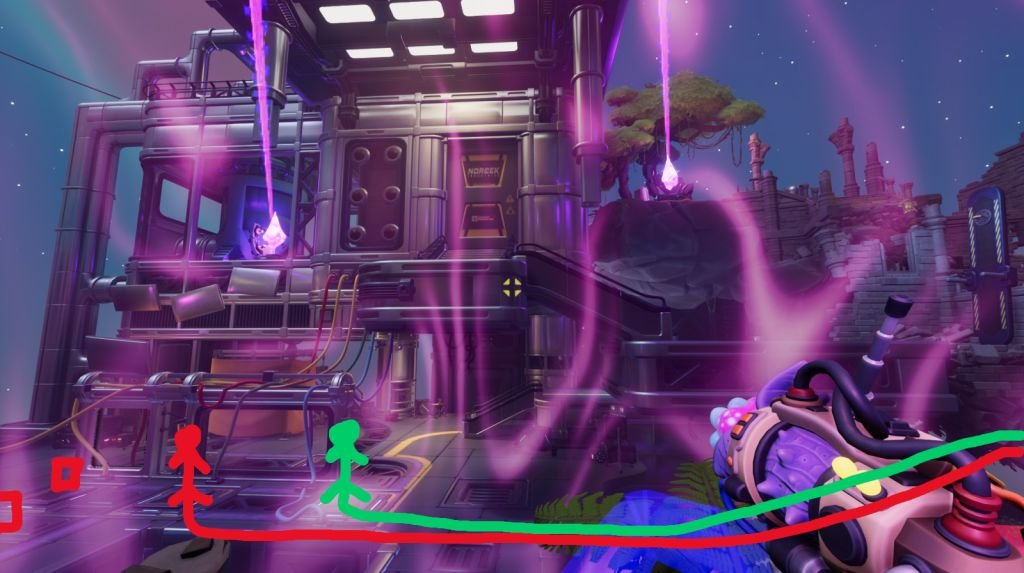
Crucial Check: Verify that all six switches remain active right as the recording concludes. If any button is left unpressed, your clones will not open the required route in the final phase.
Phase 2: Powering the Crystal 4 Elevator
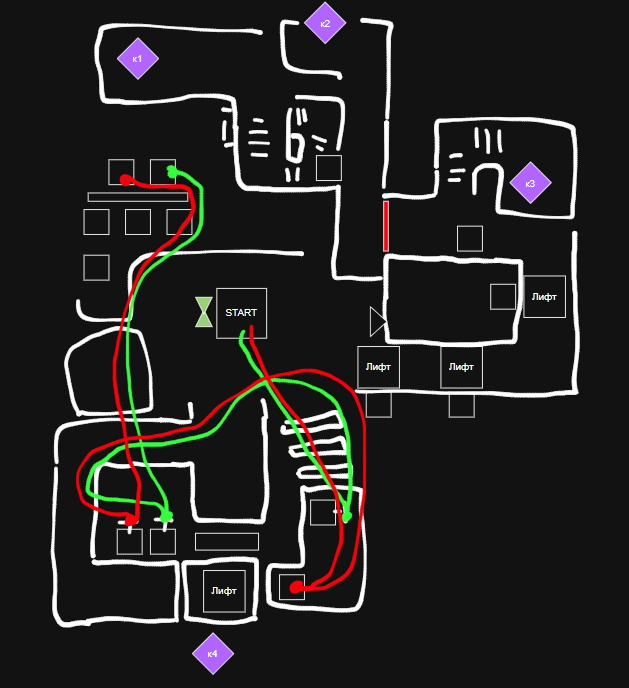
During the second phase, both players must navigate toward Crystal 4 (C4) to record the platforming and elevator mechanics needed to reach the upper level and clear the path to C1.
Setting Up the Elevator
- Reach Crystal 4: Exit the spawn area and sprint toward C4. Jumping across the shard staircase is noticeably faster than triggering the standard climbing animation.
- Deploy the canopy: Player 1 runs ahead and drops a cube onto the switch that extends the canopy, paving the route to the elevator. Simultaneously, Player 2 pulls the lever to open the security door.
- Operate the lift levers: Both players pass through the doorway to the dual elevator switches. Pull and hold both levers concurrently until the voice prompt counts down to "THREE."
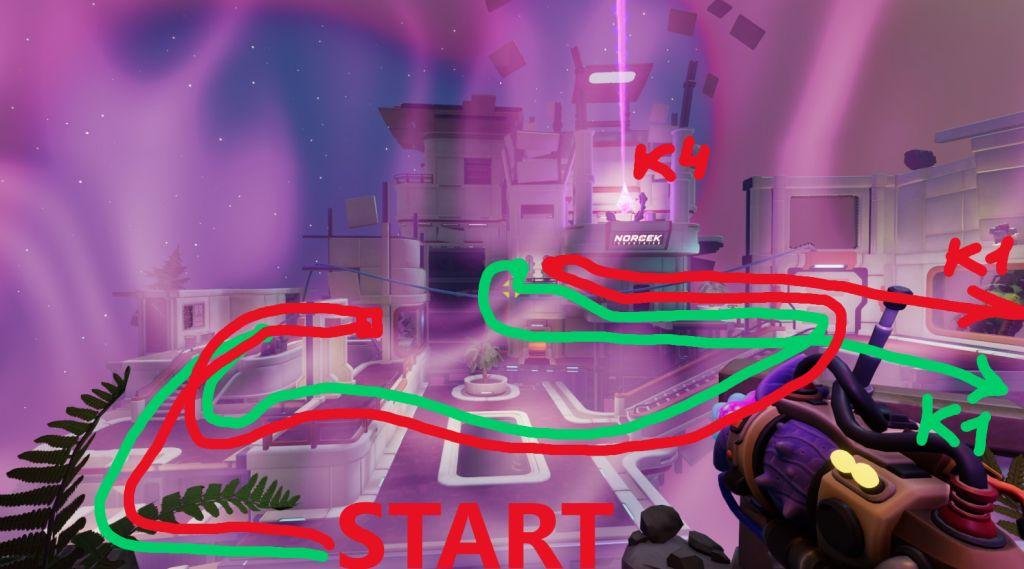
Timing the Release and Return
- Simultaneous release: Exactly when the voice says "THREE," both players must let go of their respective levers at the same moment.
- Reposition to Crystal 1: Immediately sprint back toward C1. Each player must step onto the remaining unpressed plates and stay in place until the recording timer expires.
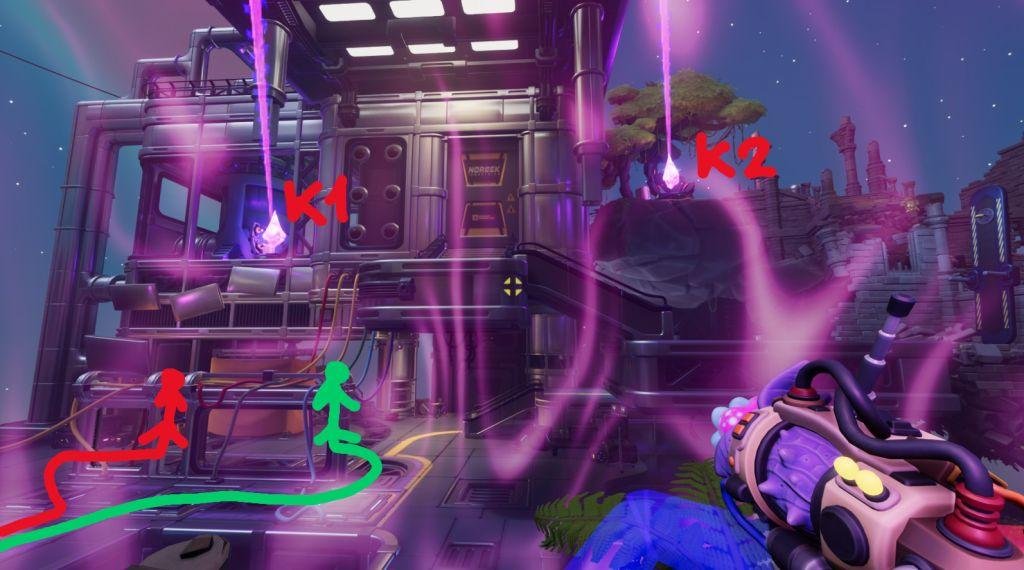
With both recording cycles locked in, your previous actions are preserved as clones ready to assist your team in the third and final run.
Phase 3: Destroying All Four Crystals
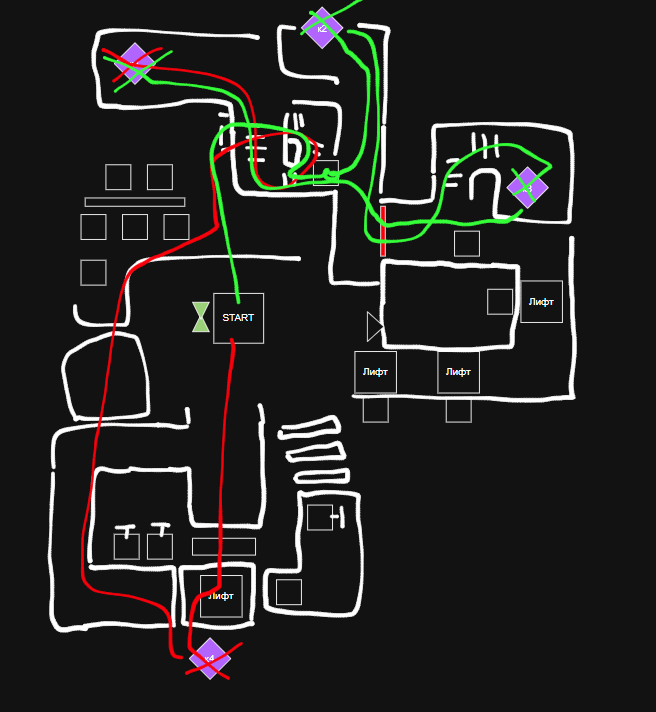
In Phase 3, you must leverage your past recordings to smash all four crystals before the clock runs out. The clones will operate switches and lifts automatically, granting access to areas that cannot be reached alone in time.
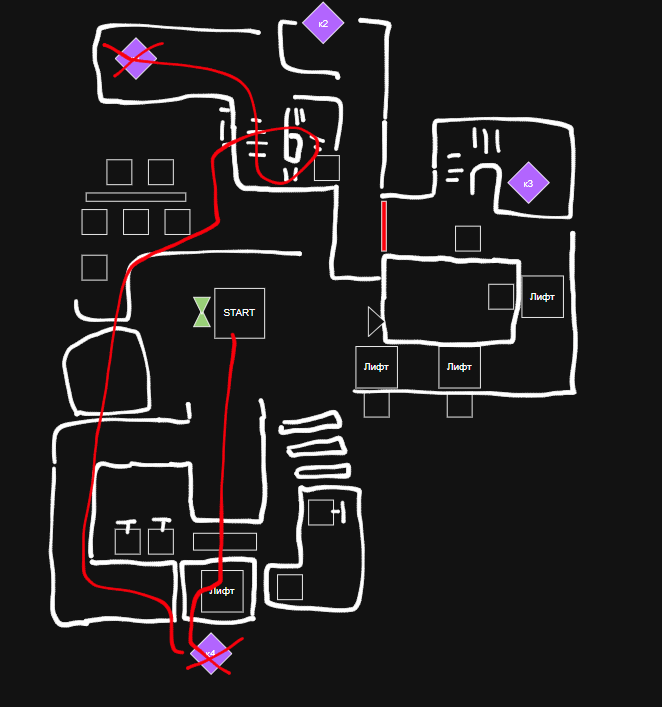
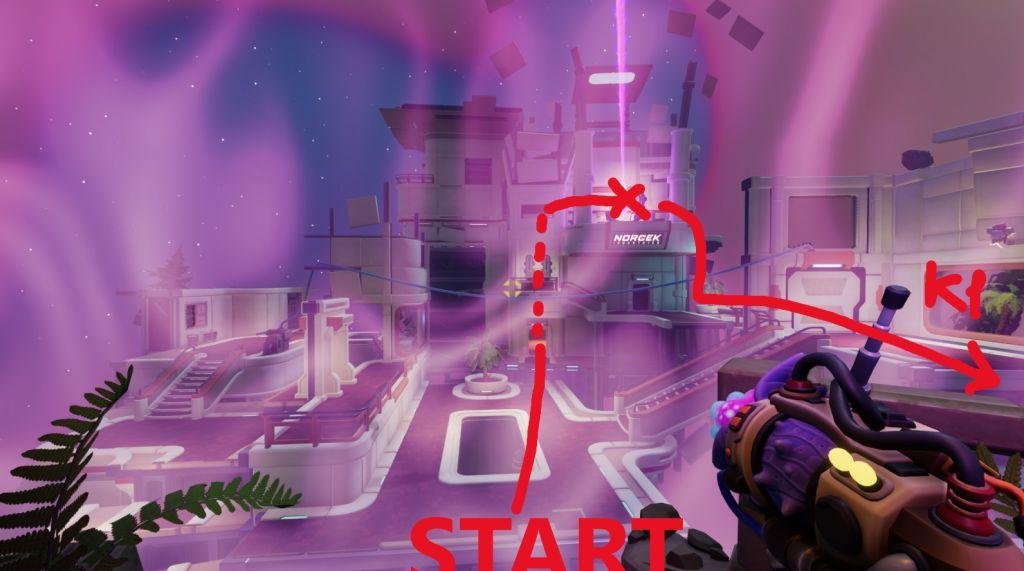
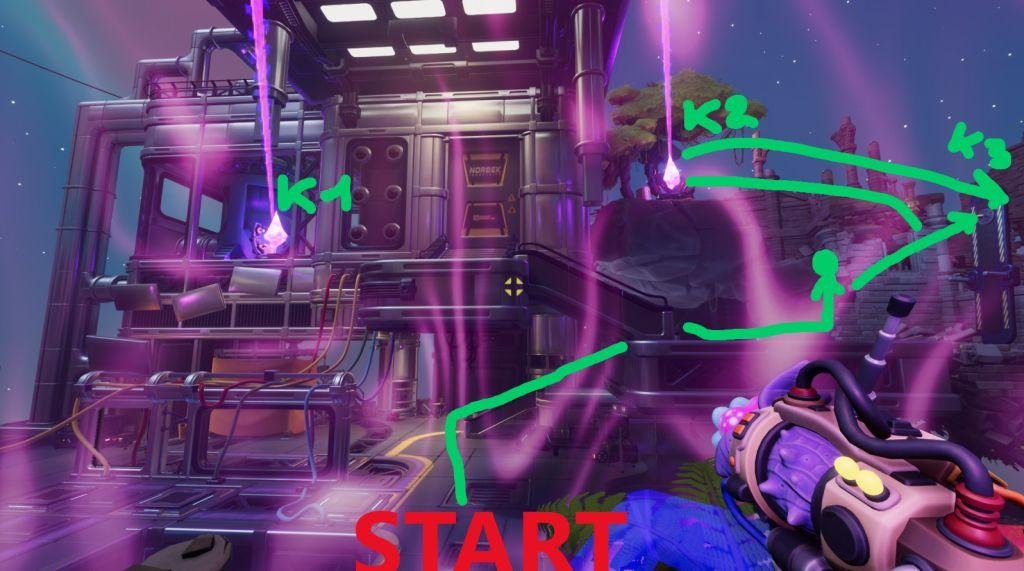
Player 1 Route: Crystals 4 and 1
- Sprint to Crystal 4: Advance down the central corridor toward C4.
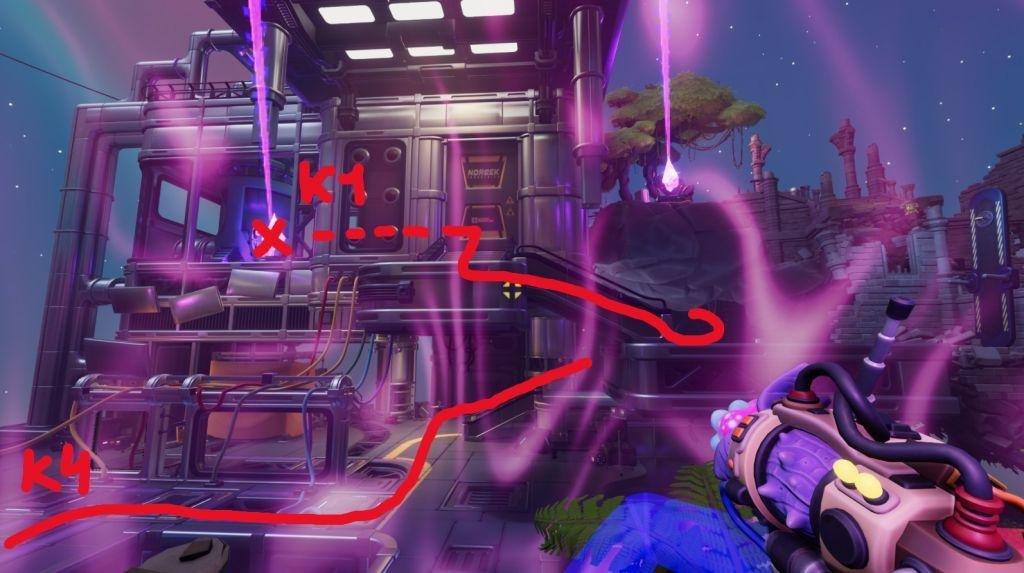
- Ride the canopy and lift: Step onto the canopy once your Phase 2 clone extends it, then board the elevator.
- Destroy Crystal 4: Allow the clone echoes to hoist the lift upward, then strike and shatter C4 at the top.
- Head to Crystal 1: Drop down and follow the stone path along the left flank instead of the middle route.
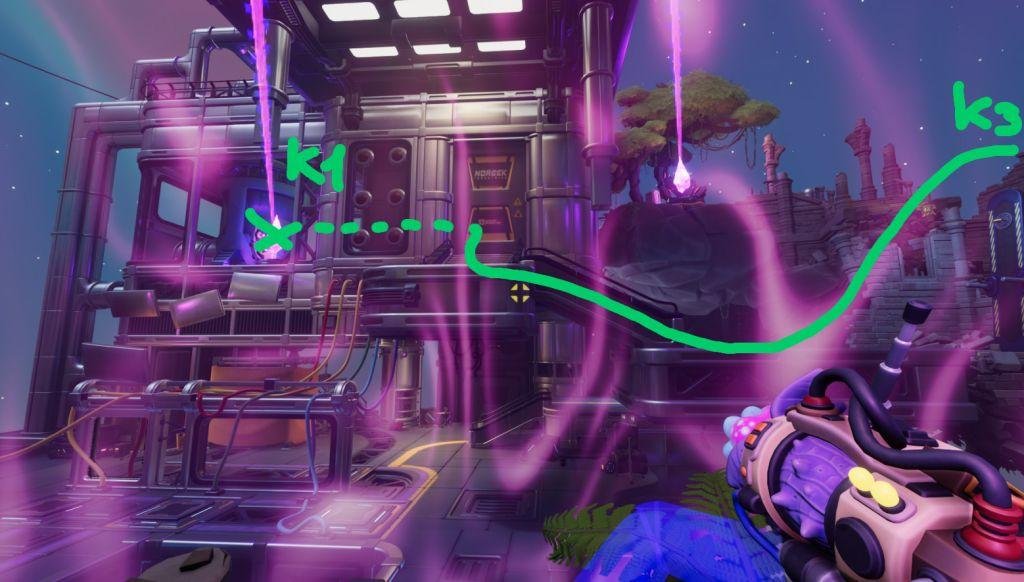
- Destroy Crystal 1: Approach the open entrance and attack C1.
Tip: An invisible collision bug can occasionally obstruct the open doorway after the stairs. If your runner gets stuck, jump forward through the threshold to bypass the barrier.
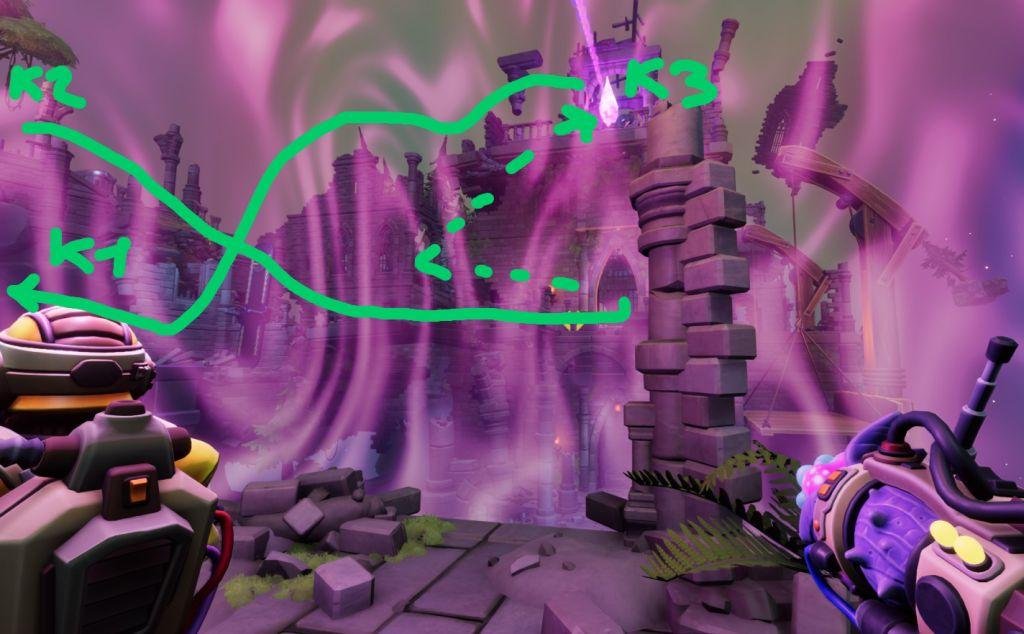
Player 2 Route: Crystals 2, 3, and 1
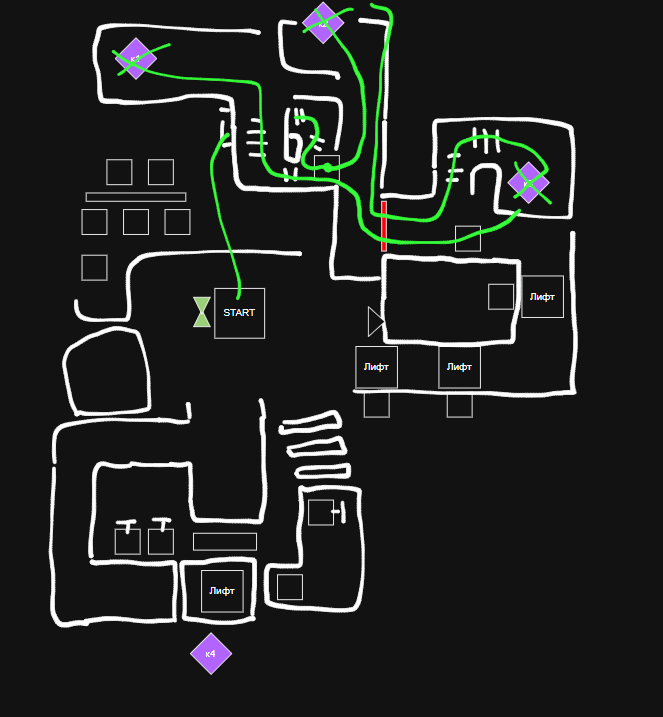
Player 2 takes a longer path and must maintain high momentum throughout the run.
- Reach Crystal 2: Use the suction cup gear to scale the stairs leading toward C2, pressing F to drop the bridge.
- Launch upward: Look upward to your left for an active charged cube and tether to it to propel yourself to the higher platform.
- Destroy Crystal 2: Shatter C2 immediately upon landing.
- Infiltrate the castle: Descend the stairs toward the castle, run along the balcony, step through the open door, and take the left staircase up.
- Destroy Crystal 3: Follow the upper stairs and smash C3.
- Rush to Crystal 1: Drop down from the C3 platform onto the stairs and charge toward the C1 entrance held open by your clones.
- Bypass and shatter: Jump forward if blocked by the doorway collision bug, then strike C1 to finish the puzzle.
Resetting Failed Runs
All four crystals must be destroyed within Phase 3. If your team misses a target or the timer runs out, you must wipe your recordings and start over from the beginning.
To reset:
- Interact with the recording terminal located near the spawn point, represented by an hourglass symbol on the map.
- Re-record Phase 1 and Phase 2 from scratch.
Because each newly completed recording replaces the prior run, wiping an imperfect attempt is always safer than trying to salvage mismatched clone paths.