


At a Glance: Unlocking every achievement in Dinoblade requires completing the campaign, mastering each skill tree, and discovering seven swords along with three Max Heal Ores. Key missable tasks include protecting the Ankylosaurus in the canyon and hunting down all six roaming Sauropods before conquering Boss Rush.
Tackling every milestone in this prehistoric action title requires equal parts combat skill and thorough exploration. While campaign milestones pop automatically as you fell mandatory bosses, several trophies demand uncovering hidden weaponry, gathering rare upgrade resources, and solving unmarked environmental encounters across the prehistoric wild. This comprehensive dinoblade achievements guide breaks down each challenge to ensure you reach full completion without wasted backtracking.
- Story Progression Achievements
- Stainless Extinction: All Sword Locations
- Sword #2
- Sword #3
- Sword #4
- Sword #5
- Sword #6
- Sword #7 (Final Weapon)
- The Iron Dino: All Max Heal Ore Locations
- Max Heal Ore #1
- Max Heal Ore #2
- Max Heal Ore #3
- Tiny Tank Achievement
- Silencing the Earthquakes Achievement
- Feed the Beast Achievement
- Skill Tree Mastery Achievements
- Feeding the Blade Achievement
- Bonus Boss SP Orb Locations
- Boss SP Orb #1
- Boss SP Orb #2
- Boss SP Orb #3
- Boss Rush Tips
- Dinoblade 100% Achievement Checklist
Achieving a 100% completion rating comes down to securing all blade varieties, finding every Max Heal Ore, and mastering each combat tree. Keeping track of regional secrets as you travel avoids tedious cleanup runs later in your playthrough.
Warning: The following walkthrough outlines encounter details and story boss reveals.
Story Progression Achievements
A large portion of the achievement roster unlocks naturally as you clear critical path objectives and fell required story encounters. You can focus on learning attack rhythms without worrying about missable steps during these fights.
- THE PRICE OF SURVIVAL
- FIRST BLOOD
- AN AXE-TINCTION EVENT
- THE FALLEN TYRANT
- BROKEN PLATES
- DROP THE HAMMER
- OUT-HEAVED
- THE SKY-EATER FALLS
- PARRY GOD
- PARRYSAUR!
- THE PACK IN THE FOREST
- GROUNDED PERMANENTLY
- OUT-SLASHED
- SILENCING THE DUAL ROAR
- CHAINBREAKER
- FROM ASH TO DUST
- THE NECROMANCER
- THE REAPER
- BREAK THE SPIRIT, CLAIM THE STEEL
- I AM the Meteor
Advancing through the main campaign guarantees all twenty of these milestones. Simply stay aggressive and defeat every mandatory target in your path.
Stainless Extinction: All Sword Locations
Earning STAINLESS EXTINCTION requires adding every blade in the game to your arsenal. Missing even one weapon will keep the trophy locked.
Your default starter weapon automatically counts as Sword #1. The remaining six weapons must be claimed from specific post-boss battlefields and secluded wilderness corners.
Sword #2
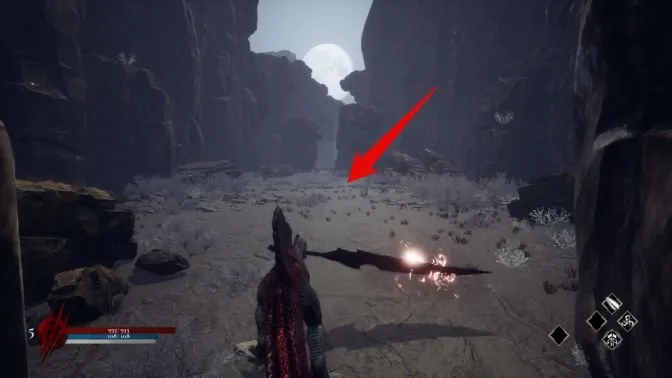
Begin by felling Kasei the Tyrant during the campaign.
Exit his battle zone and continue down the main trail. The blade sits directly in front of you, lodged firmly into a boulder.
Sword #3
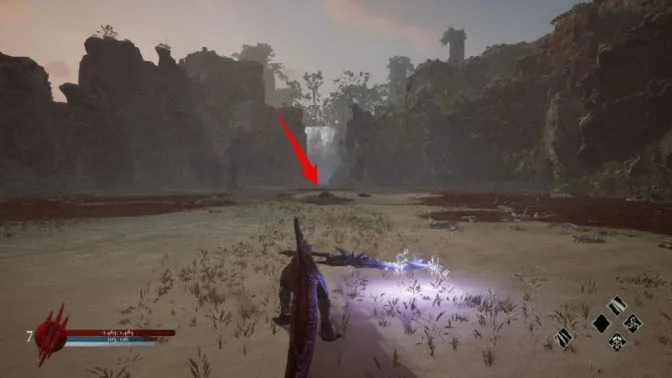
Engage and bring down Mokusei, the towering Titan Sauropod.
After the giant collapses, inspect the center of the battlefield to collect the weapon. If the model fails to populate immediately, briefly exit the zone boundary and re-enter to force it to spawn.
Sword #4
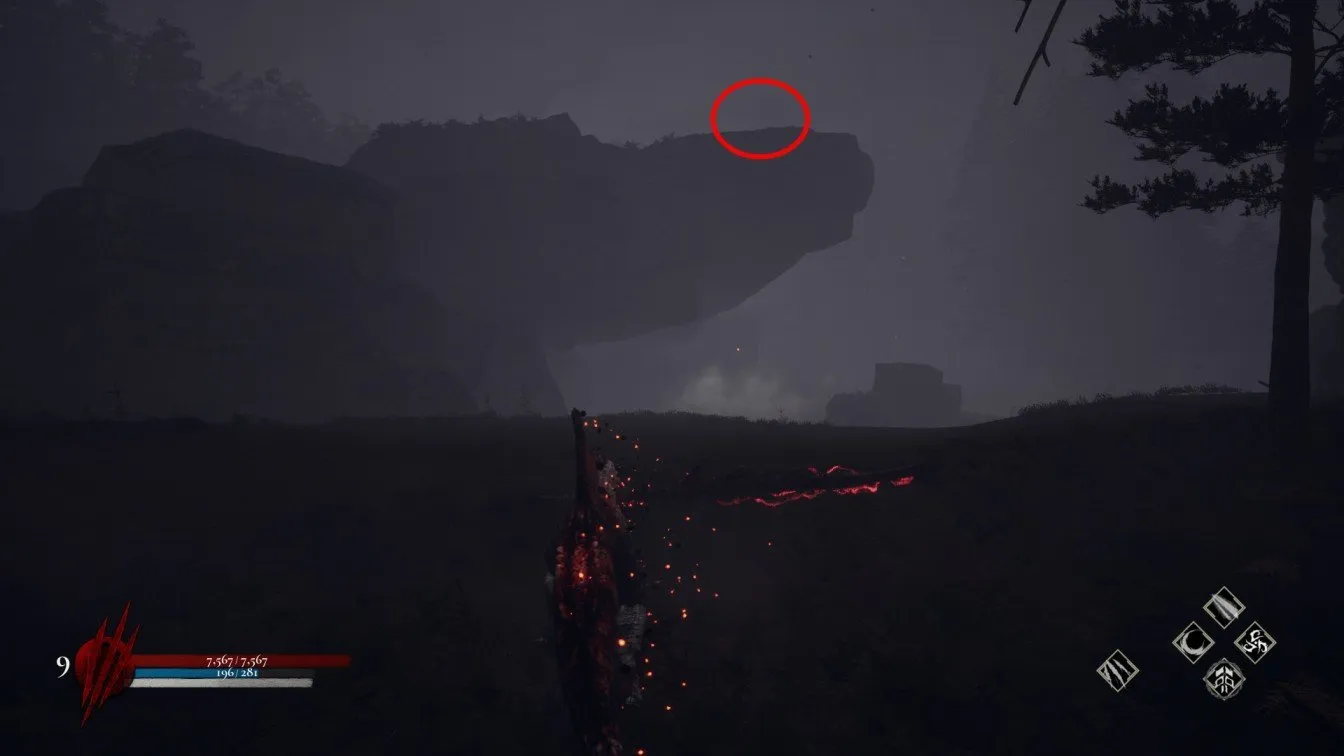
Head into Darkclaw’s Forest and defeat Ketsuro.
Once the encounter ends, scale the cliff faces overlooking the arena floor. The sword rests embedded in a rocky crag at the very summit.
Sword #5
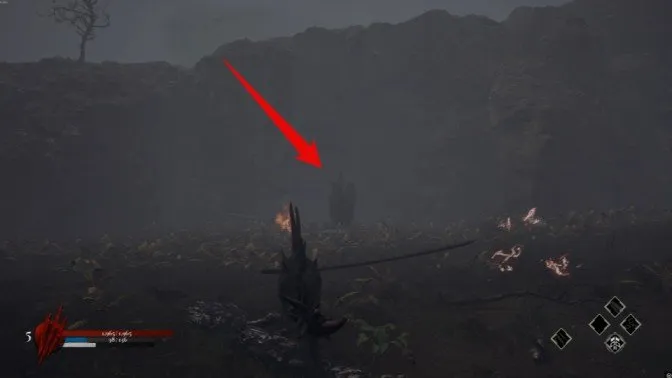
Locate and conquer Dosei the Therizinosaurus.
Inspect the immediate vicinity where the beast falls. The weapon will emerge directly from the stone beside the defeated boss.
Sword #6
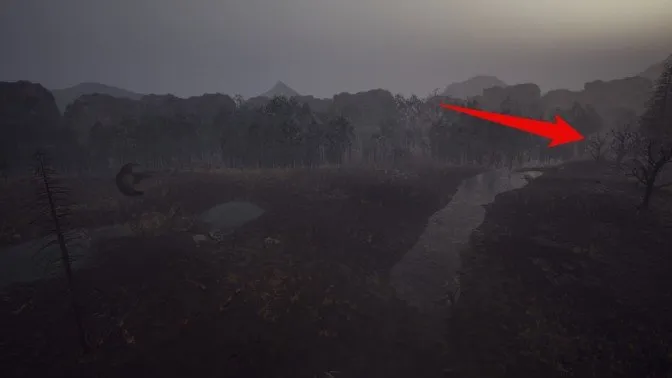
Make your way down into the murky swamp territory.
Navigate toward the eastern side of the zone where a massive Sauropod carcass rests. Search along the riverbank for a concealed passage between the tree trunks.
This hidden tree line opening sits directly across from the gateway leading to Akai Tsuki.
Follow the narrow trail inward until you reach the weapon sticking out from a jagged rock.
Sword #7 (Final Weapon)
Challenge and overcome the fearsome Akai Tsuki.
Your final blade appears on the ground as soon as the encounter concludes, unlocking STAINLESS EXTINCTION.
The Iron Dino: All Max Heal Ore Locations
Securing THE IRON DINO requires finding all three pieces of Max Heal Ore tucked away in well-hidden nooks. Gathering each chunk substantially bolsters your overall survivability.
Max Heal Ore #1
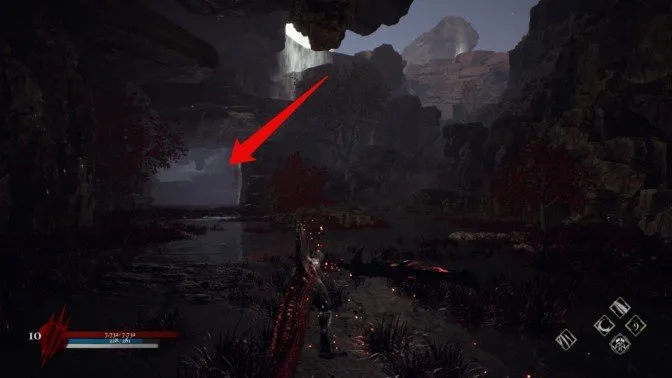
Trek through the rocky canyon passage.
Watch the trail as you near the region’s boundary until you spot a distinct fork in the road.
Take the left path and eliminate the small pack of mid-sized carnivores guarding the passage.
Continue past the defeated predators to find a narrow cavern entrance. The first ore deposit lies at the far end of the tunnel.
Max Heal Ore #2
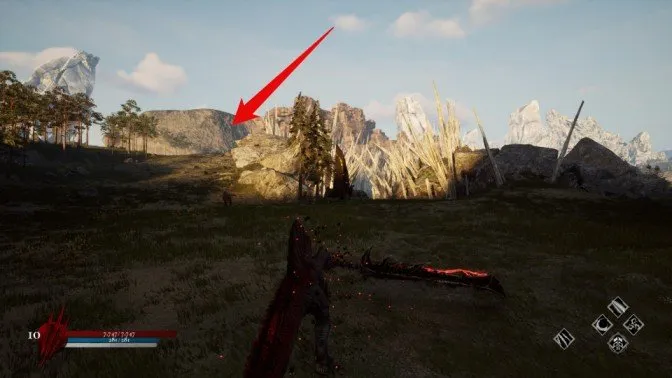
Travel out to the Great Lake territory.
Position yourself at the main gateway outside Haku’s encounter zone.
Scale the hillside ascending to your left while hugging tight against the cliff wall.
Follow the upper ridge line along the rock face until a concealed cavern mouth appears.
Head inside the cavern chamber to secure your second upgrade ore.
Max Heal Ore #3
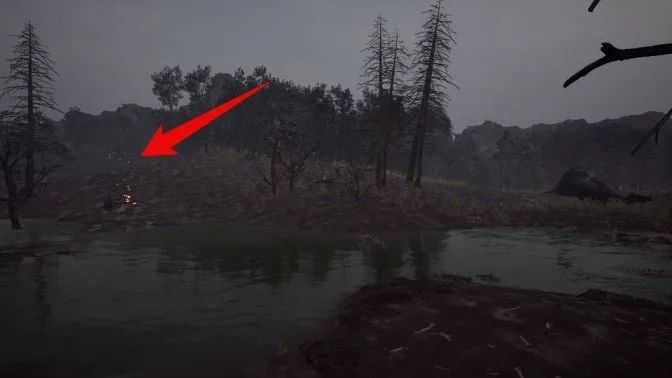
Return to the swamp biome.
Locate the giant Sauropod skeleton resting along the eastern edge of the swamp floor.
Pan your camera left toward the dense tree line adjacent to the bones.
Push through the foliage into a small hidden clearing to retrieve the final ore deposit.
Tiny Tank Achievement
Requirement: Protect and save the stranded Ankylosaurus from danger.
Enter the canyon zone and proceed deeper down the valley floor.
Take the left path winding past the waterfall where the hammer-wielding Rex roams. This encounter takes place comfortably after defeating the area’s introductory boss.
Further ahead, two aggressive carnivores will be cornering a lone Ankylosaurus.
Direct all of your attacks exclusively toward the two predators.
Control your swings carefully to ensure you never clip the Ankylosaurus with stray hits.
Wait patiently for a couple of seconds after both predators drop. The TINY TANK achievement pops as soon as the game registers the herbivore has survived.
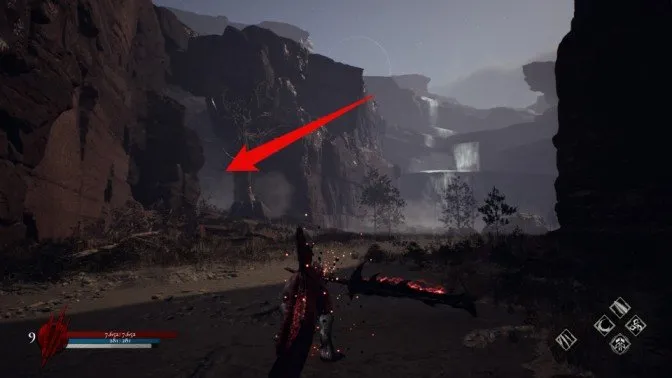
What to do if the Ankylosaurus perishes?
Immediately sprint back to the resting point situated near the waterfall.
Resting resets the entire scripted fight, allowing you to re-attempt the rescue right away.
Silencing the Earthquakes Achievement
Requirement: Track down and eliminate all six roaming Sauropods.
There are exactly six giant Sauropods distributed across the world that count toward this achievement tally.
While these colossal beasts carry substantial health pools, their move sets are slow and easily avoided with steady positioning.
You are free to fell them in whatever order suits your exploration route.
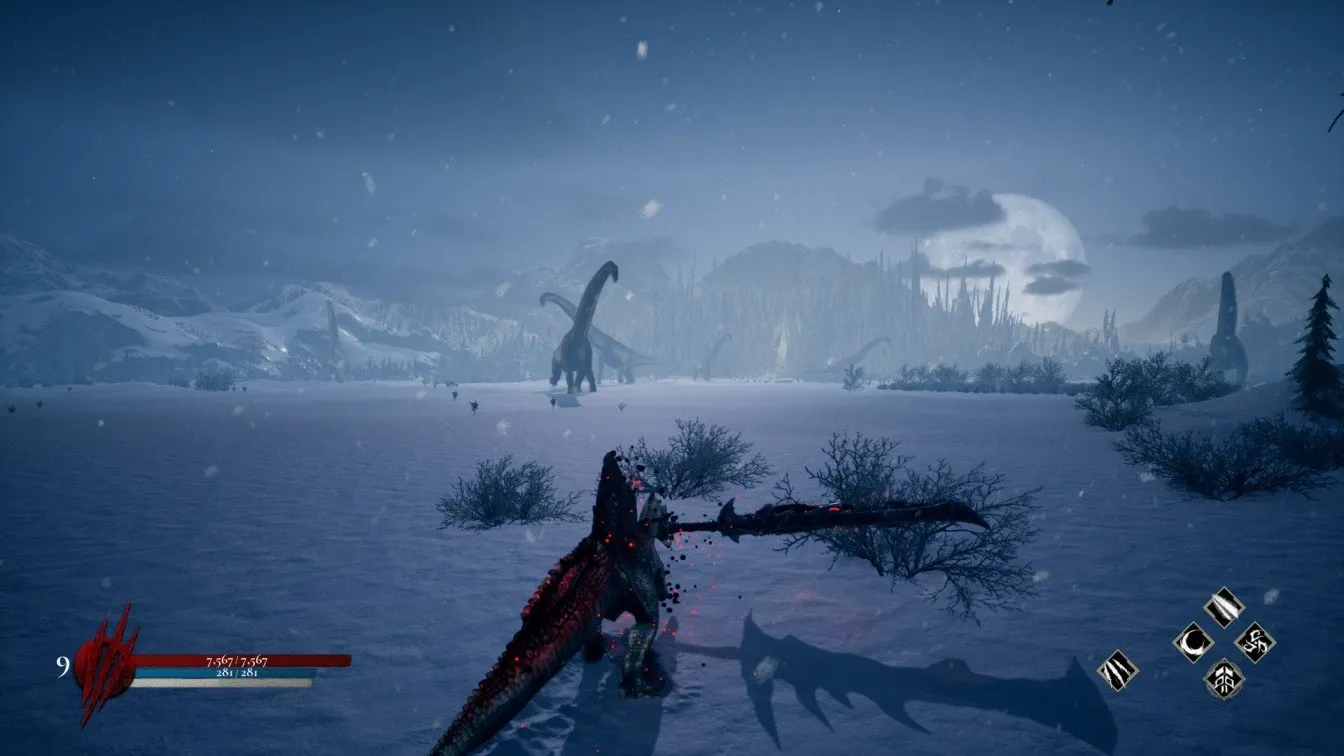
Your kill tallies persist regardless of resting at checkpoints or fast traveling between biomes. Defeating your sixth target immediately unlocks SILENCING THE EARTHQUAKES.
Feed the Beast Achievement
Invest enough skill points into Alpha Roar to bring the ability up to its maximum upgrade rank.
Once unlocked, press the activation button to roar during active gameplay.
The trophy triggers only after using the fully upgraded skill, not from simply purchasing the final node in the menu.
Skill Tree Mastery Achievements
Unlocking MASTER OF THE DASH, MASTER OF THE DANCE, and MASTER OF THE BLADE requires fully capping each designated discipline.
Acquire every node within a branch to claim its corresponding trophy. Focus on a single tree at a time to earn them efficiently.
Feeding the Blade Achievement
Clear the demanding Boss Rush mode to secure this milestone.
This survival gauntlet grants substantial upgrade currency along the way, letting you fill out leftover skill trees that remained unmaxed during the campaign.
Relying on this mode eliminates any need to grind basic enemy mobs repeatedly in the campaign zones.
Bonus Boss SP Orb Locations
While these secret Boss SP Orbs are not tied to specific achievements, collecting them provides critical points needed to reach peak power earlier.
Boss SP Orb #1
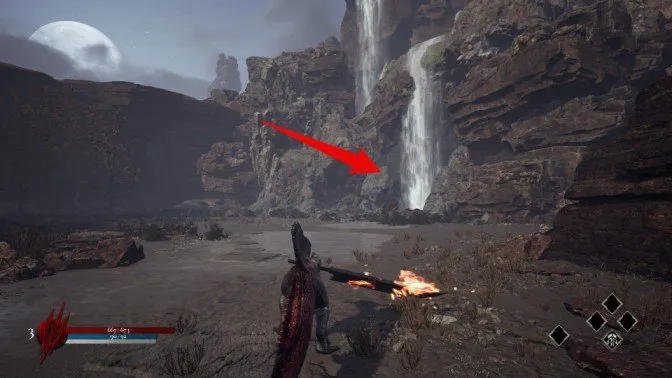
Return to the introductory section of the canyon biome.
Walk directly behind the cascade near your starting spawn to find the orb tucked away in the spray.
Boss SP Orb #2
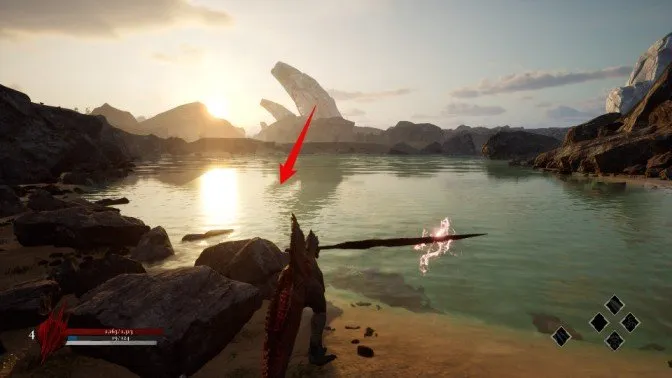
Head into the Great Lake region.
Swim out into the deep water toward the geographical center of the lake.
Look below the surface to spot a sunken mound of prehistoric bones.
Dive down to collect the floating orb resting on top of the skeletal pile.
Boss SP Orb #3
Trek through Darkclaw’s Forest until you progress past the hammer-wielding Rex.
Check the left perimeter toward the edge of the zone for a mantleable cliff shelf.
Climb up onto the stone landing to claim the final bonus SP Orb.
Boss Rush Tips
The Boss Rush gauntlet features significantly elevated boss health and aggressive patterns, with the final duo providing a massive spike in challenge.
To increase your odds of survival during consecutive showdowns, keep these strategies in mind:
- Complete your unfinished offensive and defensive skill trees prior to attempting serious runs.
- Rely heavily on parry timing, as late-game heavy strikes are far easier to counter cleanly than to roll away from.
- Equip the Stick (Parasaurolophus) passive ability to give yourself crucial healing or defensive margins during prolonged battles.
Dinoblade 100% Achievement Checklist
| Achievement | Requirement |
|---|---|
| STAINLESS EXTINCTION | Collect every sword in the game |
| THE IRON DINO | Locate all three Max Heal Ores |
| TINY TANK | Rescue the Ankylosaurus in the canyon |
| SILENCING THE EARTHQUAKES | Defeat all six roaming Sauropods |
| FEED THE BEAST | Fully upgrade Alpha Roar and trigger it once |
| MASTER OF THE DASH | Purchase all upgrades in the Dash tree |
| MASTER OF THE DANCE | Purchase all upgrades in the Dance tree |
| MASTER OF THE BLADE | Purchase all upgrades in the Blade tree |
| FEEDING THE BLADE | Conquer Boss Rush mode |
Once you clean up the environmental secrets, save the beleaguered herbivore, and bring down Boss Rush, you will officially secure 100% completion in Dinoblade.