- Certain Dinoblade achievements unlock organically as you play the main story and defeat crucial bosses. These milestones require no extra effort beyond progressing through the game’s narrative.
- STAINLESS EXTINCTION challenges you to collect every sword hidden throughout the game. Your starting weapon counts as the first sword, so the hunt begins after that.
- Sword #2 appears after you defeat Kasei the Tyrant . Exit the boss arena and proceed forward to find it embedded in a rock directly ahead.
- Sword #3
- Sword #4
- Sword #5
- Sword #6
- Sword #7 (Final Sword)
- How to Unlock THE IRON DINO (All Max Heal Ore Locations)
- Here are all the Max Heal Ore locations and how to reach them:
- Max Heal Ore #2
- Max Heal Ore #3
- TINY TANK Achievement
- SILENCING THE EARTHQUAKES Achievement
- FEED THE BEAST Achievement
- MASTER OF THE DASH, MASTER OF THE DANCE, and MASTER OF THE BLADE
- FEEDING THE BLADE Achievement
- Bonus Boss SP Orb Locations
- Boss SP Orb #1
- Boss SP Orb #2
- Boss SP Orb #3
- Boss Rush Tips
- Dinoblade 100% Achievement Checklist
Dinoblade immerses players in a prehistoric world of ferocious battles and powerful swords, demanding both skill and exploration. Uncovering every achievement isn’t just about completionism—it’s an integral part of mastering the game’s blend of combat and secret hunting. Many achievements hinge on your ability to notice hidden weapons and upgrades that the game doesn’t always highlight, making a thorough playthrough essential.
Tracking down every sword, Max Heal Ore, and collectible bonus adds depth to your journey through Dinoblade’s world. By knowing where to find these, you can unlock all achievements and gain powerful upgrades without excessive grinding. The game’s secrets often reward those who explore carefully and revisit areas, so it pays to be thorough as you progress.
Warning: This article contains major story and boss spoilers.
Certain Dinoblade achievements unlock organically as you play the main story and defeat crucial bosses. These milestones require no extra effort beyond progressing through the game’s narrative.
- THE PRICE OF SURVIVAL
- FIRST BLOOD
- AN AXE-TINCTION EVENT
- THE FALLEN TYRANT
- BROKEN PLATES
- DROP THE HAMMER
- OUT-HEAVED
- THE SKY-EATER FALLS
- PARRY GOD
- PARRYSAUR!
- THE PACK IN THE FOREST
- GROUNDED PERMANENTLY
- OUT-SLASHED
- SILENCING THE DUAL ROAR
- CHAINBREAKER
- FROM ASH TO DUST
- THE NECROMANCER
- THE REAPER
- BREAK THE SPIRIT, CLAIM THE STEEL
- I AM the Meteor
Each listed achievement will unlock naturally during your standard playthrough without the need for backtracking or grinding.
You can earn all of these during a normal playthrough.
STAINLESS EXTINCTION challenges you to collect every sword hidden throughout the game. Your starting weapon counts as the first sword, so the hunt begins after that.
Below are the locations and conditions for each sword from the second onward:
The first weapon you get in the start of the game counts as your first sword. The following locations are for the second sword onward.
Sword #2 appears after you defeat Kasei the Tyrant . Exit the boss arena and proceed forward to find it embedded in a rock directly ahead.
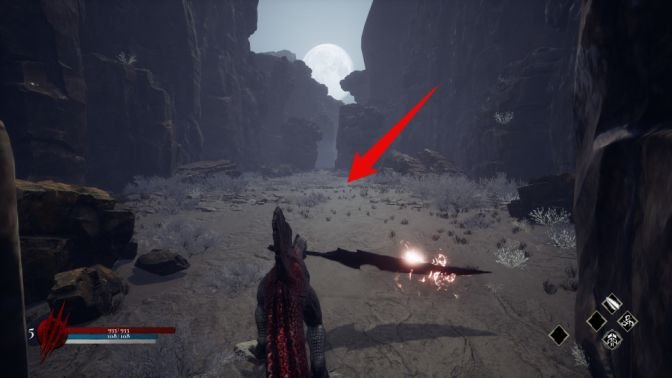
Sword #3 unlocks once you bring down Mokusei, the colossal Titan Sauropod. The sword spawns in the center of the arena; if it doesn’t appear immediately, exit and re-enter the arena.
Sword #4 can be found after defeating Ketsuro within Darkclaw’s Forest. Head toward the cliff above his arena; the sword awaits inside a rock near the top.
Sword #3
Defeat Mokusei, the Titan Sauropod.
The sword awill ppear in the middle of his arena once you defeat him. if it does not appear immediately, then leave the arena and come back to check again.
Sword #4
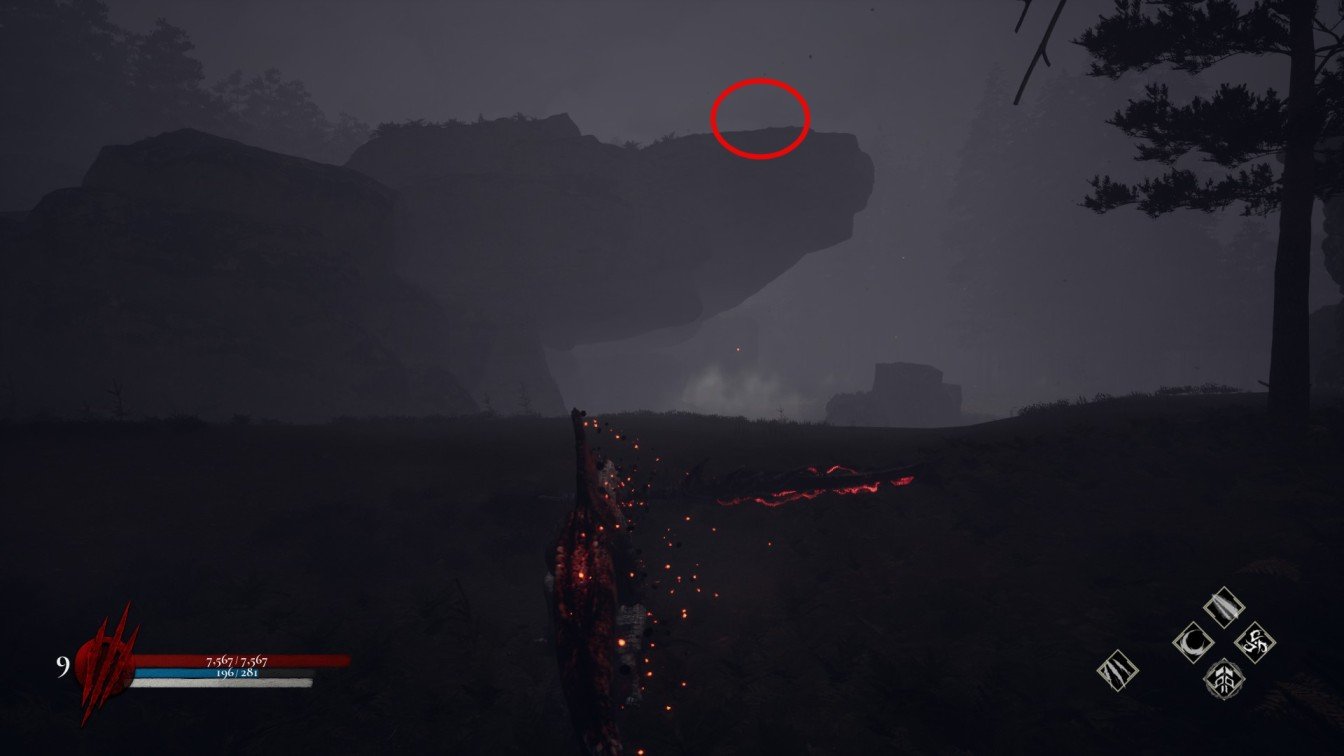
Sword #5 becomes available following your victory over Dosei the Therizinosaurus. It appears embedded within a rock close to where the boss fell.
After the fight, go toward the cliff above his arena. The sword is inside a rock at the top.
Sword #5
For Sword #6, travel to the swamp region. Locate the dead Sauropod on the right side of the map, then find the narrow path beside the river across from the entrance to Akai Tsuki’s domain. Follow this trail to discover the sword lodged in a rock.
The sword spawns inside a rock near where the boss dies.
Sword #6
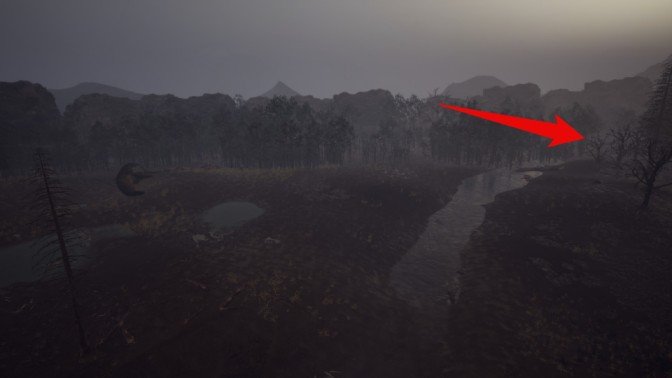
Travel to the swamp.
Go to the right side of the map where the dead Sauropod lies. Look for a narrow opening between the trees beside the river.
This path is directly across from Akai Tsuki’s entrance.
Follow the opening until you find the sword embedded in a rock.
Sword #7 (Final Sword)
The final Sword #7 drops once you defeat the powerful boss Akai Tsuki. Find this sword at the boss’s defeat location to complete your sword collection.
You;ll find the final sword when the boss is defeated.
How to Unlock THE IRON DINO (All Max Heal Ore Locations)
The THE IRON DINO achievement requires finding every Max Heal Ore scattered across Dinoblade’s world. These ores upgrade your maximum health and are vital for survival in tougher fights.
Here are all the Max Heal Ore locations and how to reach them:
Max Heal Ore #1 is located in the canyon. Near the area’s end, take the left path at a split and eliminate nearby dinosaurs. Then, enter the small cave opening on this route; the ore lies at the back.
Near the end of the area, you’ll reach a split path.
Take the left route and defeat the dinosaurs around your size.
Walk past them and enter the small opening inside the cave. The ore is at the end.
Max Heal Ore #2
Max Heal Ore #2 can be found at the Great Lake. Stand at the entrance of Haku’s arena, then climb the hillside on your left close to the cliff wall. Continue along this cliff until discovering a hidden cave containing the ore.
Stand at Haku’s arena entrance.
Climb the hillside on the left and stay close to the left wall.
Continue following the cliff until you find a hidden cave.
The Max Heal Ore is inside.
Max Heal Ore #3
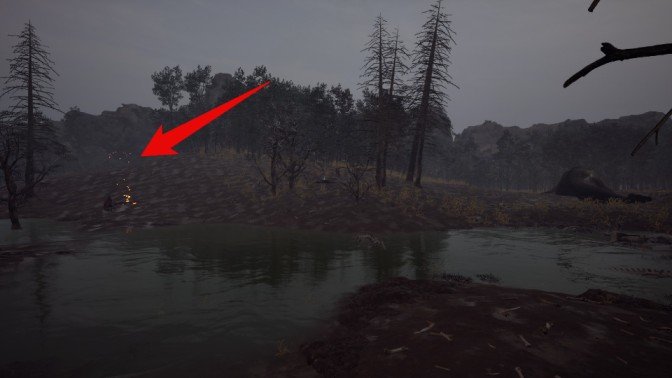
Max Heal Ore #3 is in the swamp area. Approach the dead Sauropod on the map’s right side and explore the small clearing between nearby trees on the left to locate the ore.
Find the dead Sauropod on the right side of the map.
Check the area to the left of the skeleton.
The ore is hidden inside a small clearing between the trees.
TINY TANK Achievement
The TINY TANK achievement tasks you with saving an Ankylosaurus. In the canyon’s left path past the waterfall, you’ll encounter two carnivores attacking the Ankylosaurus. Only defeat the attackers and avoid harming the Ankylosaurus. After the fight, wait a few seconds for the achievement to unlock upon the creature’s survival.
Head into the canyon.
Take the left path past the waterfall where the hammer-wielding Rex appears. This section is well after the canyon’s first boss.
You’ll eventually find two carnivores attacking an Ankylosaurus.
Kill only the two attackers.
Do not hit the Ankylosaurus.
Wait for a few second after the fight ends. The achievement will unlock once the Ankylosaurus survives.
If the Ankylosaurus dies, rest at the checkpoint near the waterfall to reset the encounter and try again.
Rest at the nearby checkpoint beside the waterfall.
This encounter will rest and you can try again.
SILENCING THE EARTHQUAKES Achievement
SILENCING THE EARTHQUAKES requires defeating all six Sauropods in the game. These large foes have considerable health but aren’t overly threatening and can be defeated in any order. Progress won’t reset if you rest at checkpoints or reload areas; the achievement unlocks once all six are downed.
The game has exactly six Sauropods that count for this achievement.
They have large health pools but aren’t too dangerous.
You can defeat them in any order.
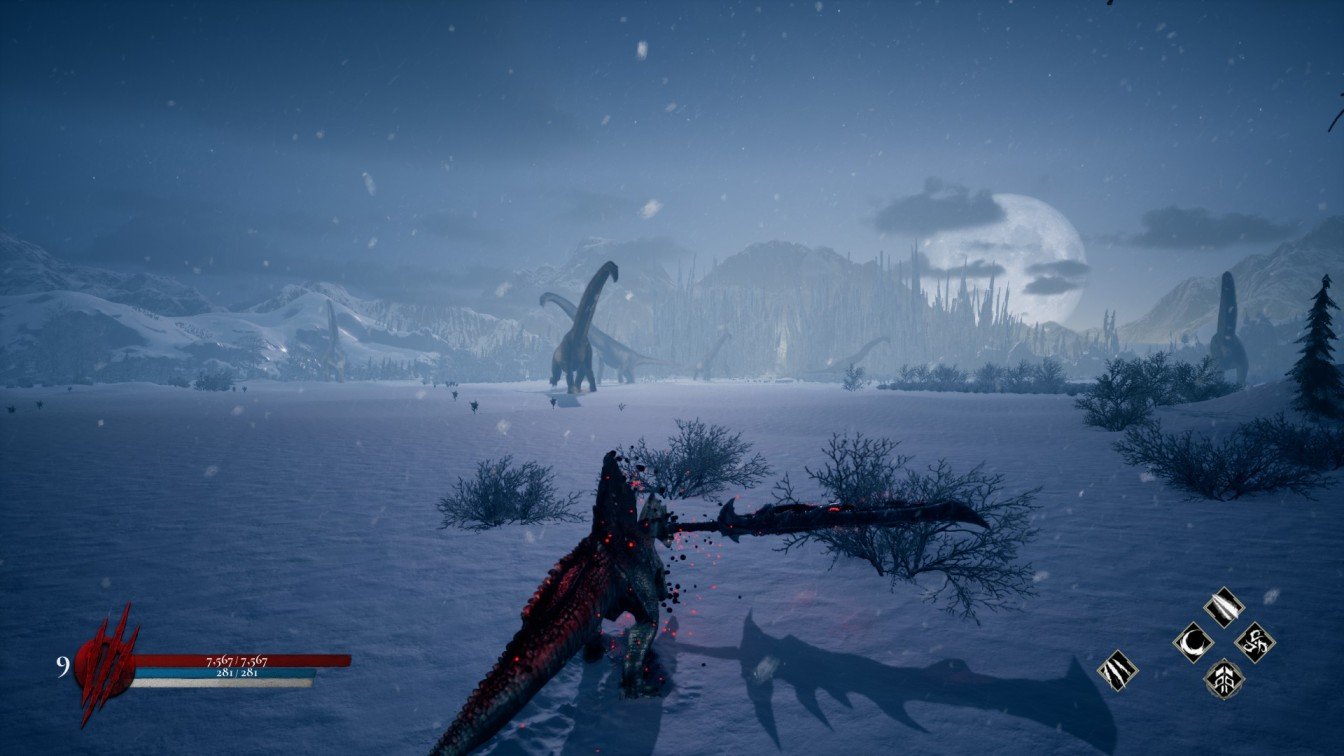
Resting at checkpoints or resetting areas won’t affect your progress. The achievement unlocks once you defeat all six Sauropods.
FEED THE BEAST Achievement
With the FEED THE BEAST achievement, you must upgrade the Alpha Roar ability to its highest level and use it once in this form. Simply upgrading isn’t enough; activation of the maxed skill in combat is mandatory.
After the final upgrade, activate Alpha Roar once.
The achievement won’t unlock until you actually use the fully upgraded skill.
MASTER OF THE DASH, MASTER OF THE DANCE, and MASTER OF THE BLADE
The skill tree achievements MASTER OF THE DASH, MASTER OF THE DANCE, and MASTER OF THE BLADE unlock upon fully upgrading each respective skill tree. Purchasing every upgrade within these categories will secure these achievements.
Just purchase every upgrade in each category and you will unlock the achievement.
FEEDING THE BLADE Achievement
FEEDING THE BLADE becomes available after completing Boss Rush. This mode grants ample opportunities to finish remaining skill tree upgrades missed in the main story, eliminating the need for excessive replaying.
Boss Rush gives you enough upgrade opportunities to finish any skill trees you couldn’t complete during the main storyline.
This means you won’t have to replay sections just to earn more upgrade points.
Bonus Boss SP Orb Locations
Bonus Boss SP Orbs don’t unlock achievements but provide valuable perks. Here are their locations to help you enhance your character’s abilities:
Boss SP Orb #1
Boss SP Orb #1 is hidden behind the waterfall in the canyon near the beginning of the game.
Check behind the waterfall near the start of the game.
Boss SP Orb #2
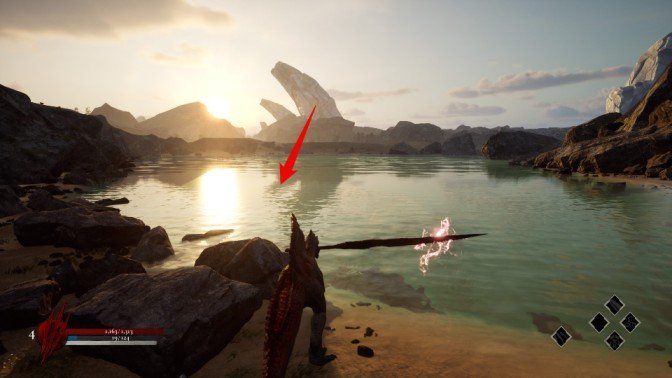
Boss SP Orb #2 lies underwater at the Great Lake’s center, resting atop a pile of bones.
Swim to the lake’s center.
Look for a pile of bones underwater.
The SP Orb is on top of the bone pile.
Boss SP Orb #3
Boss SP Orb #3 is located in Darkclaw’s Forest near the end of the area. After passing the Hammer Rex, look for a climbable ledge on the left; the orb is situated on top.
Look to the left for a climbable ledge near the end of the area.
The Boss SP Orb is on top of that ledge.
Boss Rush Tips
Boss Rush elevates the challenge compared to the main campaign, particularly the final two bosses. If you find yourself struggling, consider finishing all skill tree upgrades, practicing parrying techniques which counter many difficult moves, and equipping the passive ability from the Stick (Parasaurolophus) to bolster your defenses.
If you’re struggling:
- Finish upgrading the remaining skill trees first.
- Practice parrying since many late-game attacks are easier to counter than to dodge.
- Equip the Stick (Parasaurolophus) passive if you need extra help during tough fights.
Dinoblade 100% Achievement Checklist
The full Dinoblade 100% Achievement Checklist includes:
STAINLESS EXTINCTION: Collect every sword.
THE IRON DINO: Find all Max Heal Ore.
TINY TANK: Save the Ankylosaurus.
SILENCING THE EARTHQUAKES: Defeat all six Sauropods.
FEED THE BEAST: Max Alpha Roar and use it.
MASTER OF THE DASH/DANCE/BLADE: Max each skill tree respectively.
FEEDING THE BLADE: Complete Boss Rush.
By collecting every sword and Max Heal Ore, maxing out your skills, saving the Ankylosaurus, and conquering Boss Rush, you’ll secure all achievements Dinoblade has to offer, culminating in a complete and satisfying game completion.