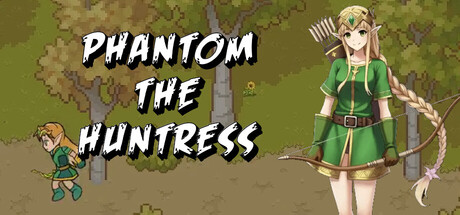
Phantom the Huntress can feel confusing at the start because it doesn’t hold your hand much. Most new players don’t struggle because the game is hard — they struggle because they don’t understand how its daily cycle, quests, and progression systems fit together.
This guide explains the full beginner flow step by step so you know exactly what to do from your first click to your long-term progression.
1. The Very First Thing You Must Do
When you start the game, you’ll be standing in the guild hall.
There is only one NPC you can interact with at this moment. You must click that character to begin the tutorial progression. Nothing else in the game will unlock until you talk to that first NPC.
This interaction triggers the rest of the guild system and introduces the core gameplay loop.
2. Ranking System (Your Main Progression)
Ranking is one of the most important systems in the game.
You increase your rank by completing requirements shown in the HUD at the top-right of the screen. These usually involve completing quests, gathering materials, or advancing through guild challenges.
At the very start, you will actually rank up immediately because the first requirement is simply owning the game.
Higher ranks unlock:
New quest types
Guild challenges
Stronger rewards
Late-game progression paths
3. Understanding the Guild NPCs
After your first interaction, several key NPCs appear inside the guild. Each has a specific role.
Camilla – The Quest Manager
She stands near the door and is the most important NPC in the game.
You must talk to her every day to activate quests. Without doing this, no missions will be available.
She allows you to select quest zones and mission types.
Guide NPC – Controls & Setup
This character helps configure your controls and explains input settings.
You can safely skip this once you understand how menus work, but it’s useful early if you’re unfamiliar with the interface.
Guild Master – Challenge System
Located on the right side of the guild.
She manages guild challenges, which are required for higher ranks and late-game progression.
Guild Teleport Circle
Located on the left side.
This teleports you to the quest area you selected through Camilla. Each area contains three available quests.
4. Controls, Skills, and Equipment Setup
Before starting your first mission, you must configure your abilities.
Opening the Menu
You can access the main menu using:
Right click
ESC key
Controller start button
Bow Arts (Your Skill System)
This is where you equip arrow skills.
You must assign arrows to your three available skill buttons. If you don’t equip arrows, you will not be able to attack at all.
Items & Quick Access
You can assign consumables like potions or teleport scrolls to quick slots for faster use in the field.
Skill Tree
You receive one skill point per level, plus bonus points on odd levels.
Most skills require specific arrow types, meaning you must craft or purchase arrows before using certain abilities.
5. City Facilities You Must Know
After leaving the guild, you can explore the city.
Blacksmith
Handles all crafting and equipment production.
You can:
Buy arrows and gear
Craft equipment
Accept production missions
This location becomes extremely important later because arrows are required for nearly all combat abilities.
Inn
Located north of the city.
This is where you end your day and reset the quest cycle. Ending the day is necessary to progress time and continue the main gameplay loop.
6. Choosing Your First Mission
When selecting early missions, your safest choice is gathering.
Gathering Missions
Best starting option.
They allow you to collect materials and build resources without requiring heavy combat preparation.
Hunting Missions
Used mainly for leveling and combat experience.
These become important once you have better gear and skills.
Dungeons
These are significantly harder and require large arrow supplies and stronger abilities.
Beginners should avoid them early.
Crafting Missions
These cost resources upfront but become profitable later in the game.
7. What to Do in Quest Areas
After teleporting, you will find three NPCs who each offer one quest.
You can track progress through:
Map markers showing quest objectives
The quest journal inside the menu
HUD summaries on the right side of the screen
Collected items appear visually at the top of the screen, and gatherable resources often glow to help you locate them.
During hunting missions, targets are marked with icons and appear larger than normal enemies.
8. Claiming Rewards Properly
Once you finish objectives, you must return to the quest-giving NPCs to receive rewards.
Continuing to fight enemies after completing missions provides little value unless you are specifically trying to farm materials.
Efficient play focuses on completing objectives quickly rather than grinding endlessly.
9. Returning to the City
After finishing quests, you can return by:
Walking back manually
Using a teleport scroll
Teleport scrolls are much faster and should always be kept in quick access slots.
10. The 100-Day Retirement Cycle
This is the core long-term mechanic of the game.
Each day ends when you rest at the inn. Time advances, and new quests become available.
You can play in two general modes:
Free Play Mode
You progress without time pressure.
Retirement Challenge Mode
You have 100 days to:
Earn as much gold as possible
Reach the highest rank
Maximize achievements
Your performance during these 100 days determines your ending. There are over 50 possible outcomes depending on your success.
Leave a Reply