


At a Glance: Rubinite features 38 total achievements, divided into 24 unmissable story progression milestones and 14 missable encounter and exploration objectives. While most missed trophies can be tackled via post-game save reloading or boss rematches, clearing combat challenges during your initial boss encounters saves considerable backtracking.
Earning full completion in Rubinite demands thorough exploration alongside sharp combat skills. This rubinite achievements guide breaks down every challenge, from straightforward narrative checkpoints to intricate boss mechanics and well-hidden collectibles.
- Story Achievements
- Wake Up From a Nightmare
- Defeated the Beast
- Repelled the Guardian
- Defeated the Dual Cultists
- Defeated the Martyred Angel
- Defeated the Grave Keeper
- Defeated the Plague Bearer
- Defeated Faye
- Defeat the Ghost
- Defeated Roy
- Defeated the Witch
- Maybe the End
- Escape the Illusion
- True Difficulty
- First Encounter?
- Someone Else’s Past
- Defeated the Red-Eyed Tree
- Defeated… Myself?
- Remove the Curse
- Defeated the Puppeteer
- Obtain the Legendary Rubinite
- Leave the Rest to Me!
- Save the Kingdom
- RUBINITE
- Missable and Conditional Achievements
- Amulets? Pffft. Forget Them
- True Hunter
- I’m Not Tasty at All!
- Bomb Disposal Expert
- Plague It Cool
- Out of Body
- Don’t Even Think About It
- You Dare Use My Own Weapons Against Me, Ruby?
- Illuminate the Night
- Fulfilling a Wish
- There You Are
- Collection Achievements
- Finder’s Keepers
- Talismans Connoisseur
- Fully Fledged
- Can You Permanently Lock Yourself Out?
Although missed milestones can be retrieved later thanks to post-game reloading, tracking them in advance saves you from extensive backtracking across the kingdom.
Below you will find all milestones arranged chronologically, starting with required story progression before moving into missable challenges and collectible tasks.
Rubinite Achievement Roster
| Category | Count |
|---|---|
| Total Achievements | 38 |
| Story Progression | 24 |
| Missable & Optional | 14 |
A standard playthrough naturally unlocks all 24 campaign trophies. The remaining achievements require specific boss conditions, secret pathways, and complete item inventories.
Story Achievements
These achievements trigger automatically as you progress through the main plot on Normal difficulty. Steady forward movement ensures you claim all of them without special detours.
Wake Up From a Nightmare
This milestone pops the moment the campaign kicks off. Play through the opening prologue sequence and emerge from the initial dream.
No special setup or hidden criteria are needed here.
Defeated the Beast
The Beast serves as the opening major gatekeeper in the campaign.
Bring down this creature to advance the narrative, and Defeated the Beast will register immediately after the battle concludes.
Repelled the Guardian
The Guardian stands as the next mandatory encounter blocking your forward momentum.
Defeat this adversary and venture deeper into the monastery grounds to secure Repelled the Guardian.
Selecting Your Route:
Following the Guardian’s defeat, the trail branches into two distinct paths.
You must decide between two excursions:
- Heading north along the Priest route
- Heading south along the Grave Keeper route
The sequence you choose has no permanent consequences because both wings must be cleared before the plot moves forward.
Tackling the northern route first presents a slightly smoother difficulty curve, which matches the order covered below.
Defeated the Dual Cultists
Travel northward until you step into the chamber where the Dual Cultists wait to ambush you.
Overcome both adversaries to earn Defeated the Dual Cultists.
Defeated the Martyred Angel
Push onward along the northern corridor once the cultists fall.
Slaying the Martyred Angel at the end of this wing secures Defeated the Martyred Angel.
Defeated the Grave Keeper
Double back to the southern crossroads once the northern sector is clear.
The Grave Keeper catches many off guard because its weapon sweeps reach much further than their visuals suggest. Maintain spacing and strike between swings rather than overcommitting.
Taking down this boss awards Defeated the Grave Keeper.
Defeated the Plague Bearer
Continue pressing deeper into the southern territory until you confront the Plague Bearer.
Because this boss divides into multiple threats, relying on agile light slashes generally provides better repositioning than slow Focus Strikes.
Eliminate the monster to claim Defeated the Plague Bearer.
Defeated Faye
Your journey leads into a second duel against Faye.
Besting her here unlocks Defeated Faye and swings open the massive gates toward the next district.
Defeat the Ghost
Next up in the main quest is an encounter with Grant.
His cloaking technique can seem overwhelming initially, but applying a Focus Mark lets you trace his exact footsteps while he remains invisible.
Equipping the Thorns Charm also chips away at his outer defense whenever he makes physical contact.
Topple Grant to receive the Defeat the Ghost achievement.
Defeated Roy
Roy provides one of the fairest and most rhythmic duels in the entire game.
Each of his blade combinations carries distinct windups, so focus on reading his visual telegraphs instead of blindly trading blows to earn Defeated Roy.
Defeated the Witch
Your subsequent boss encounter pits you against Alcina.
Her magical barrages carry high burst potential, but memorizing her safe zones makes dodging straightforward.
Victory against Alcina grants Defeated the Witch.
Maybe the End
Once Alcina falls, watch the cutscene transition and allow the staff credits to roll uninterrupted.
The Maybe the End trophy pops as soon as the credit crawl finishes.
Escape the Illusion
From the main menu, load your cleared save file following the ending sequence.
You will reappear right before the final encounter with a route unlocked into the real world, awarding Escape the Illusion.
True Difficulty
Crossing into the true world forces a high-stakes rematch against the Beast.
Defeat this powered-up variant to secure True Difficulty.
First Encounter?
Continue along the real-world campaign trail until you cross paths with Mira following the first Faye encounter.
Exhausting your dialogue with her unlocks First Encounter? without any extra tasks.
Someone Else’s Past
Further into this alternate realm, you will be pulled into another clash with Grant.
Once you triumph, Mira unseals an obscured side room nearby.
Step inside and examine the Swan relic to register Someone Else’s Past.
Defeated the Red-Eyed Tree
Mira promptly clears the barricade leading to the next boss zone after the Swan room.
Enter the newly revealed clearing and conquer the Red-Eyed Tree to claim Defeated the Red-Eyed Tree.
Defeated… Myself?
Cross swords with Roy once more during the real-world scenario.
Following the duel, interact with him to project into his consciousness and challenge your personal shade.
Defeating this mirror image triggers Defeated… Myself? immediately.
Remove the Curse
This achievement unlocks in tandem with your victory over the shadow counterpart.
You do not need to perform any supplemental actions to make it pop.
Defeated the Puppeteer
The Puppeteer stands in your path just ahead of the climactic showdown against Alcina.
Dismantle the boss to gain Defeated the Puppeteer.
Obtain the Legendary Rubinite
Resume your forward path once the Puppeteer has been dealt with.
A story scene will play shortly after, granting the Legendary Rubinite along with the matching achievement.
Leave the Rest to Me!
Initiate conversation with Mira before crossing the threshold into the final arena.
Pick the affirmative dialogue option reassuring her that everything will turn out fine, then step forward to face Alcina.
Making that specific dialogue promise triggers Leave the Rest to Me! right away.
Save the Kingdom
Clear the final campaign encounter on any chosen difficulty setting to earn Save the Kingdom.
RUBINITE
Conquer the entire campaign while playing on Normal difficulty.
This stands as the crowning story achievement and concludes the narrative milestones.
Missable and Conditional Achievements
Most of the missable achievements in Rubinite revolve around special boss conditions or overlooked interactions. While you can technically retry encounters via rematches later, tackling them on your first attempt eliminates redundant boss runs.
Amulets? Pffft. Forget Them
This trophy requires conquering any major boss without equipping a single talisman.
The simplest opportunities arise during early-game encounters, notably:
- The Beast
- The initial Faye battle
Both fights feature modest health pools and predictable patterns, meaning stripping off passive bonuses won’t put you at a severe disadvantage.
True Hunter
Secure victory against any boss without sustaining a single hit of damage.
Stay at mid-range, punish her cooldown recoveries, and disengage before she retaliates.
The introductory duel against Faye offers the ideal testing ground thanks to her small moveset. Taking even glancing chip damage disqualifies the attempt, requiring a quick match restart.
I’m Not Tasty at All!
You can unlock I’m Not Tasty at All! during the Dual Cultists encounter.
One cultist periodically winds up an unblockable grab that devours Ruby. Intentionally let this grab land once rather than dashing clear.
Break free from the monster’s hold, and the trophy will register immediately.
Bomb Disposal Expert
This achievement is tied to the battle against the Grave Keeper.
Following his wide spinning attack, the boss scatters miniature gelatinous blobs across the floor that swell into destructive explosives over time.
Prioritize cutting down every blob while they remain in their diminutive state.
If even one blob finishes expanding and detonates, you will need to restart the attempt.
Alternate Strategy:
The Grave Keeper chooses between several skill rotations throughout the fight.
If your offensive output is high enough to eliminate him before he initiates the bomb scatter, Bomb Disposal Expert automatically triggers upon his death.
Plague It Cool
This task stands among the most mechanically precise boss challenges in Rubinite.
While fighting the Plague Bearer, the creature fractures into duplicates as its health drops.
To execute the achievement correctly:
- Damage the boss until the initial split occurs.
- Avoid striking the smaller offshoot.
- Focus attacks exclusively on the primary large torso.
- Trigger a second division to spawn another body.
- Only finish off the boss once three independent bodies occupy the arena simultaneously.
Accidentally destroying the smaller clone prematurely fails the requirement, forcing a fight reset.
Out of Body
Target this condition when fighting Grant in the monastery.
Grant possesses an ability where he intentionally damages himself to discard his protective plating.
Your goal is to deplete his health bar before he performs that specific self-harm move.
Maintain relentless pressure, shattering his guard rapidly so he stays locked in recovery animations throughout the encounter.
Don’t Even Think About It
This objective must be fulfilled during your second confrontation with Faye.
Throughout both phases, Faye repeatedly charges in with grab maneuvers.
You are required to parry every single grab she attempts across the entire duel.
Dodging the grab or outrunning it does not satisfy the requirement; only clean deflections count.
Missing even one parry attempt invalidates the unlock.
Restart immediately if a grab connects or slips by without a parry.
Her second phase offers some relief, as she reduces her grab frequency in favor of wider projectile sweeps.
You Dare Use My Own Weapons Against Me, Ruby?
This milestone cannot be completed during your initial story battle with Roy.
After finishing the fight, pick up Roy’s Daggers and equip them through your Charms interface.
Follow these steps to finish the unlock:
- Head back to the Monastery.
- Interact with the prayer shrine.
- Select Roy’s boss rematch.
- Toss a few daggers into him during combat.
You are not required to defeat him during this rematch.
Landing a few hits with his own blades triggers the achievement instantly.
Illuminate the Night
This is commonly overlooked because the game gives no prompt signaling that the environment has updated.
After taking down Roy, comb through the Monastery grounds and light every unlit candle scattered across the rooms.
The achievement pops the moment the final wick catches fire.
Recovering a Missed Attempt:
If you reach the credits without lighting them, load your finished save file.
You will spawn right before the final confrontations, leaving the halls fully accessible so you can finish your rounds.
Fulfilling a Wish
Unlocking Fulfilling a Wish requires maxing out every available offensive skill upgrade.
With your attack skills completed, descend into the basement level and vanquish the Penitent.
The achievement unlocks immediately once the Penitent is slain.
There You Are
This secret is concealed immediately outside the Red-Eyed Tree arena.
Before walking through the boss fog, turn left and inspect what appears to be an ordinary solid stone wall.
An invisible corridor cuts directly into the masonry here.
Navigate through the hidden passage using this sequence:
- Down
- Left
- Up
- Left
- Down
- Left
Following this precise path reveals a hidden character, awarding There You Are.
You can optionally engage and defeat this hidden NPC once discovered.
Permanently Missable?
Fortunately, no.
You can safely backtrack here after defeating the Red-Eyed Tree, provided you do not exit the biome entirely beforehand.
Collection Achievements
The final trio of achievements centers around exploration, currency farming, and complete item inventories.
None present extreme technical hurdles, but you will spend time scouring Monastery halls, grinding Blood Dust, and collecting loose items.
Finder’s Keepers
You unlock Finder’s Keepers after discovering and opening all eight chests hidden inside the Monastery.
While some sit out in plain sight, others hide behind decorative pillars or dark corners. Listening for subtle ambient audio chimes will help alert you whenever a container sits nearby.
Here is where to uncover every container:
Main Room Chest

The opening container waits in the Main Room.
Slip directly behind the massive stone statue dominating the center of the hall. The carving fully occludes the chest from the front perspective, making it easy to bypass without checking.
Once you check behind the plinth, it is an effortless pickup.
Side Hall Chest
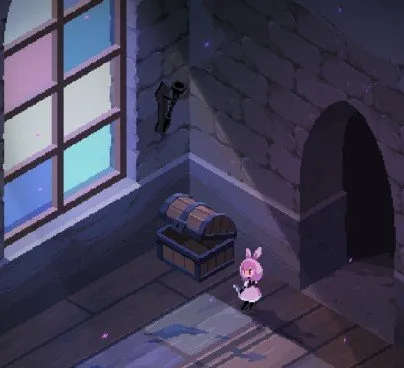
You will locate the next container in the Side Hall.
This one features minimal camouflage. Keep an eye along the hallway perimeter during normal travel, and you will spot it against the wall.
Dining Hall Chest
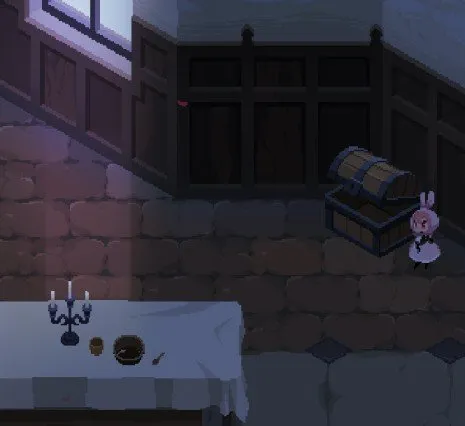
Make your way into the Dining Hall.
Examine the space beside the elongated banquet table, pushing slightly north along its right boundary.
Although fully exposed, many players overlook it by focusing solely on enemy encounters in the room’s center.
Library Chest
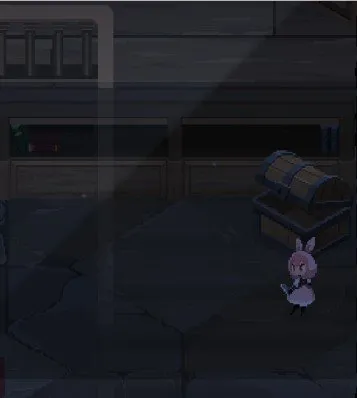
Proceed to the Library wing next.
Rather than scanning the towering bookshelves, duck beneath the main staircase structure.
The chest sits wedged into the shadows under the steps, blending naturally with the dark woodwork.
Courtyard Chest

The Courtyard harbors another cleverly positioned chest.
Approach the second structural pillar standing on the left side and investigate behind its base.
The pillar’s width blocks direct camera sightlines, making thorough manual inspection necessary.
Mirror Room Chest
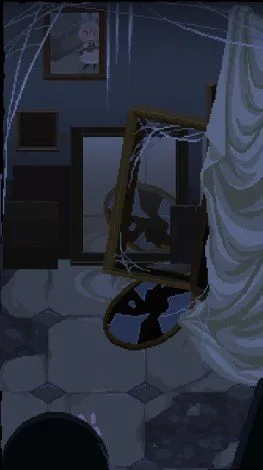
This is easily the most inventive environmental secret in the facility.
Inside the Mirror Room, examine the grand mirror hanging prominently against the back wall.
The glass reflection displays an object that is otherwise invisible from the standard room angle.
Using the glass as your reference, walk directly down to the bottom-left corner of the room.
Interact with the empty space to pop open the hidden container.
Abbot’s Office Chest

Pay a visit to the Abbot’s Office.
This container features none of the optical tricks or blind spots found in earlier rooms.
Simply walk through the doorway and claim the loot before proceeding.
Sick Ward Chest

The final Monastery cache rests inside the Sick Ward.
Weave past the rows of medical cots until you reach the chest resting along the partition.
Opening this eighth container completes your facility search.
With all eight lids flipped, the Finder’s Keepers achievement will pop immediately.
Talismans Connoisseur
This trophy asks you to catalog every individual talisman in the game.
While most are manufactured through crafting, several key talismans remain gated behind late-game campaign beats.
To round out your collection:
- Mend every Broken Talisman by visiting Wichiwi.
- Invest Blood Dust to craft every listed catalog talisman.
- Progress through the true ending branch to claim story-locked amulets.
- Secure Roy’s Daggers, as they count toward the total talisman tally.

For most players, the achievement triggers upon receiving the Pure Rubinite, assuming all prior craftables have been registered. Missing even a single crafted charm beforehand can require starting the talisman inventory from scratch on a subsequent run.
Fully Fledged
This milestone represents the final character progression challenge in Rubinite.
After escaping the dream illusion, Ruby’s talent grid morphs completely. Defensive upgrades and potion bonuses are replaced with raw offensive nodes.
Farm enough Blood Dust to purchase every talent within this refreshed talent matrix.

The achievement pops instantly upon purchasing your final node. Grinding the necessary dust takes some time, making this a natural candidate for your last unlocked achievement.
Can You Permanently Lock Yourself Out?
No achievements are permanently missable on a single save file.
Every boss encounter can be challenged again through the prayer rematch system, and loading a cleared game places you right before the final sequence to allow free exploration.
However, carry-over inventory tracking can occasionally behave inconsistently across New Game+ cycles. For this reason, aiming to finish Talismans Connoisseur within your initial run before grabbing the Pure Rubinite remains the safest and most reliable strategy.