


- Allogloom Chapter 1 Walkthrough
- How to Complete the Blessed Festivities Ceremony
- Get the Decorative Plate
- Build the Ceremony Stool
- Get the Meat
- Finish Chapter 1
- Allogloom Chapter 2 Walkthrough
- Find the Key to Mom’s Office
- Collect the Gardening Tool and Journal
- Repair the Tape and Get the Cable
- Charge the Journal and Find the Password
- Escape the House
- Allogloom Chapter 3 Walkthrough Chapter 3 kicks off outside Nora’s home, tasking you with exploring the village and dealing with an ominous monster blocking your path.
- Collect the Blood and Bone Bag
- Find Granny’s Glasses and Get the Hammer
Allogloom is a haunting point-and-click adventure, putting you in Nora’s shoes as she unravels mysteries in a curious village. The game’s mix of inventory puzzles and narrative depth means every item you pick up or solve has important weight on the story’s progression and its eerie atmosphere.
Allogloom Chapter 1 Walkthrough
Chapter 1 throws you into preparations for the Blessed Festivities ceremony. Before you get overwhelmed, know that three main items are essential: the Decorative Plate, the Ceremony Stool, and Meat. They aren’t just lying around; you’ll need to complete several steps to assemble and collect them properly.
How to Complete the Blessed Festivities Ceremony
Begin by chatting with Tommy and Gran to get your bearings, then inspect the cardboard box on the left side of the starting area.
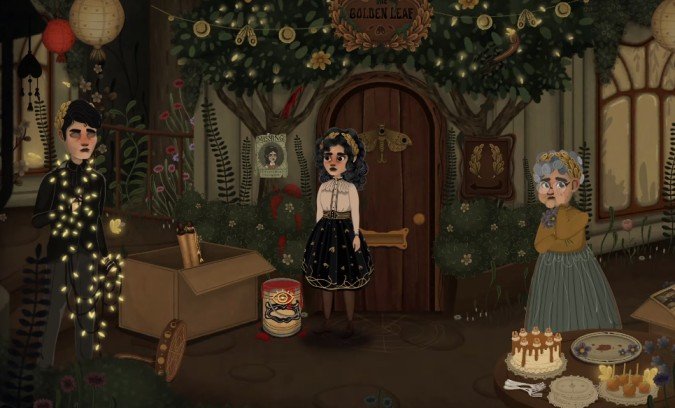
You’ll discover another box alongside a list detailing the ceremony’s requirements.
These must-have items include:
- Decorative Plate
- Ceremony Stool
- Meat
- Decorative Plate
- Ceremony Stool
- Meat
Get the Decorative Plate
The Decorative Plate is easily missed but sits plainly on the table next to Gran. Don’t overlook interacting with the nearby cake as well—you’ll need a slice of it later on.
Build the Ceremony Stool
For the Ceremony Stool, start by checking the bucket filled with sticky red sap lying on the floor; it’s crucial for assembling the stool.
Grab the incomplete stool nearby. Notice there’s a missing leg trapped up in the tree overhead near Gran—but reaching it requires assembling a special tool first.
Step 1: Scavenge the components.
Enter The Golden Leaf house and gather these objects:
- Tool hanging on the wall beside Dad
- Puzzle piece on the bottom-right desk
- Stick by the entrance
Enter The Golden Leaf and look around for these objects:
- Take the tool hanging on the wall beside Dad.
- Pick up the puzzle piece from the desk in the bottom-right corner.
- Grab the stick near the entrance.
Step 2: Solve the puzzle box.
Back outside, place the puzzle piece into the locked box to open it.
Return outside and interact with the puzzle box you found earlier. Place the puzzle piece into it to open the box.
Inside, you’ll find a scroll and rope—make sure to keep them.
Step 3: Craft the tool. Combine necessary items in your inventory to build it.
Open your inventory and combine the items needed to create the tool.
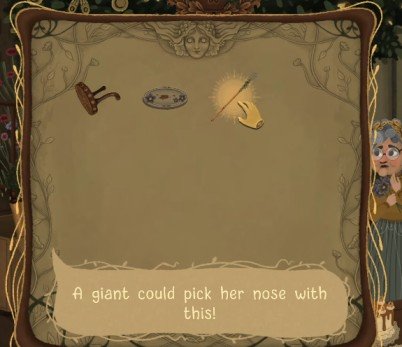
Use the newly crafted tool to retrieve the stool leg from the tree.
Pro tip: Use this tool multiple times on the flower bucket in the meat room to unlock the Dad was right achievement.
Step 4: Finalize the stool. Coat the missing stool leg with sap from the bucket, then attach it to complete the Ceremony Stool.
You now have the missing leg. Use it on the bucket of sticky sap to prepare it, then combine it with the incomplete stool to finish the Ceremony Stool.
Get the Meat
Getting the Meat is tied to obtaining a slice of cake for Dad first.
Step 1: Talk to Gran and Dad. Gran initially refuses to give you cake. Then head over to Dad and ask about Granny’s Blessing cake. He reveals he usually gives walnuts to Hopper.
Speak to Gran and ask for a piece of cake. She will refuse.
Now enter The Golden Leaf and talk to Dad. Ask him, “Did you see Granny’s Blessing cake?” He will explain that he usually gives his walnuts to Hopper.
Step 2: Secure the cake. Return to Gran and request the cake slice again—she’ll finally agree.
Return to Gran and ask, “Can I take a slice of cake?” This option should now be available because you interacted with the cake earlier.
Take the cake back to Dad.
Step 3: Collect the meat. After eating walnuts, Hopper will hand you the meat you need for the ceremony.
After eating the walnuts, Hopper will give you the piece of meat. Pick it up for the ceremony.
Before moving on, interact with the radio to watch Hopper dance—a small moment that adds charm.
Finish Chapter 1
When you have the Decorative Plate, Meat, and Ceremony Stool, combine or place them on the circle in front of the door to trigger the ceremony cutscene and complete Chapter 1.
Place the completed offering on the circle in front of the door. This triggers a cutscene and completes Chapter 1.
Allogloom Chapter 2 Walkthrough
Allogloom Chapter 2 Walkthrough
Next up in Chapter 2: Nora needs to unlock her mother’s office and recover the journal that holds key secrets about the village. The catch? The office is locked and the journal unpowered.
Find the Key to Mom’s Office
Survey the locked office window—spot the gardening tool inside but out of reach without a key.
Go back inside the house and collect the wooden object from the tape box.
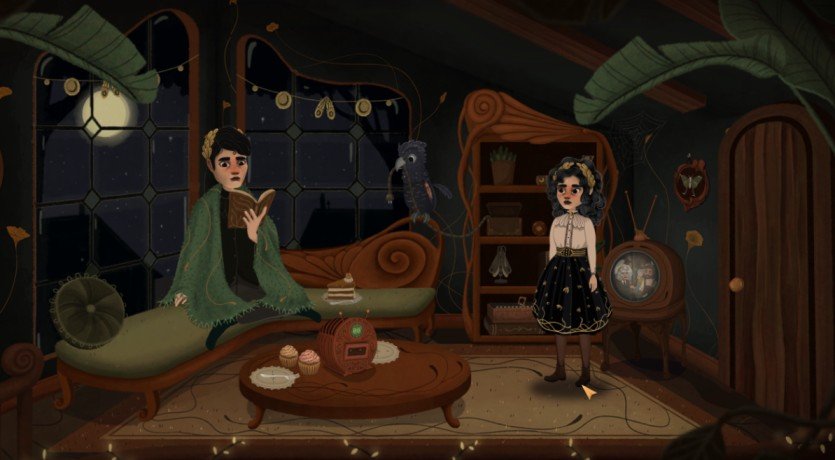
Don’t miss interacting with the TV at least once—it’s tied to a later achievement.
Move to the left to go downstairs. A cutscene with Darling will play.
Downstairs, collect the green scarf by the door and a key inside the drawer. These pieces get you closer to entry.
- The green scarf beside the door.
- The key inside the drawer.
You can also inspect the bag to learn more about Tommy.
Once you have the key, talk with Tommy upstairs for extra story context, then unlock Mom’s office.
Collect the Gardening Tool and Journal
Inside the office, grab the gardening tool from the basket.
We have come here for the gardening tool, so pick it from the basket.
Allogloom inside Mom’s office inspecting the aquarium to find the Tape.
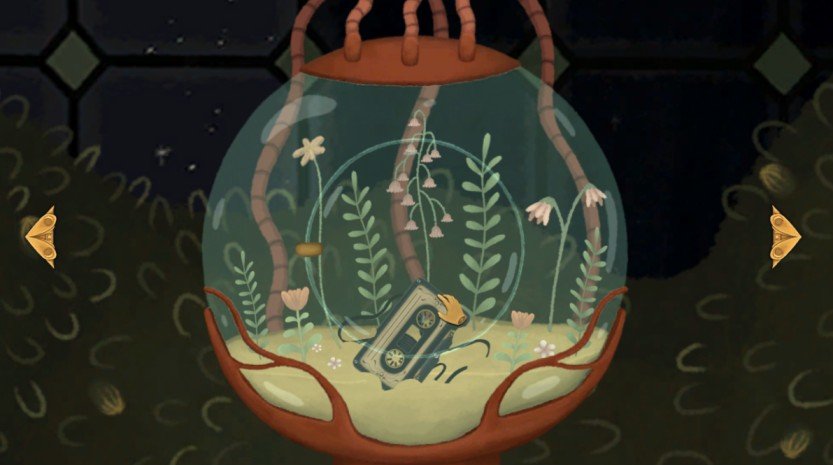
Open your mother’s pencil case to collect the pencil.
Note the storybook on the desk offers background details if interested.
The book on the desk also contains additional story details if you want to learn more about the family.
Head outside and use the large scissors to open the package delivered by the moth. Inside, retrieve your mother’s journal—but it’s out of battery power.
The journal has no battery power, so you need to find a way to charge it.
Repair the Tape and Get the Cable
Tommy hints the tape can be repaired using the pencil.
Combine the pencil and tape in the inventory.
Insert the fixed tape into the orange radio. Hopper dances and drops a cable you need.
Grab the cable and return to the office to charge the journal.
Charge the Journal and Find the Password
Combine the journal and cable to power it up.
For the Crispy Nora achievement, repeatedly interact with the electrical outlet while the inventory is empty before using any items.
If you want the Crispy Nora achievement, interact with the electrical outlet several times while Nora has nothing in her inventory. Do this before picking up or equipping any items.
Plug the journal into the outlet under your mother’s desk. It asks for a password, which you must derive from clues around the room.
Examine a moon drawing nearby. Use the wooden object from the tape box on it to reveal critical clues.
Exit the journal interface and inspect the large drawing showing the moons.
Take the wooden object you collected from the tape box and use it on the moon drawing. This will reveal the information needed to enter the password.
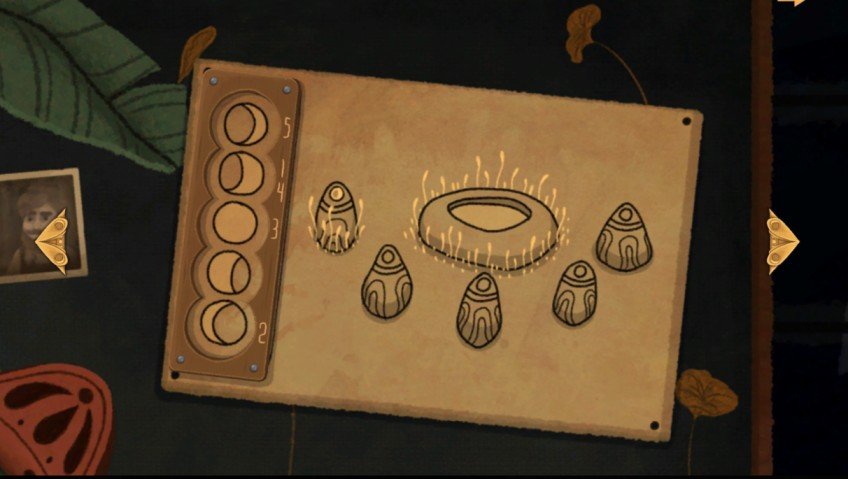
Enter the password into the journal using the numbers found on the drawing and object.
The first moon corresponds to 5, the second to 1 and 4, followed by markings for subsequent digits.
Open the journal again and use the numbers shown on the wooden object and moon drawing to work out the correct sequence.
The first moon uses 5, while the second moon uses 1 and 4. Follow the markings on the drawing for the remaining numbers.
After input, the lights go out, and exiting the village map triggers a cutscene advancing the plot.
Escape the House
Escape the House
Return indoors to the monster-infested room. You can interact with Hopper again, then inspect the TV for a grim update on the village.
You can interact with Hopper before continuing. Then inspect the TV to see what happened to the rest of the village.
Take the green blanket from the sofa and combine it with the previously collected green scarf in your inventory.
Open your inventory and combine the green scarf with the green blanket. Use the combined item on the wood to create a way down.
Use this combined item on a wooden structure to create a makeshift escape route down. Nora climbs down safely, with Hopper in tow, wrapping up Chapter 2.
This completes Chapter 2.
Allogloom Chapter 3 Walkthrough Chapter 3 kicks off outside Nora’s home, tasking you with exploring the village and dealing with an ominous monster blocking your path.
Chapter 3 begins outside Nora’s house, near the entrance. You need to explore the village, collect several objects, and find a way to deal with the monster blocking your path.
Collect the Blood and Bone Bag
Start by picking up the Blood and Bone bag inside the shed adjacent to your house.
When entering the village, avoid clicking on the house door—that route won’t progress the story. Instead, head towards the forest where moths and lights are visible, then proceed right.
At first, you cannot do much in the village. Remember the location with the moth and lights, then head to the right.
Find Granny’s Glasses and Get the Hammer
Knock on Gran’s door. She greets you but is too inebriated to help properly.
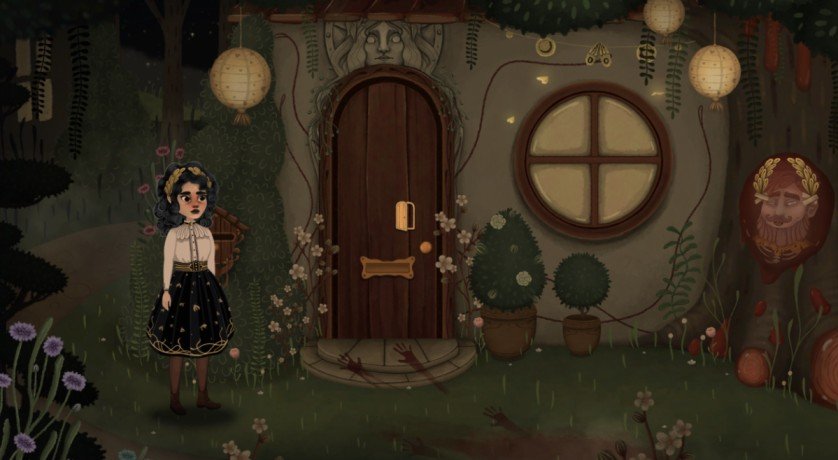
Look behind her for a hammer—this item is needed but won’t be handed over until you find her lost glasses.
Talk with Gran, inquiring about her well-being and hammer. Both dialogues hint at her missing glasses.
Continue right, passing near the remains of grandfather Earl and follow the illuminated path deeper into the village mysteries.