


This comprehensive hope 01 enemy guide breaks down every hostile threat, robotic sentry, and zone boss you will encounter during your sector raids, including combat tactics and gear recommendations.
Combat Fundamentals & Preparation
I rely on a few universal combat habits to preserve resources and survive dangerous encounters throughout the facility:
- Melee efficiency: I always use my combat knife or equipped bayonet on baseline enemies in the opening rooms. Melee attacks eliminate early targets in just a few hits, allowing me to save ammunition for heavily guarded zones.
- Cover mechanics: Whenever I position myself near objects like metal barrels, a blue arrow prompt appears. Crouching behind these objects grants complete cover from enemy sightlines and absorbs incoming projectiles. While enemies will remember my position, crouching allows me to break line of sight, wait until targets turn their backs, and initiate stealth ambushes. Keep in mind that physical cover objects possess finite durability and will break under sustained fire.


- Luxury Fabrics: Permanent operational upgrades demand rare Luxury Fabrics. Whenever I scavenge an item tagged with purple text as a Luxury Item in its description, I transport it back to base and feed it directly into the recycler.
- Armor Penetration: Bullet caliber serves as a general guideline, but weapon penetration mechanics vary significantly across firearms. For instance, the Piper fires light rounds yet achieves armor penetration equal to or exceeding many heavy-caliber platforms. I test all new weapons against ballistic gel at the base firing range to verify how deep rounds penetrate before risking them in raids.
- Targeting Weak Points: Most biological and mechanical targets possess critical zones. Direct hits to these spots inflict multiplied damage and bypass base armor ratings entirely. For humanoid threats, headshots reliably bypass plating.
When preparing to engage major sector bosses, I always stick to these rules:
- Equip recovery items like MB1 Injectors or Med-Sprays directly to your quick-use belt for uninterrupted emergency healing.
- Match your weapons and body armor to the threats of the surrounding region, as bosses deploy the same attack properties and minion spawns found in their local zone.
- Locate and prioritize the designated weak point present on every boss encounter.
- If running magazine-fed firearms, load and bring at least four full spare magazines alongside loose cartridges to ensure consistent damage uptime.
- Reserve sufficient empty inventory slots before entering an arena so you can extract with all dropped boss rewards.
- If facing an unfamiliar boss, run a preliminary scouting raid with disposable low-tier equipment to learn their patterns before committing high-end gear.
Slimes
Slimes represent the standard biological hazard in the facility, formed of mutated tissue and bone. Most varieties lack armor plating and perish from two or three basic strikes. I never waste medium, heavy, or scatter ammunition on standard slimes, relying instead on clean knife and bayonet attacks to conserve shots.
Baby Slime

These miniature variants are agile and difficult to target, though their total health is minimal. They advance toward you, pause briefly, and then leap forward. I sprint forward and knife them during that brief pause before they become airborne. If their leap lands, they can follow up with a piercing strike that inflicts severe damage. Watch out for their silhouette blending into foreground props.
Chunky Slime
These larger specimens feature exposed bone fragments jutting from their mass.


Chunkies are common and provide larger, easier targets than babies. Upon sighting you or taking damage, a Chunky elevates its body and walks forward at a pace between standard walking and sprinting. With a single melee upgrade, I reliably eliminate them in one or two blade hits. Be alert around nearby human remains: a Chunky can merge with a corpse to animate it into a Skinless, or rupture into a swarm of Baby Slimes.
Dropper
Stationary ceiling organisms reminiscent of biological barnacles.


While harmless alone, Droppers quickly escalate multi-enemy fights. They suspend themselves from the ceiling and spawn a new Baby Slime every few seconds. I scan unlit ceiling sections with my flashlight between light fixtures to locate them early. Droppers boast slightly higher endurance than Chunkies, requiring several focused shots to bring down.
Entangler


The Entangler shoots out grasping tentacles that lock you in place. While bound, you take zero direct damage, but your movement speed and motion range drop significantly while your stamina continuously depletes. When trapped, I quickly roll away to break the hold or look down and slash the base with my knife once or twice to destroy it.
Runaway Heart
A rare ambulatory flesh cluster resembling a heart with legs.

This harmless, skittish entity functions as a resource cache. Hitting it causes it to scatter hundreds of fabricks as it takes damage. It possesses exceptional sprint speed and flees into adjacent rooms upon taking damage. I maintain steady aim and track its escape path without breaking line of sight to secure the full fabric payout.
Skinless



These humanoid monstrosities populate deeper hospital wings and industrial sectors, and they also form when a Chunky possesses a corpse. Upon sighting you, a Skinless shrieks before sprinting into melee. They lack armor completely, allowing me to take them down instantly with clean headshots.
Evolved Skinless

Though imposing, an isolated Evolved Skinless is predictable. As it closes distance, wait for it to raise its heavy club arm. The moment it winds up, I dodge-roll straight behind its back. The creature consistently smashes the floor multiple times before turning around, granting ample time to fire directly into its unguarded rear.
Armored Slime
A resilient biological mass with reinforced frontal plating.


The dense shell on its front deflects low-penetration rounds. I defeat it either by using high-penetration firearms head-on or by dodge-rolling past its flank to shoot its soft, unarmored rear. The creature also discharges projectile attacks through its shell, requiring strict dodge timing.
Blood Spitter


When alarmed, the Blood Spitter positions itself at mid-range, rises upright, and launches a blood projectile. The splatter creates a red hazard puddle that deals no damage but forces your movement down to walking speed. If I sprint directly into close quarters, the creature panics and retreats without attacking. It possesses no armor, so a quick headshot eliminates it immediately.
Honeyed Lady
An aggressive biological variant that sprays toxic yellow fluid.


The Honeyed Lady operates similarly to the Blood Spitter but presents a much greater threat. Her spit attacks fire at a significantly higher rate, though they do not leave slowing residue on the ground. I push into close range to disrupt her pattern and focus headshots to bring her down quickly.
Spiked Slime

This variant launches its prominent cranial spike as a ballistic projectile, capable of triggering bleed effects and causing limb fractures on contact. I keep my distance whenever one appears. Despite its shell-like appearance, it lacks true damage resistance, allowing standard ammunition to dispatch it cleanly.
Robots
Robotic defense units present a much steeper challenge than biological slimes. Their structural armor completely deflects light and mini-caliber ammunition, producing a white deflection hit marker. Even standard medium rounds occasionally bounce off reinforced plates. While melee strikes can damage them, closing into point-blank range against mechanical foes is generally far too dangerous.
Enforcer

Enforcers are early-game security units sporting heavy frontal plating and a built-in firearm. Upon alerting, an Enforcer triggers a siren, illuminates its targeting light, and advances into firing range. It discharges a single heavy shot before initiating a reload cycle. I deal with Enforcers by firing medium-penetration rounds through their front plate or by rolling behind them during their reload window to use standard calibers against their exposed chassis.
UFO Drone
An airborne surveillance unit emitting a bright optical beam.


These hovering drones are fast, evasive, and hard to track. Fortunately, their vibrant green chassis illumination makes them obvious in unlit areas, and their light plating makes them vulnerable to low-caliber rounds. Once alerted, they fly into position and fire a continuous cutting laser.
Med-bot


Med-bots patrol corridors at a slow pace. When they engage, their internal mechanism lifts upward to expose an internal core while launching hypodermic darts that cause heavy bleed buildup. That exposed core serves as their primary weak point. They carry substantial armor and durable health pools, making accurate, high-penetration fire essential.
Mini Med-bot

These compact units spawn in swarms and can quickly overwhelm you when supporting larger enemies. At close range, they produce and fling syringes that induce bleeding status. While individual strikes deal minor raw damage, the bleed accumulation is severe. I use shotguns against Mini Med-bots because their spread easily clears unarmored clusters in single blasts.
Wheeler Mines
Self-propelled wheeled explosive munitions.

Wheeler Mines charge recklessly to detonate on contact. Because they move faster than other enemies and sound loud operational alarms upon detection, you can engage them before other threats arrive. They have no defensive plating; detonating the lead mine with any firearm triggers a chain reaction that destroys the entire formation.
Turret

Ceiling turrets are among the most dangerous mechanical threats in the game. On the positive side, their laser designator telegraphs their targeting line, an audible cue precedes every volley, and they reload after every three-round burst. On the negative side, they conceal themselves in dark ceiling corners, feature heavy armor that demands high-penetration rounds, possess large health pools, and wait to fire until you stop moving. Because their three-shot burst is spaced out, rolling through the first bullet often lands you directly in the third. I use cover, heavy ammunition, and wait for their reload cycles.
Zapper UFO

This variant shares the frame and light armor profile of standard UFO drones. Instead of channeling a continuous beam, it fires an instantaneous single-target electric blast.
Special Sector Entities
Possessed Robe

These creatures lack armor plating but possess massive health reserves. I recommend using high fire-rate weapons to dump an entire magazine into them immediately. To attack, the entity parts its fabric and spits rapid projectile streams. High-caliber slow-firing rifles leave you vulnerable to its spit volume, so prioritize automatic fire.
Bat

These subterranean creatures roost quietly on high ceilings. They will not pursue or attack you when illuminated by flashlights, nor will they retaliate if you jump into them (though physical contact deals collision damage). They only become hostile if stray gunfire strikes them or nearby surfaces.
Mushroom Grunt
An aggressive fungal biped found in overgrown sub-levels.

A fast-moving fungal unit that sprints directly into melee range upon detecting you. Eliminate it at range before it closes the distance.
Mushroom Impaler


This stationary fungal creature attacks from long range across line of sight. When preparing to strike, it elevates its stalk and projects a grey particle marker beneath your feet. A moment later, it slams down, erupting a sharp stalagmite from the floor. This eruption inflicts severe bleeding and fractures limbs, so dodge away from the grey indicator immediately.
Hospitek Boss – Chirurgeon Overseer
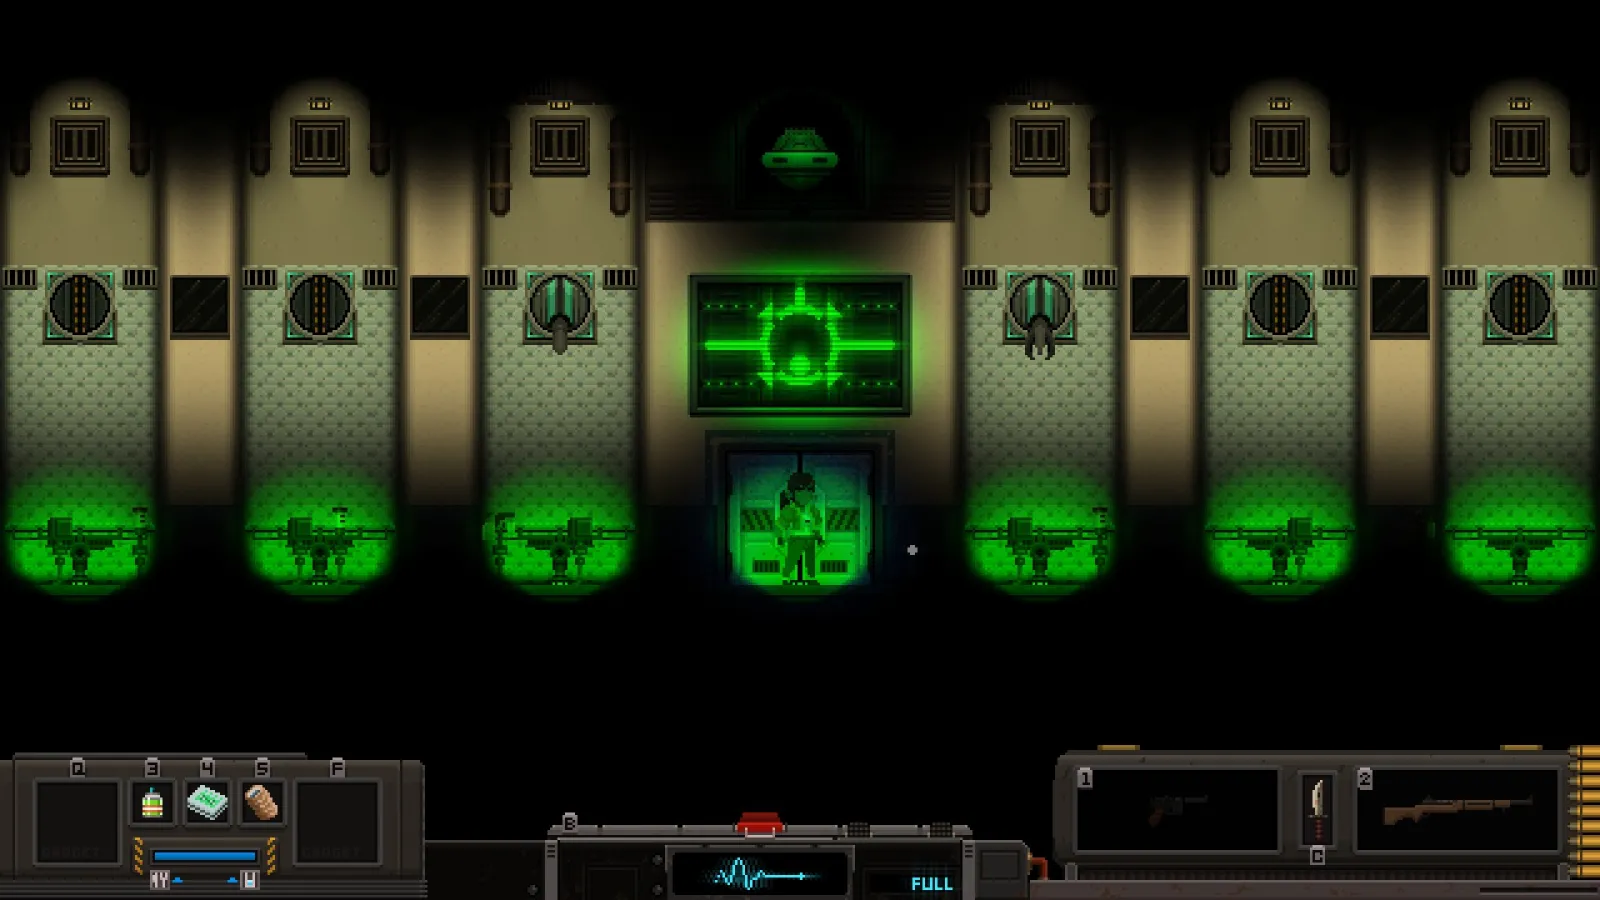
The Chirurgeon Overseer is a heavily armored aerial construct featuring a primary weak point located beneath its central base. Throughout the encounter, it deploys localized melee turrets and minion dispensaries.
Loadout Recommendations:
- Bring an accurate weapon with strong armor penetration along with at least two full stacks of matching ammunition.
- Equip a shotgun as your secondary firearm to rapidly clear deploying Mini Med-bots.
- Attach a Laser Sight gadget to track the boss high along the ceiling rafters and land clean shots on its underside weak point.
Overseer Combat Moves

The boss discharges a broad horizontal wave of energy projectiles across the room. Staying on the opposite side of the chamber keeps you out of range, providing a brief window to reload or apply an injector.

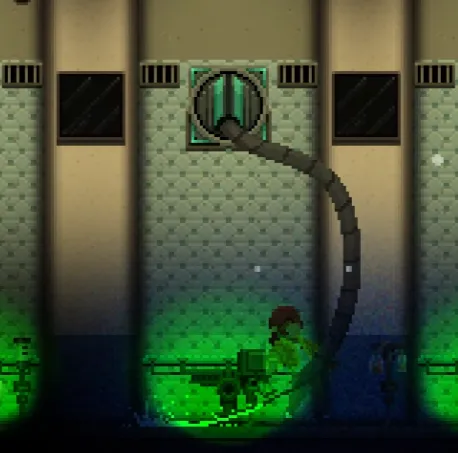
Stationary mechanical turrets drop to the arena floor and lash out with robotic arms if you wander into close range. I eliminate them with three to five rapid rifle shots before maneuvering around the room.

The boss deploys automated dispensers that release a Mini Med-bot roughly every ten seconds. Destroy these dispensers as soon as they appear, otherwise the accumulation of bleed darts and physical melee strikes will pull your focus away from the boss.
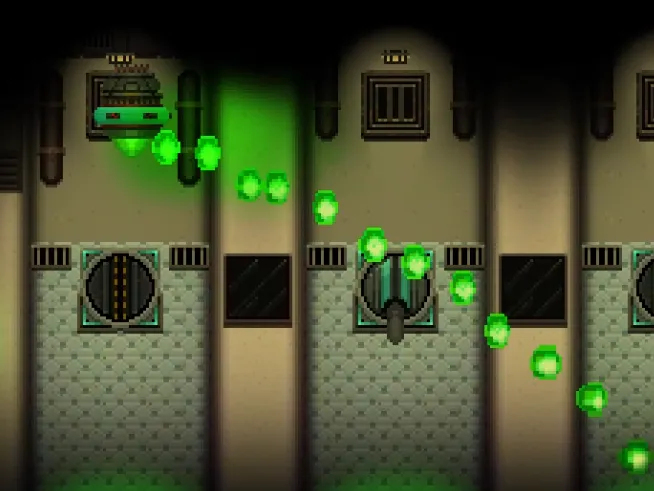
The boss rains an extensive curtain of ballistic ordnance down across the entire arena floor. Watch the overhead arcs and dodge-roll between falling projectiles.

After sustaining heavy damage, the Overseer descends toward the entry portal and generates three orbiting shield plates that absorb frontal fire before floating back toward the ceiling. Its attack patterns remain the same during this phase.
Once destroyed, the arena turret sockets rupture and yield roughly 300 Medical Fabrics. Because of its manageable attack patterns, I farm this boss encounter whenever I need medical upgrade materials.
Aquatek Boss – Honeyed Mother
The Honeyed Mother is an unarmored, toxic biological entity that floods the arena floor with corrosive liquid while summoning waves of minor slimes.

Loadout Recommendations:
- Place two Inhalers on your hotbar to purge poison stacks inflicted by the boss, minions, and arena sludge.
- Equip an automatic, high-capacity firearm chambered in mini or light rounds. Because the boss and her summoned units carry zero armor, raw rate of fire matters far more than armor penetration.
Poison damage creates an orange border along your screen that solidifies into an active poison debuff at five accumulated stacks. Avoiding poison damage for a couple seconds lets your stacks decay naturally, but using an inhaler cleanses it instantly.
Honeyed Mother Combat Moves


Whenever the boss plays a distinct vocal animation, biological clusters emerge from overhead sewer pipes. These masses drop down and burst into roughly five basic slimes or a Honeyed Lady. Shoot the pipe sacs or destroy the dropped masses before they burst.

The boss discharges a standard projectile fan across the floor. Jump or dodge-roll through the gaps to prevent poison buildup and direct damage.

The boss channels a green particle surge that spreads to all active slimes in the arena, applying combat buffs to their movement and health.
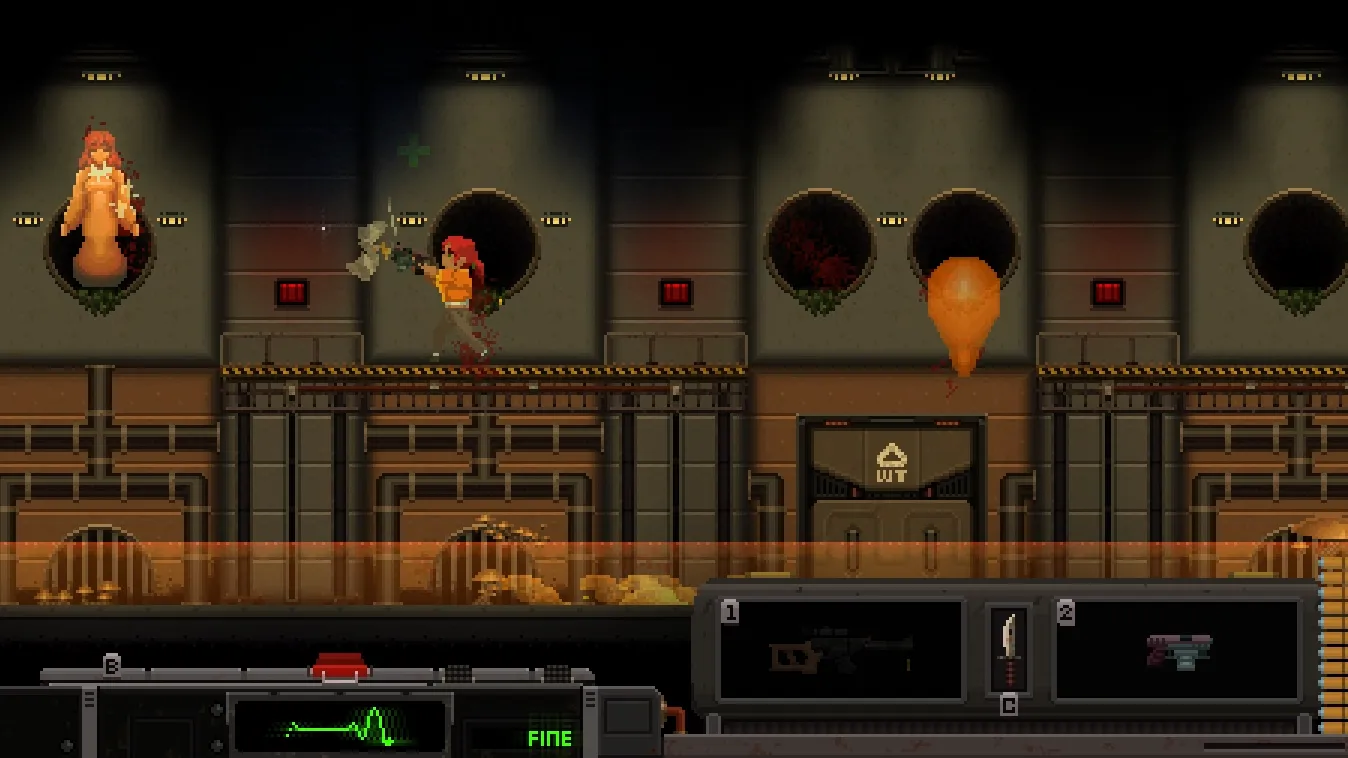
Whenever the boss relocates into a new drainage pipe, the arena floor floods with toxic sludge for approximately eight seconds. Standing in the sludge inflicts continuous poison and movement penalties. Watch for the two mechanical lift pads: stepping onto their designated floor markers within three seconds elevates you to high ground. Clear the slimes below from this perch so you don’t get swarmed when the flood recedes.
Defeating her yields rare loot and an orange sludge emitter gadget. Returning to base and reporting your success to Kio rewards you with valuable Luxury Fabrics.
BCS Boss – The Inmate
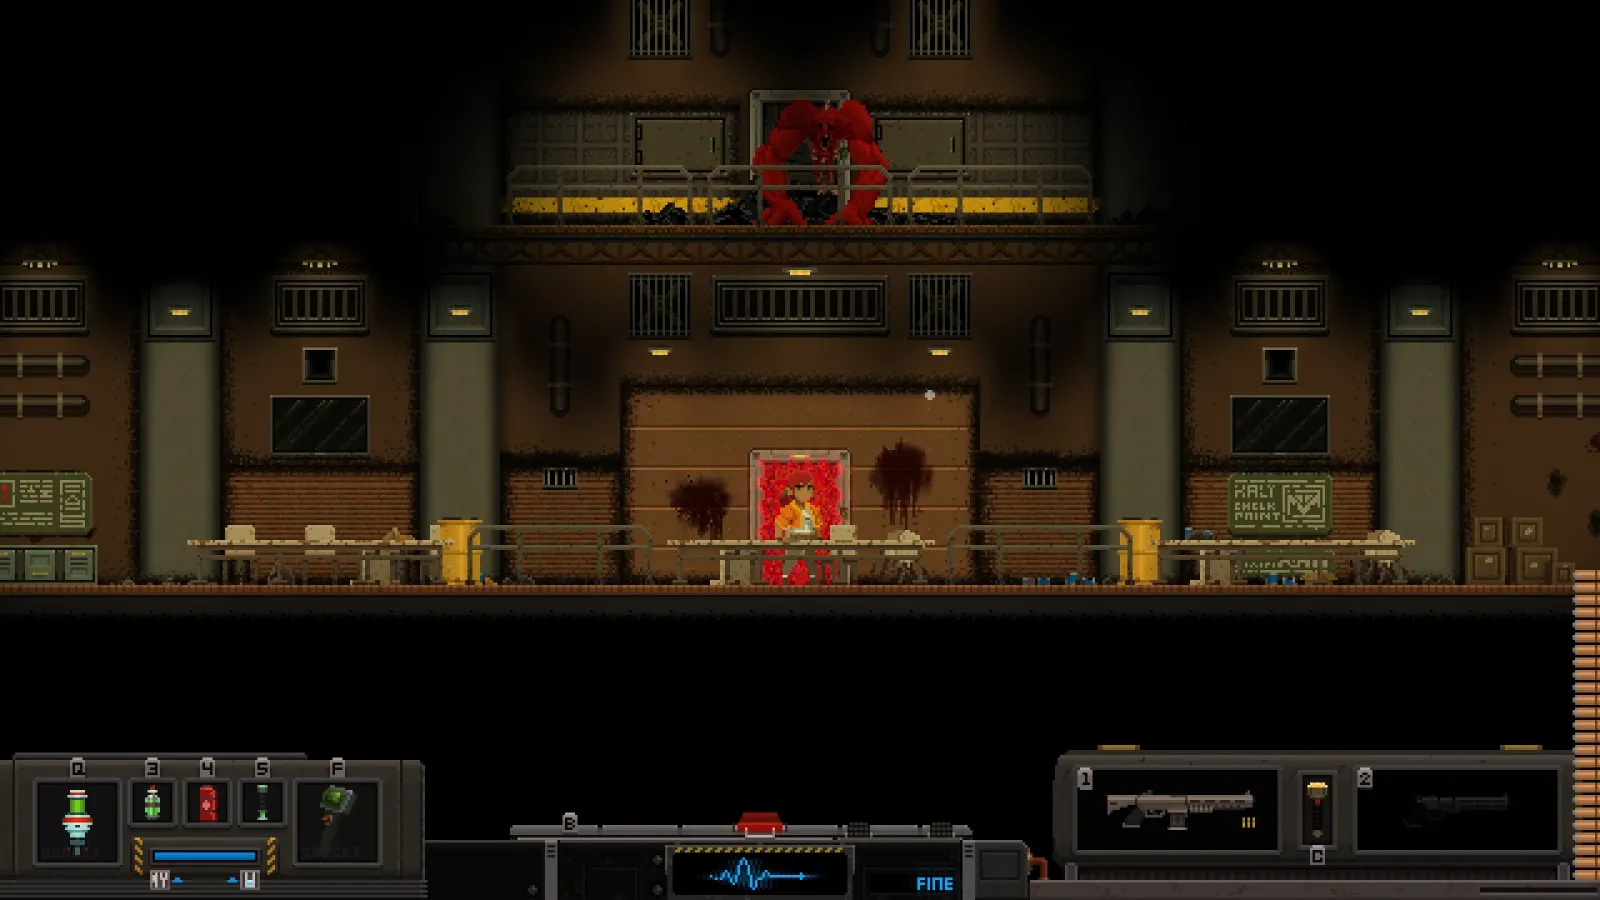
The Inmate is an aggressive, high-speed brute that exerts relentless physical pressure inside a confined industrial chamber.
Loadout Recommendations:
- Bring high fire-rate, magazine-fed weapons with low recoil; the boss possesses no protective armor plates.
- Slot two MB1 Injectors on your hotbar. His attacks are relentless, and the stationary animation required by Med-sprays will easily get interrupted.
- Wear armor specialized against blunt force trauma to mitigate his heavy melee swings.
- Leave ample open inventory slots to extract the weapons and ammo stored in the armory room unlocked after the fight.
The Inmate Combat Moves


Immediately after dropping into the arena, the boss opens with a short-range horizontal swipe. Dodge backward or roll past his arm to evade the swing.


Directly following his first swing, The Inmate pivots and unleashes an extended straight punch with exceptional forward reach. He turns to track you throughout the windup, meaning rolling behind him will not keep you safe. Crouch behind nearby metal barrels or duck beneath the punch’s trajectory.


The boss leaps across more than half the arena length, leading his jump based on your running trajectory. On impact, he slams the floor, radiating a ground shockwave with six hit points splitting left and right. Because the shockwave’s travel distance matches the length of a dodge-roll, rolling along the ground often lands you right into the impact. Jump vertically to clear the shockwave.
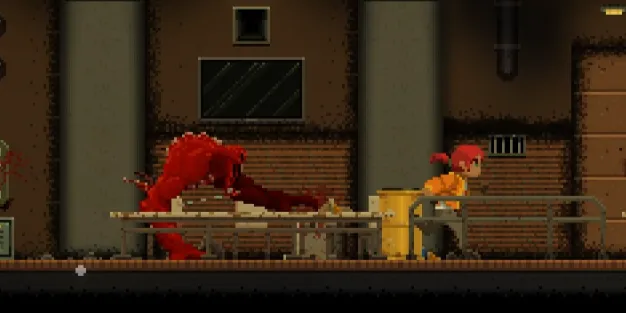
The Inmate sprints at roughly the same speed as an unarmored player, allowing him to stay glued to your position if you hesitate. Keep moving, fire during his recovery frames, and manage your stamina carefully.
Upon death, The Inmate dissolves and drops the BCS Armory Keycard. Take this keycard back through the entrance elevator to unlock the blast door marked with red lighting, giving you access to weapon crates and ammunition caches. If your inventory is full, offload items into the mail service tube past the right-hand blast door. Defeating the boss also deactivates the sector lockdown, granting temporary raid access to the adjoining maintenance tunnels and cave networks.